As June settles into its warm, firefly‑flecked evenings, the night sky begins one of its most dramatic seasonal transformations. The soft, delicate star fields of spring slowly give way to the bold, brilliant constellations of summer. The Milky Way—our home galaxy—tilts upright and begins its slow climb across the eastern horizon, preparing to take center stage in July. For families stepping outside after dinner, this is the moment when the sky becomes a storybook: full of heroes, mythical creatures, glowing planets, and even a few surprises that streak across the darkness without warning.
The remaining nights of June and the full month of July offer some of the most exciting skywatching of the year. Whether you’re using binoculars, a small backyard telescope, or simply your own eyes, these weeks are rich with bright planets, easy‑to‑find constellations, and a few special events that reward anyone willing to look up.
The Last Half of June: The Milky Way Awakens
In the second half of June, the sky begins its seasonal shift right after twilight. As the Sun dips below the horizon, the western sky still holds the last traces of spring. The constellation Leo, shaped like a backward question mark, sinks lower each night. But turn toward the east, and you’ll see the future of summer rising.
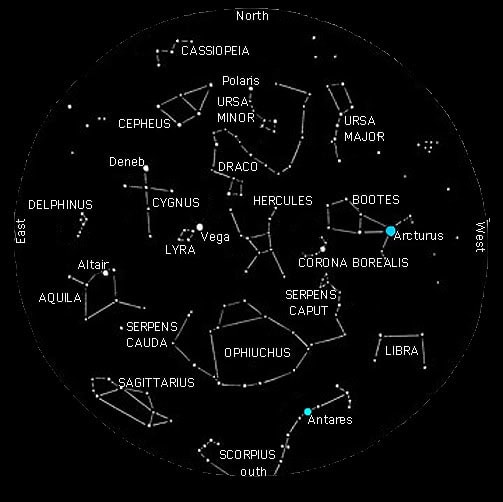
One of the first stars to appear is Vega, a brilliant blue‑white beacon that shines even before the sky is fully dark. Vega belongs to the constellation Lyra, the celestial harp, and it’s one of the easiest stars for beginners to find. If you step outside around 10 p.m., look high in the east for the brightest star you can see. That’s Vega, and it’s your guide to the Summer Triangle.
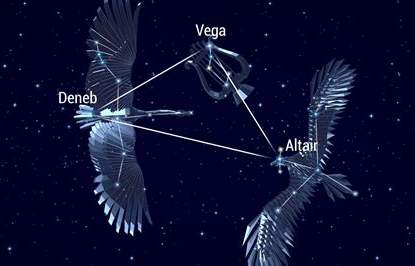
A little to Vega’s right is Deneb, the tail of the great swan Cygnus. Deneb is one of the most luminous stars known—so powerful that if it were as close to us as Vega, it would cast shadows on Earth. Below Vega and Deneb is Altair, the bright heart of Aquila the Eagle. Together, these three stars form the Summer Triangle, a giant shape that will dominate the sky all the way through August.
Families who enjoy binocular stargazing will find June especially rewarding. Sweep your binoculars slowly between Vega and Deneb, and you’ll notice the sky looks hazy, almost smoky. That soft glow is the Milky Way itself—hundreds of millions of distant stars blending together. In late June, the Milky Way is still low, but each night it rises earlier and climbs higher, preparing for its grand July display.
June also brings a beautiful planetary pairing. Saturn rises in the late evening, glowing with a steady, golden light in the east. It’s not bright enough to compete with Vega, but it stands out because it doesn’t twinkle. If you have a small telescope, Saturn is a delight in June. Even at low magnification, its rings appear clearly separated from the planet, and children often gasp when they see them for the first time.
The Moon’s June Farewell
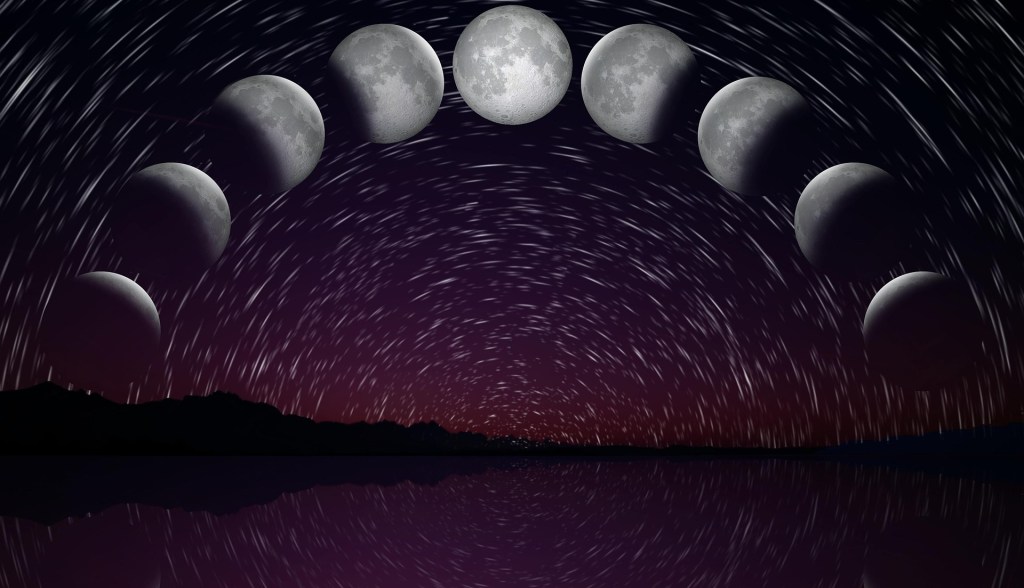
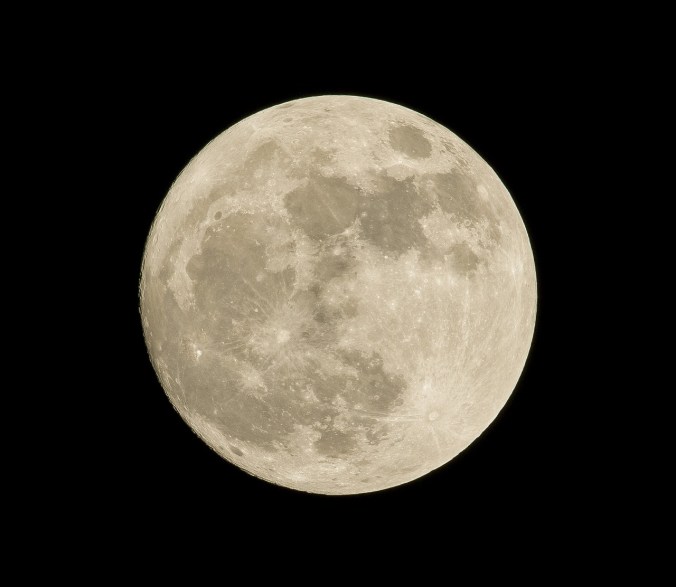
The Moon plays a gentle role in the last half of June. After the First Quarter phase, it grows brighter each night, washing out some of the fainter stars but adding its own charm to the sky. When the Moon is near Antares—the fiery red heart of Scorpius—it creates a striking contrast. Antares is a red supergiant so large that if it replaced our Sun, its surface would reach beyond the orbit of Mars. Seeing the Moon glide past it is a reminder of how vast and varied the universe truly is.
By the final days of June, the Moon rises later and later, leaving the early evening sky dark and perfect for Milky Way viewing. This is the moment when summer truly begins.
July: The Milky Way Takes Center Stage
July is the month when the night sky becomes a living tapestry. The Milky Way stretches from the northeast to the southwest like a river of starlight, and even in moderately light‑polluted areas, its brightest sections are visible. For families in suburban neighborhoods, the best time to look is between 10 p.m. and midnight, when the Milky Way stands tall in the east.
The heart of the Milky Way lies in the constellation Sagittarius, which rises earlier each night. Sagittarius is shaped like a teapot—one of the easiest star patterns for beginners to recognize. Once you find the teapot, look just above its spout. That faint, glowing cloud is the center of our galaxy, located about 26,000 light‑years away. Even binoculars reveal a treasure chest of star clusters and nebulae in this region.
One of the most rewarding objects for families is the Lagoon Nebula. It appears as a soft, glowing patch of light in binoculars, and in a small telescope, you can see its delicate structure. Nearby is the Trifid Nebula, famous for its dark dust lanes that divide it into three sections. These nebulae are stellar nurseries—places where new stars are born—and July is the perfect month to explore them.
The Planets of July
July 2026 offers a beautiful lineup of planets that are easy for families to enjoy.
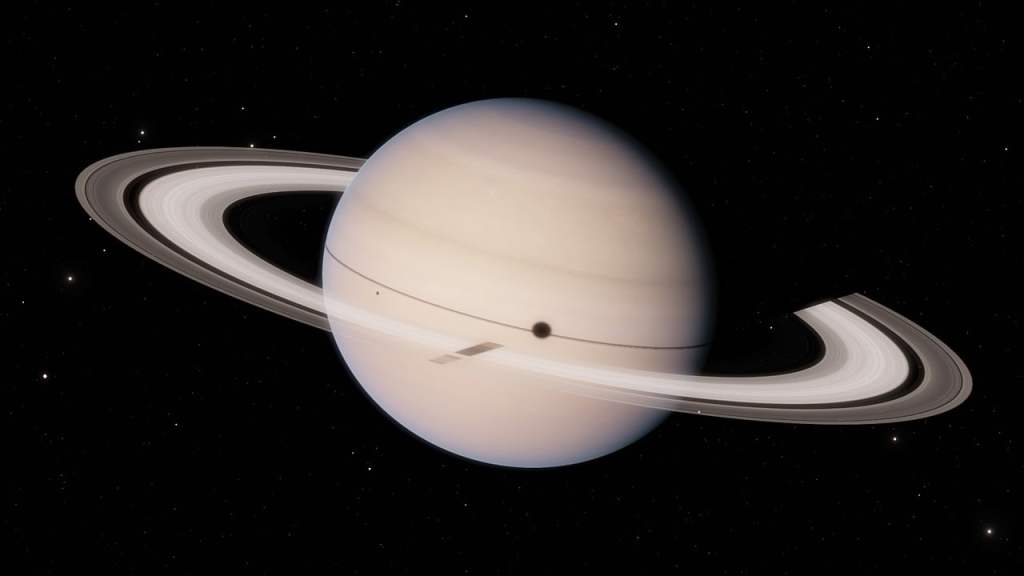
Saturn continues to rise earlier each night, becoming a late‑evening object by mid‑July. Its rings remain tilted at a favorable angle, making them easy to see in small telescopes. If you look closely, you may notice Titan, Saturn’s largest moon, shining like a tiny star nearby.
Jupiter returns to the morning sky in July, rising shortly before dawn. It’s unmistakable—bright, steady, and golden. Early risers will find it a rewarding sight, especially when the Moon passes nearby. Through binoculars, you can see Jupiter’s four largest moons lined up like tiny beads. In a telescope, the planet’s cloud bands and swirling storms come to life.
Mars also begins to make a quiet return, though it remains faint in July. It rises in the early morning hours, glowing with a soft orange light. As the year progresses, Mars will grow brighter, but for now, it’s a subtle treat for dedicated skywatchers.
The July Moon: A Guide Through the Stars
The Moon plays a starring role in July’s night sky. Early in the month, it glides past Spica, the bright blue star in Virgo. A few nights later, it moves near Antares again, creating another beautiful pairing. When the Moon is a thin crescent, it reveals Earthshine—the soft glow caused by sunlight reflecting off Earth and illuminating the Moon’s dark side. Children often find this magical, as if the Moon is holding a secret lantern.
The Full Moon of July is known as the Buck Moon, named for the time when young deer begin to grow new antlers. This year’s Buck Moon rises large and golden, creating a perfect opportunity for family photos or a moonlit walk.
The Delta Aquariid Meteor Shower Begins
While the famous Perseid meteor shower peaks in August, July marks the beginning of the Delta Aquariids. This shower produces faint, graceful meteors that seem to glide across the sky rather than streak. The best time to watch is after midnight, when Aquarius rises higher in the southeast. Even though the Delta Aquariids are not as dramatic as the Perseids, they offer a peaceful, steady display that rewards patience.
Families can make a simple tradition of meteor watching: spread out a blanket, lie back, and count how many meteors each person sees. Even a handful of meteors can make the night feel special.
A Sky Full of Stories
What makes June and July so magical is not just the stars themselves, but the stories they tell. Cygnus the Swan flies along the Milky Way, wings outstretched. Scorpius crawls across the southern horizon, its tail curling toward Sagittarius. Hercules stands overhead, guarding the brilliant globular cluster M13, which looks like a tiny ball of diamond dust in binoculars.
These constellations have been guiding travelers, inspiring storytellers, and delighting families for thousands of years. When you step outside on a warm summer night, you’re joining a tradition as old as humanity itself.
A Final Invitation to Look Up
The remaining nights of June and the full month of July offer some of the richest skywatching of the year. Whether you’re exploring the Milky Way, spotting Saturn’s rings, watching the Moon drift past bright stars, or catching a few early meteors, the sky is full of wonders waiting to be discovered.
All you need is a clear night, a comfortable place to sit, and a sense of curiosity. The universe will take care of the rest.