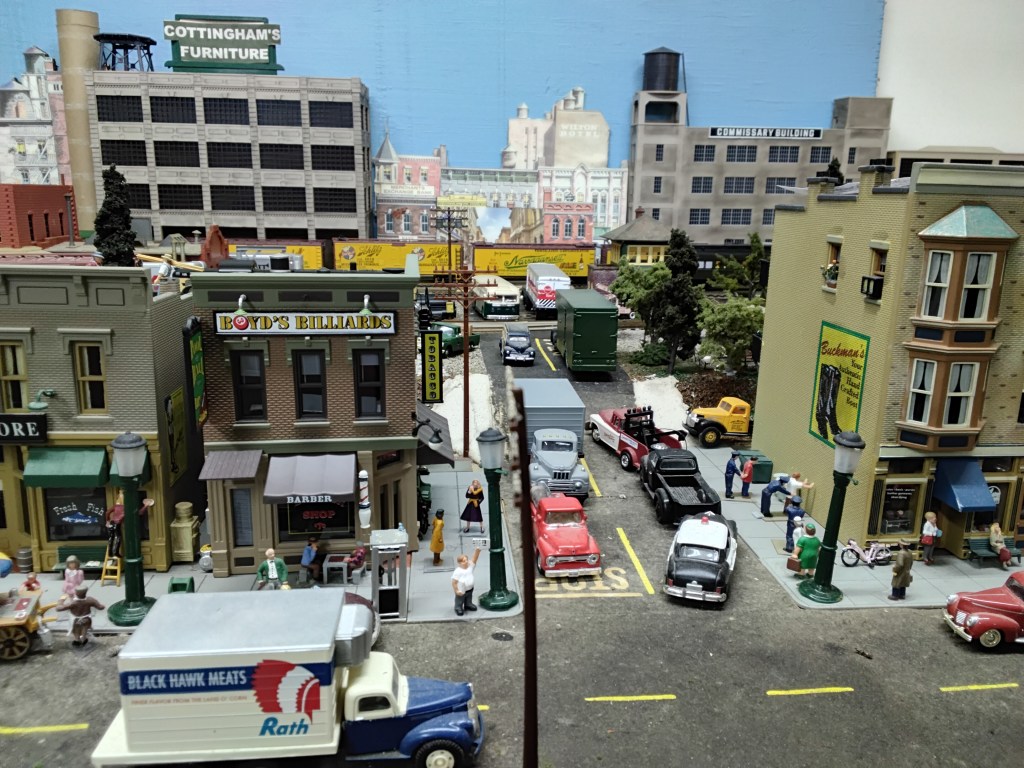
Now that your town is officially bustling with its new miniature citizens, they’re going to need a safe, realistic way to get around! Wait, did we say roads? While those streets are essential, they look awfully stark sitting on bare pink foam or white plaster hillsides. If your HO or N scale residents looked out their tiny windows right now, they would see a barren wasteland.
It is time to bring your world to life. Welcome to this month’s installment: Greenery and Groves. Today, we are breaking down how to turn those bare plaster hillsides into lush, vibrant forests, manicured suburban lawns, and overgrown trackside brush using simple, budget-friendly materials. Grab your scenic glue and spray bottles—it is time to cultivate your green thumb!
The Golden Rule of Miniature Nature: Variety is King
If you walk outside and look at a real hillside, you will notice something immediately: nature is messy. You will never see a forest made of only one type of tree, nor will you find a field that is a single, uniform shade of green.
The most common mistake new modelers make is buying one giant tub of medium-green turf and sprinkling it everywhere. To make your layout look realistic, you must layer different textures, colors, and heights.
- Undergrowth (Fine Turf): This represents dirt, moss, and short grass.
- Weeds and Wildflowers (Coarse Turf & Clump Foliage): This adds medium-height texture.
- Bushes and Brambles (Underbrush): This bridges the gap between the ground and your trees.
- The Canopy (Trees): This provides vertical scale and draws the eye upward.
In 2022 I wrote three articles on my Six Scenery Steps – Part 1, Part 2, Part 3 Trees. With this article I will attempt to update the information.
Painting the Dirt: Laying the Foundation

Layering different heights and textures of grass creates a realistic meadow.. Source: Railroad Prototype Modeler
Before you plant a single blade of grass, you must cover your base. If you sprinkle green grass directly onto white plaster or pink insulation foam, any tiny gap will reveal the bright material underneath, instantly breaking the illusion.
Start by painting your terrain with a flat, earthy latex or acrylic paint. A shade like “chocolate brown” or “dark tan” works beautifully. While the paint is still wet, you can lightly sprinkle a fine layer of real, sifted dirt or dark brown scenic turf over it. This gives your ground cover an organic, textured base to cling to.
Masterclass: Creating Realistic Ground Cover
Once your dirt layer is dry, it is time to build up the foliage. The absolute best tool for this is a simple, budget-friendly mixture of scenic turf (ground foam) and a liquid adhesive.
The Low-Cost Scenic Glue Formula
Instead of buying expensive premade scenic cements, you can easily mix your own family-friendly scenic glue at home:
- The Recipe: Mix 1 part white PVA school glue (like Elmer’s) with 3 parts water. Add two drops of liquid dish soap.
- The Secret: The dish soap acts as a “wetting agent.” It breaks the surface tension of the water, allowing your glue mixture to soak deep into the turf rather than sitting on top like a bead of rain on a waxed car.
Applying the Layers
To get a gorgeous, multi-dimensional meadow, follow this step-by-step application sequence.
1.Wet the Area First:Crucial for even glue absorption.
Fill a fine-mist spray bottle with water and a few drops of dish soap. Lightly mist your painted, dirt-covered hillside. This prevents your dry turf from blowing away when you apply the glue.
2.Sift the Fine Turf:Build up your base grass layer.
Using a shaker jar, gently dust the wet area with fine-textured turf. Combine different shades like Woodland Scenics Fine Turf (Earth) and Fine Turf (Green Grass) to create natural color variations.
3.Add Weeds and Shrubs: Bring in the medium heights.
While the ground is still damp, place small pinches of coarse turf and medium clump foliage along ditch lines, trackside banks, and the edges of forests. This represents wild weeds and brambles.
4.Lock It Down:Apply the homemade scenic glue.
Using a clean eye-dropper or a gentle spray bottle, apply your 1:3 scenic glue mixture over the entire area. Be generous; the soapy water will pull the glue throughout all the layers. Let it dry completely for 24 hours.
Budget-Friendly Trees: The Forest on a Dime
Buying individual, premade model trees can quickly drain your hobby budget, especially if you need hundreds of them to cover a steep mountain ridge. Fortunately, making your own realistic trees is incredibly fun, highly satisfying, and a perfect weekend activity for the whole family.
Method 1: The Classic “SuperTree” (Deciduous)
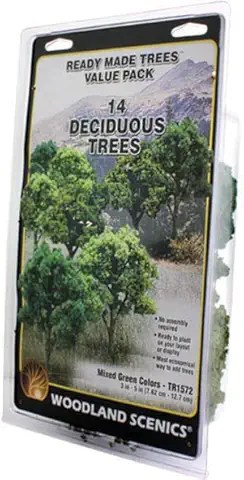
One of the most realistic methods for making leafy, deciduous trees uses natural plant materials. Scenic Express SuperTrees are made from a dried, delicate plant called sea foam. They have natural, organic branch structures that look exactly like real tree limbs in HO and N scale.
- Groom the Armature: Take a single sprig of the dried plant and trim it with scissors into a pleasing tree shape.
- Apply Adhesive: Spray the branch structure with cheap, extra-hold unscented hairspray or a specialized spray adhesive.
- Add the Leaves: Gently shake a canister of blended green flock or leaf turf (such as Noch Leaf Foliage) over the sticky branches.
- Seal It: Give the tree one final coat of hairspray to lock the leaves in place, then plant it on your layout using a dab of hot glue on the trunk.
Method 2: The Bottle-Brush Pine (Coniferous)
If you are modeling a mountainous, alpine environment, you will need plenty of evergreen pines. You can make dozens of these in an afternoon using jute twine, wire, and a drill—or you can purchase a budget-friendly bulk pack of wire bottle-brush trees and upgrade them.
To make cheap wire pines look incredibly realistic, spray them with matte dark-green paint, then roll them in coarse, dark-green ground foam while the paint is wet. The foam clings to the bristles, instantly transforming plastic-looking toy trees into lifelike forest giants.

A dense pine forest creates a beautiful sense of depth and scale.. Source: Model Train Info
Comparison: Choosing the Right Scenic Materials
To help you budget your next trip to the local hobby shop, here is a quick breakdown of the most popular ground cover products on the market today.
| Material Type | Best Used For | Pros | Cons |
| Fine Ground Foam | Basic grass, moss, distant hills | Extremely budget-friendly, easy to apply | Lacks vertical texture on its own |
| Clump Foliage | Bushes, low shrubs, tree leaves | Great for quick three-dimensional volume | Can look like green popcorn if overused |
| Static Grass | Realistic fields, lawns, wild pastures | Unmatched realism; fibers stand straight up | Requires a specialized electrostatic applicator |
| Natural Lichen | Quick underbrush, dead forest debris | Very inexpensive, great organic shapes | Can dry out and become brittle over time |
Bringing Your Wild Scenes to Life
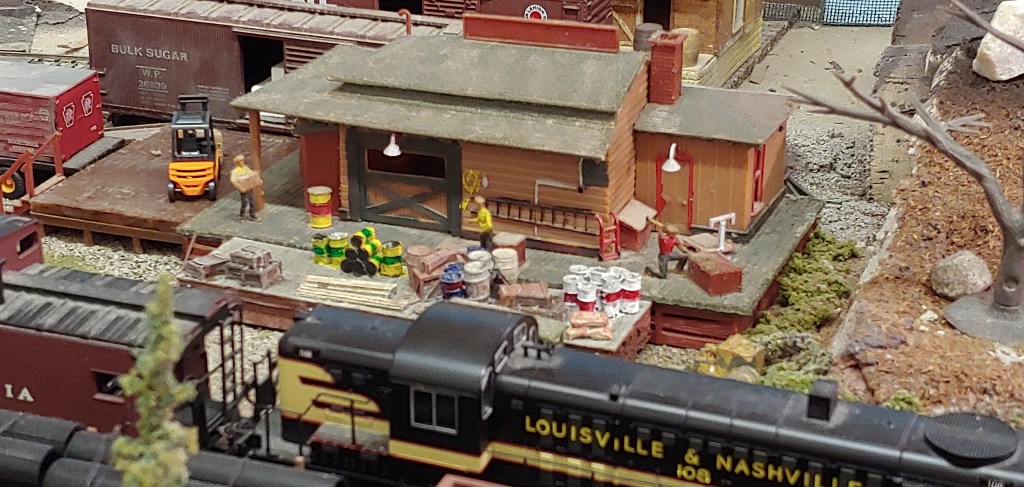
The final step in mastering your miniature wilderness is adding the small details that tell a story. Consider placing a fallen branch (a real twig from the yard) covered in a bit of green moss next to the tracks. Add some dark green clump foliage around the base of your trees to represent roots digging into the soil.
By building up your terrain in layers—from dirt to fine grass, up through weeds and shrubs, and finally to your towering forest canopy—your layout will transition from a collection of plastic models into a breathtaking, realistic landscape.
For Model railroading scenery products and other products that help in building your empire go here.
Coming Up in August…
Now that your town is nestled in a gorgeous, lush valley with bustling streets and beautiful forests, it is time to light up the night! Join us next month for our August installment, “Let There Be Light: Wiring and Installing Micro-LEDs.” We will demystify layout electronics and show you the easiest, safest ways to install glowing streetlamps, warm cottage windows, and flickering campfires that will make your miniature world shine long after the basement lights go out. You won’t want to miss it!
Until then, happy modeling, and keep those trains rolling!