Part 1
Many people’s first introduction to model railroading is with a simple circle or oval on a sheet of plywood. No scenery, no landscaping and maybe not even any buildings or vehicles
It doesn’t take long, however, to get the urge to start adding accessories to the railroad to make it more realistic. For many people, this become a lifelong endeavor, and can grow to very large proportions
There are many options for landscaping a railroad. You can add things like grass, trees, lakes or rivers alongside the track. Or you can get a little more in depth and add hills and valleys for your train to travel through, and tunnels through the mountains.


There are many methods and articles for scenery. I have read many articles, attended a few seminars (classes) and and discussed these methods at our club meetings. We have come up with our own methods for scenery. The six steps that work best for us. These steps are not hard and fast rules, merely a suggestion that will help you get to the point where you are not looking at a train running on plywood.

Step 1 The base, for this example, will be a 4 x 8 sheet of Fiberboard. A reasonable starting point. The track plan can be what ever you wish, an oval or something a little different from the internet or magazine. Our emphasis here will be scenery.
If you drive through the neighborhood or around town the main point you will see is that it is not level. Some grade changes are everywhere. (Work in small areas in the beginning, this will help you get experience and the learning process will be easier.) The first thing to do is plan what you you would like to have and where you want it. Then map a small area and begin. This is very easily done by clumping newspaper in piles and draping paper towels dipped in a plaster of paris mix and draping the wet towels over the clumped newspaper. A second method would be to use extruded Styrofoam stacked and carved to form the hills, then use the plaster cloth to form the terrain use Woodland Scenics Plaster Cloth. It’s not very messy. Using the plaster cloth can be used for small grades or larger hills. As the plaster is drying you can smooth the hill by using wet fingers and rubbing lightly for the smooth surface. You will find if you experiment you can have the terrain you desire.
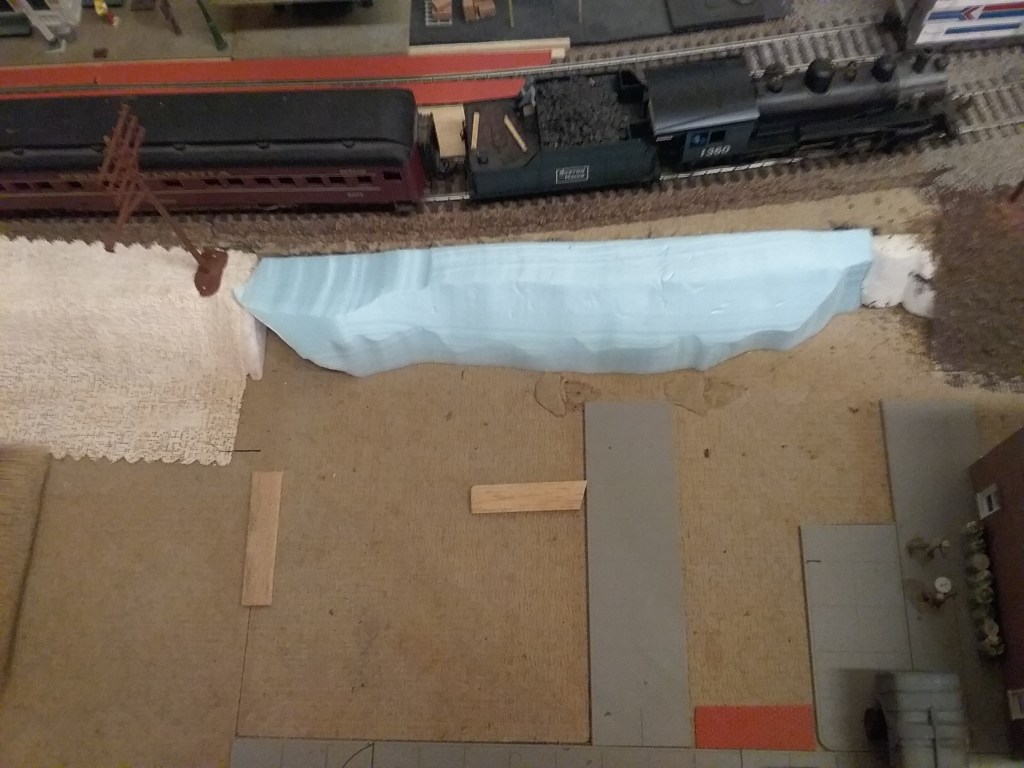
The picture to the above shows two levels, the engine sits about 1.5 inch above the lower level. The blue Styrofoam hides the elevation. As you can see it does not need to be neatly cut. Rolled up newspaper also works well. Its only function is to support the plaster cloth. The styrofoam was glued in place with Elmers white glue
Plaster cloth can be cut to fit any size and location.

Here you see a cut piece of plaster cloth in place. I place the cut plaster cloth in a plastic dish to soak for several minutes then put it in place.

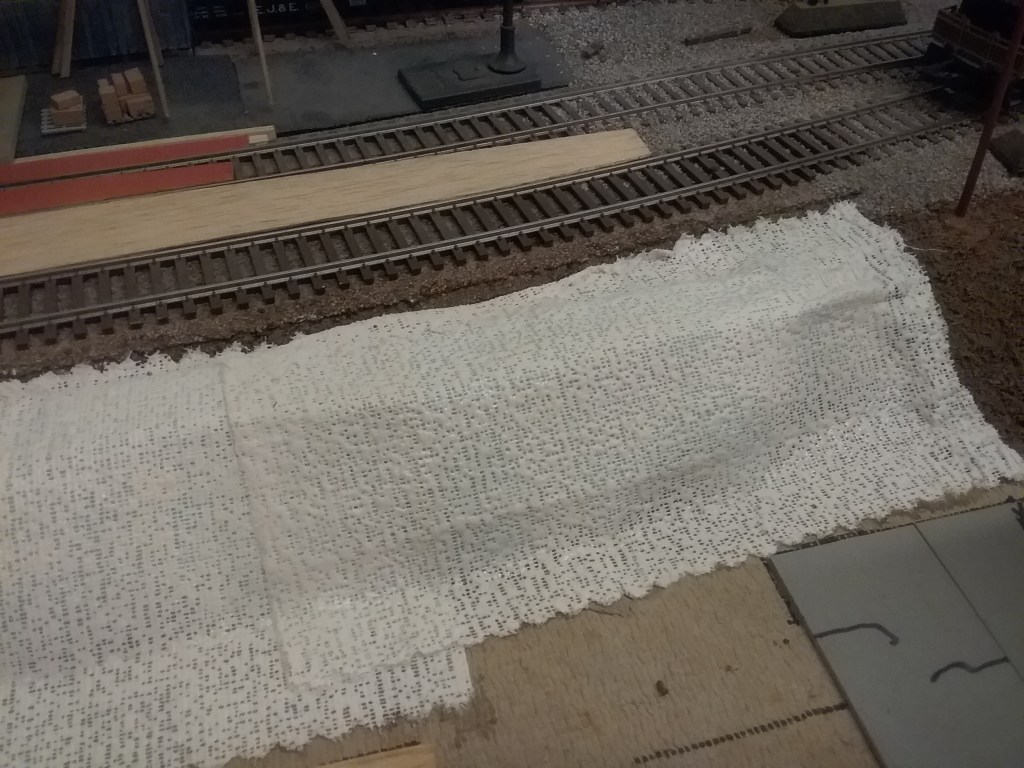
Here another sheet of plaster cloth has been put in place to complete the coverage of the Styrofoam. Use as many sheets as necessary to cover the area.

I like to place two layers of plaster cloth for strength. Then using wet fingers smooth the plaster as you can see in the picture the holes have disappeared by smoothing the plaster adding to the strength. The Styrofoam allows for smooth surface and smooth finish.
Rolled up newspaper will allow for a more hilly finish as the plaster cloth will follow the contours easily.
Here another sheet of plaster cloth has been put in place to complete the coverage of the Styrofoam. Use as many sheets as necessary to cover the area.

Once you are satisfied with the area you are working, paint with an earth color spray or brush whichever you desire. I find spray cans are faster and easier.
If you are working in an area where track has been placed you will want to mask the track as I did.

For this example I used a black spray paint to lightly cover the area.
At this point I walk away to let the paint and plaster dry. Doesn’t take very long.
Step 2 is spreading earth or sifted dirt onto to the wet paint. If you have let the paint dry fear not, you can use a spray on glue. 3M and Elmer’s both make a great product, I have used both. Spray the area with the glue and use a tea strainer to cover the area with earth, gently tap the strainer as you cover the area. You can use the Fine Turf or sifted dirt. The dirt can come from your back yard. Let it dry then put it through a tea strainer. let it sit for a day or two then use it on your scene. If it gets a little thick in areas don’t be concerned, you can smooth it out with a small brush or let it go. At this point you can spray the area with an inexpensive hair spray. That will hold everything in place.

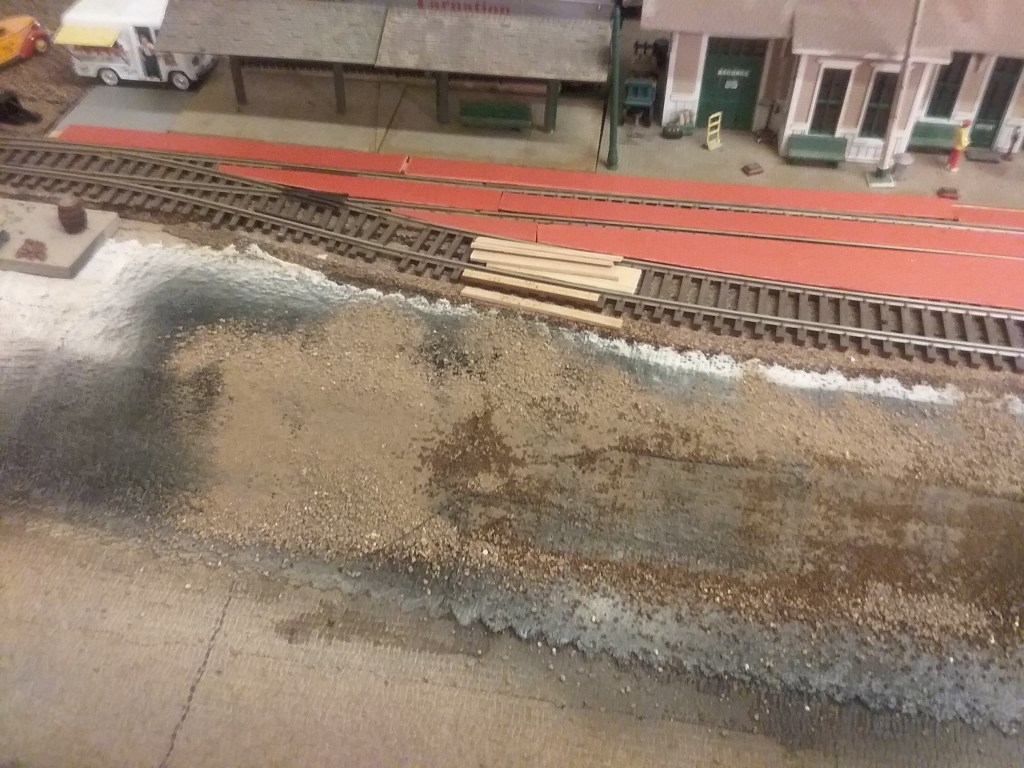

At this point the two levels are connected by a rolling hill, covered in dirt.
In the next installment we will add grass, weeds bushes and shrubs to make the area appear to be ready for trees, people and vehicles. Bringing the railroad to life.
Related Model Railroad Articles
The History Of Model Railroading
Model Train Scales
5 Top Model Train Accessories
Discover Model Trains
Deciding a Track Plan Before Building Your Model Railroad Layout
How to Add Excitement to Model Railroad Scenery on Your Model Train Layout
Inexpensive Ways to Make Trees and Ground Cover For Your Model Railroad Layout
A Train Set For Christmas
Scenery – Six Steps
More Information

A quick easy way to a stunning Layout CLICK HERE

