Developing Your First Model Train Layout

To develop your model train layout there are four major steps to take before you begin construction:

1: Select the size of your model train, that is the scale or gauge. Scales range from micro-sized Z scale for tiny layouts to giant G-scale used mostly for outdoor garden layouts.

Visit hobby shops or model train websites and see the various scales available. Staff at a hobby shop will usually be happy to point out the advantages and/or disadvantages of each scale. Your decision about scale/size will be partly based on the space available for your layout. The most popular scales are O scale which is 1/48th actual size and the smaller HO scale which is 1/87th actual size. As a result of being the two most popular scales these have the greatest variety of locomotives, cars and accessories available.

Model Train Scales an article written earlier may also help.

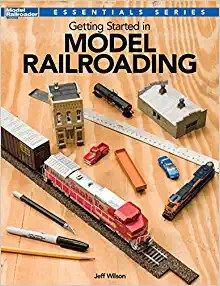
2: Learn about layouts for the scale you have chosen by reading magazines such as O Gauge Railroading and Classic Toy Trains (these two are for O scale). Model Railroading provides detailed information about HO and N scale. All are full of information – all the good train hobby stores carry them or you can pick them up at places like Barnes & Noble or Amazon.

Also visit websites related to your scale choice Google the term “model train layouts” for a great listing of sites with information about model train layouts. You may also wish to check out Youtube for more information on layouts.

Re-visit hobby shops you visited for information when deciding on the scale of your model train set and ask questions about layout. The good ones can provide helpful advice and they sell how-to books on wiring, scenery, detailing and other subjects.

3: You then need to decide on how you start. Do you want to start with a little layout that can later be extended? Do you want to set up a permanent layout right from the start? Do you want to develop a ‘theme’ layout say a layout depicting California logging railroads in the 1920s? The major decisions are to determine your objective and set the size parameters for your layout. Don’t forget that the size parameters for your layout will be determined largely by the space you have available a basement? the corner of a lounge room? portion of your garage? etc.

Deciding a Track Plan Before Building Your Model Railroad Layout another article written here.

4: Begin making sketches and drawings on plain paper it’s easier to make changes to your drawing than to have to physically pry up a section of track that ‘went wrong’. Refer back to magazines and websites during this planning stage just to see what others have done. Many magazines and websites will have photos of layouts appropriate to the scale you have chosen. There are even some computer programs which can help you with designing your layout – look for ads in model train magazines.

Scenery – Six steps

Part 1

Many people’s first introduction to model railroading is with a simple circle or oval on a sheet of plywood. No scenery, no landscaping and maybe not even any buildings or vehicles

It doesn’t take long, however, to get the urge to start adding accessories to the railroad to make it more realistic. For many people, this become a lifelong endeavor, and can grow to very large proportions

There are many options for landscaping a railroad. You can add things like grass, trees, lakes or rivers alongside the track. Or you can get a little more in depth and add hills and valleys for your train to travel through, and tunnels through the mountains.

There are many methods and articles for scenery. I have read many articles, attended a few seminars (classes) and and discussed these methods at our club meetings. We have come up with our own methods for scenery. The six steps that work best for us. These steps are not hard and fast rules, merely a suggestion that will help you get to the point where you are not looking at a train running on plywood.

Step 1 The base, for this example, will be a 4 x 8 sheet of Fiberboard. A reasonable starting point. The track plan can be what ever you wish, an oval or something a little different from the internet or magazine. Our emphasis here will be scenery.

If you drive through the neighborhood or around town the main point you will see is that it is not level. Some grade changes are everywhere. (Work in small areas in the beginning, this will help you get experience and the learning process will be easier.) The first thing to do is plan what you you would like to have and where you want it. Then map a small area and begin. This is very easily done by clumping newspaper in piles and draping paper towels dipped in a plaster of paris mix and draping the wet towels over the clumped newspaper. A second method would be to use extruded Styrofoam stacked and carved to form the hills, then use the plaster cloth to form the terrain use Woodland Scenics Plaster Cloth. It’s not very messy. Using the plaster cloth can be used for small grades or larger hills. As the plaster is drying you can smooth the hill by using wet fingers and rubbing lightly for the smooth surface. You will find if you experiment you can have the terrain you desire.

The picture to the above shows two levels, the engine sits about 1.5 inch above the lower level. The blue Styrofoam hides the elevation. As you can see it does not need to be neatly cut. Rolled up newspaper also works well. Its only function is to support the plaster cloth. The styrofoam was glued in place with Elmers white glue

Plaster cloth can be cut to fit any size and location.

Here you see a cut piece of plaster cloth in place. I place the cut plaster cloth in a plastic dish to soak for several minutes then put it in place.

Here another sheet of plaster cloth has been put in place to complete the coverage of the Styrofoam. Use as many sheets as necessary to cover the area.

I like to place two layers of plaster cloth for strength. Then using wet fingers smooth the plaster as you can see in the picture the holes have disappeared by smoothing the plaster adding to the strength. The Styrofoam allows for smooth surface and smooth finish.

Rolled up newspaper will allow for a more hilly finish as the plaster cloth will follow the contours easily.

Here another sheet of plaster cloth has been put in place to complete the coverage of the Styrofoam. Use as many sheets as necessary to cover the area.

Once you are satisfied with the area you are working, paint with an earth color spray or brush whichever you desire. I find spray cans are faster and easier.

If you are working in an area where track has been placed you will want to mask the track as I did.

For this example I used a black spray paint to lightly cover the area.

At this point I walk away to let the paint and plaster dry. Doesn’t take very long.

Step 2 is spreading earth or sifted dirt onto to the wet paint. If you have let the paint dry fear not, you can use a spray on glue. 3M and Elmer’s both make a great product, I have used both. Spray the area with the glue and use a tea strainer to cover the area with earth, gently tap the strainer as you cover the area. You can use the Fine Turf or sifted dirt. The dirt can come from your back yard. Let it dry then put it through a tea strainer. let it sit for a day or two then use it on your scene. If it gets a little thick in areas don’t be concerned, you can smooth it out with a small brush or let it go. At this point you can spray the area with an inexpensive hair spray. That will hold everything in place.

At this point the two levels are connected by a rolling hill, covered in dirt.

In the next installment we will add grass, weeds bushes and shrubs to make the area appear to be ready for trees, people and vehicles. Bringing the railroad to life.

Continue to Part 2.

Scenery – Six steps

Part 2

There are many methods and articles for scenery. I have read many articles, attended a few seminars (classes) and and discussed these methods at our club meetings. We have come up with our own methods for scenery. The six steps that work best for us. These steps are not hard and fast rules, merely a suggestion that will help you get to the point where you are not looking at a train running on plywood.

In part 1 I demonstrated how I use the plaster cloth over the styrofoam or the crumpled paper to create a contour on the land. Then I used the fine turf after lightly painting the surface to simulate the earth. At this point I am ready to start with the addition of the grass. Return to read Part 1.

Since the area has been idle for several days to allow it to dry I sprayed spray adhesive on the area to be covered with grass.

Step 3 is fine green Grass, Woodland Scenics and Scenic Express make several shades of green and burnt grass. Again sprinkle lightly covering all or most of the area. Again if this appears too thick is some area you can work a brush to lightly smooth or let it go.

.

In the photo above you will see more grass on the top and bottom (flat surfaces). Grass isn’t very thick on the slope we’ll fix this shortly. The white areas will be covered with ballast as will the cork roadbed. I’ll cover track and ballast in a later post. I have used several methods and I will demonstrate what I do. I believe in easy.

Step 4 is coarse foam. Again this product is available from both companies. Sprinkle SPARRINGLY. LIGHTLY.

At this point I want to introduce wet water. I prefer water with several drops of dish soap (Dawn or something similar). This is applied with an eye dropper or a spray bottle. This is applied to the area prior to applying a 50/50 mix of water and white glue (Elmers). The wet water helps the glue saturate the the material and hold it to the painted base. You can see this work by first placing a drop of the 50/50 mix on you grass, it will sit there. Put a drop of wet water on the glue and it will penetrate the material.

Cover the area you just completed with wet water followed by the 50/50 glue mix and let it dry.

Step 5 Clump foliage. This clump foliage can be placed or not, it resembled small shrubs. If you do use it, place a small circle of white glue where it will be placed and place the clump there. The glue should be about the same size as the clump and dries clear. Again this step is a personal touch, use it or not.

Above you will see a scene I have on my layout where all the products I have mentioned in part 1 & 2 have been used. In addition to the use of small rocks/pebbles the various trees will be discussed in part three.

Step 6 Trees to be covered in a future article (Part 3 )

Till the next post on trees.

.

How to Add Excitement to Model Railroad Scenery on Your Model Train Layout

Model railroading is a fun and rewarding hobby that can provide hours of entertainment. However, after building a layout, some model railroaders may find that their layout lacks excitement. In this blog article, we will discuss how to add excitement to your model railroad layout. We will cover various tips and tricks that can help you create a more engaging and dynamic layout.

  1. Design a Layout with Excitement in Mind

The first step in creating an exciting model railroad layout is to design a layout with excitement in mind. When designing your layout, consider the following:

  • Track Layout: The track layout is the backbone of your model railroad. A well-designed track layout can make your layout more exciting to watch. Consider adding loops, crossovers, and other track features that can add visual interest to your layout.
  • Scenery: Scenery is an important aspect of any model railroad layout. Adding realistic scenery can make your layout more engaging and visually appealing. Consider adding mountains, rivers, and other natural features to your layout.
  • Structures: Structures such as buildings, bridges, and tunnels can add visual interest to your layout. Consider adding structures that are unique and visually appealing.

See my articles on six steps of SCENERY.

  1. Add Special Effects

Special effects can add excitement to your model railroad layout. Consider adding the following special effects to your layout:

  • Sound Effects: Adding sound effects to your layout can make it more engaging. Consider adding sound effects such as train whistles, crossing bells, and other train-related sounds.
  • Lighting Effects: Lighting effects can add visual interest to your layout. Consider adding lighting effects such as streetlights, building lights, and other lighting effects.
  • Animation: Adding animation to your layout can make it more engaging. Consider adding animated features such as moving vehicles, people, and animals.

HERE for Model Train Accessories.

  1. Use Innovative Layout Design

Using an innovative layout design can make your model railroad more exciting to watch. Consider the following layout design tips:

  • Multi-Level Layouts: Multi-level layouts can add visual interest to your layout. Consider adding multiple levels to your layout to create a more dynamic and engaging layout.
  • Hidden Staging: Hidden staging can add excitement to your layout by allowing trains to disappear and reappear. Consider adding hidden staging to your layout to create a more engaging and dynamic layout.
  • Trackside Industries: Adding trackside industries to your layout can add visual interest and excitement. Consider adding industries such as factories, warehouses, and other industrial buildings to your layout.

Use Figures and Vehicles to Bring you Layout to Life

  1. Add Realism

Adding realism to your model railroad layout can make it more engaging and exciting. Consider the following tips for adding realism to your layout:

  • Weathering: Weathering your trains and structures can add realism to your layout. Consider weathering your trains and structures to create a more realistic and engaging layout.
  • Details: Adding details to your layout can make it more engaging. Consider adding details such as people, animals, and other small details to your layout.
  • Operations: Adding realistic operations to your layout can make it more engaging. Consider adding realistic operations such as switching and yard operations to your layout.

For excellent info on switching operations please watch https://www.youtube.com/@socalscalemodels.

Conclusion:

In conclusion, adding excitement to your model railroad layout can be achieved by designing a layout with excitement in mind, adding special effects, using innovative layout design, and adding realism. By following these tips and tricks, you can create a more engaging and dynamic model railroad layout that will provide hours of entertainment.

Model Train Accessories can be found HERE

RE

Join Robert Anderson’s popular online Model Train Club to get lots of clever model railroad ideas to help you build the model train layout of your dreams! 

or

Robert Anderson is the author of Model Railroad Scenery & Layout Construction Ideas

5 Top Model Train Accessories

Many people’s first introduction to model railroading is with a simple circle or oval on a sheet of plywood. No scenery, no landscaping and maybe not even any buildings or vehicles.

It doesn’t take long, however, to get the urge to start adding accessories to the railroad to make it more realistic. For many people, this become a lifelong endeavor, and can grow to very large proportions.

Every layout is different and everyone has their own favorite accessories, but the following 5 items are some of the most common accessories that add a level of realism and interest to your model railroad.

Also See the TOP ACCESSORIES FOR MODEL RAILROADS IN 2024

1. Train Station

This is one of the first buildings most people add to their layout. It gives the railroad a starting and ending point and often serves as the basis for an entire town or city to be built up around it. The TRAIN STATION.

A quick easy way to a stunning Layout CLICK HERE

2. Lighting

There are many forms of lighting for railroads. There can be background lighting to give a backdrop a degree of realism or street lights to add to the ambiance of a city. These may be strictly for decoration, or they may actually light up at night to give the streets a realistic glow.

3. Rail Cars

The locomotive usually gets the most attention when setting up a model railroad, but there are many choices for railcars as well.

4. People and Animals

A city or rail yard isn’t complete without people as part of the design. And if your layout travels through mountains or countryside, animals add a touch of realism to the design. And vehicles always add to the realism.

A quick easy way to a stunning Layout CLICK HERE

5. Landscaping

There are many options for landscaping a railroad. You can add things like grass, trees, lakes or rivers alongside the track. Or you can get a little more in depth and add hills and valleys for your train to travel through, and tunnels through the mountains.

Model Train Scales

When you get into model railroading, you quickly learn about model train scales. Every model train that is produced has a scale letter associated with it, such as: HO, O and so forth. The scale lets you know how true to life it is and more importantly, the physical size of the train itself. The scale refers to the size in comparison with the real thing. For example, 1:220 means the real version of the model train is 220 times larger. If you are a newcomer to model trains, the amount of space will be the first factor in determining which scale to go with. For the hardcore model railroader, mixing scales is a great joy when space permits. Lets take a look at some of the model train scales and minimum space requirements.

Z Scale trains are 1:220, which means they are very small. I call these cute trains and they are perfect for those with an extremely limited space. As with any scale, you can expand the layout as large as you want to go.

Next up is the N Scale, which is 1:160. N scale trains are semi-popular and are great if you want your focus to be on your layout and not the train itself. They are small as well, so you can fit these trains into minimal space.

HO Scale model trains are 1:87 and the most popular scale of model train with model railroaders. They offer a good level of detail and allow you to fit a nice size track into an average size space. I like HO scale trains because they blend in great with any type scenery and you get a good balance as a result.

The O Scales, my favorite, are 1:48 and very popular as well. Lionel has been making great O scale model trains for many decades. These model trains are larger and require a good amount of space for a proper layout. It is possible to setup a small oval track in about a 5-foot by 5-foot area. Although the track will seem small because of the trains size, it is better than nothing. If your layout is smaller, the O scale train will dominate the view.

There are a couple other scales, such as S and G, but these are the main ones I choose to discuss in this article. Only you can decide which scale is right for you. Some, with limited space, prefer the O scale model trains, even though they dominate the layout, because of their detail and size. O scale trains are meatier and are really great for pacifying the children.

All trains have a variance in quality so one scale is not necessarily more expensive than another. Although, I have found O scale model life to be a little bit pricier. You really cant go wrong with model railroading. It is highly rewarding and wholesome. In the end, you might find yourself collecting model trains across the entire scale spectrum. Get out there and ride the rails!