Introduction to Puzzle Layouts in Model Railroading: A Beginner’s Guide
Puzzles, also known as switching in the US, is a fascinating and engaging aspect of model railroading that focuses on organizing and rearranging train cars within a yard or station area. For beginners, a puzzle layout offers a hands-on way to experience the operational side of railroading beyond simply running trains in loops or point-to-point tracks.
What is a Puzzle Layout?
A puzzle layout is a type of model railway designed primarily for the purpose of sorting, assembling, and disassembling trains rather than continuous running. It typically features sidings, yards, and multiple tracks where freight or passenger cars can be moved around, detached, and reattached in specific sequences to simulate real railway operations6.
Why Choose a Puzzle Layout?
Operational Interest: Unlike simple loop layouts, shunting layouts provide a puzzle-like challenge where you manage the placement and order of cars. This adds depth and realism, making the hobby more interactive and rewarding28.
Space Efficiency: Many puzzle layouts are compact, making them ideal for hobbyists with limited space. Despite their small size, they offer complex operational possibilities2.
Learning Real Railway Practices: Puzzles mimics real-world railway logistics where freight cars are sorted in classification yards or stations for delivery to various destinations. This helps beginners understand how goods and passengers are moved efficiently by rail78.
Basic Concepts of Switching
Organizing Trains: Switching involves arranging cars in a required sequence for departure. For example, brake wheels must be at the rear, and cars destined for different locations are sorted accordingly8.
Sidings and Yards: These are the tracks off the main line where cars are temporarily parked or rearranged. A typical puzzle layout will have several sidings to represent different industries or destinations28.
Operations: The process includes detaching cars from incoming trains, moving them to the correct sidings (such as goods sheds, coal yards, or cattle docks), and assembling outbound trains with the correct cars8.
Getting Started with a Simple Switching Layout
For beginners, starting with a simple switching layout is recommended. This can be as small as a shelf or table-top design with a few sidings and a small yard. The goal is to create a scenario where you receive a mixed train and then sort the wagons according to their destinations or cargo types.
Example Layout: A small branch line with a goods yard and a passenger platform can provide a variety of switching tasks, such as dropping off freight cars and picking up passengers1.
Operating Potential: Even simple layouts can offer hours of engagement by simulating real railway tasks like mixed passenger and goods trains, prioritizing passenger cars, and managing slow speeds to avoid mistakes1.
Tips for Enjoying Switching
Plan Your Traffic: Decide on the era, location, and type of traffic your layout will represent. This determines the kinds of cars and operations you’ll have2.
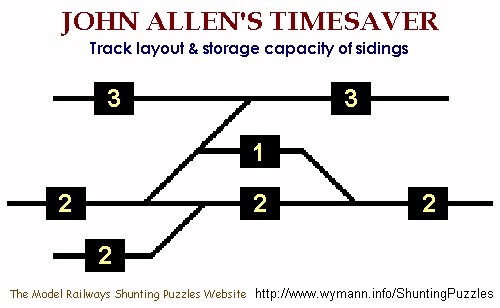
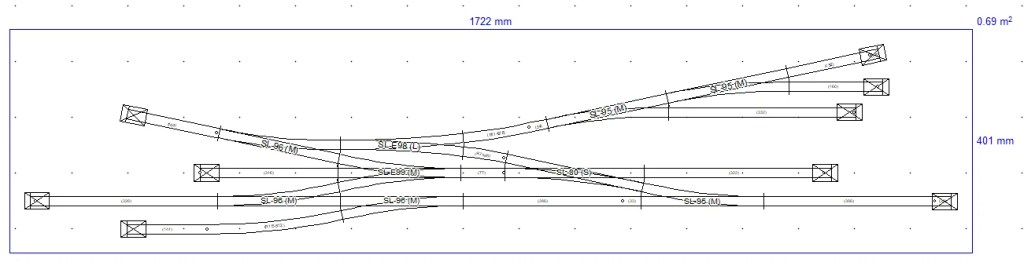
Use Switching Puzzles: Popular puzzles like Timesaver or Inglenook Sidings can help beginners practice switching techniques in a structured way6.
Patience and Practice: Switching can be complex and sometimes frustrating, but it is also very rewarding as you master the skills of organizing trains efficiently8.
Conclusion
A switching layout is an excellent introduction to model railroading for beginners who want more than just running trains around a loop. It combines operational realism, strategic thinking, and hands-on fun. By starting small and focusing on the basics of sorting and organizing cars, you can develop a deeper appreciation for the art and logistics of railroading.
Once you start switching, your layout will provide hours of pleasure and a rich understanding of how real railways work behind the scenes8. Enjoy the challenge and the satisfaction of creating order from the complexity of rail traffic!
This introduction is designed to spark interest and provide a clear understanding of what switching layouts are and why they are a rewarding choice for beginner model railroaders.
As summer begins in the Northern Hemisphere, June 2025 promises a dazzling array of celestial events, from bright planets and constellations to subtle meteor showers and rare planetary encounters. Whether you’re a beginner eager to spot your first star or an advanced astronomer seeking deep-sky targets, there’s something magical to discover every night. This guide will help you make the most of the June night sky, with tips and highlights for every level of experience.
Planets: Bright Guests in the Night Sky
Mercury and Jupiter—A Rare Evening Encounter
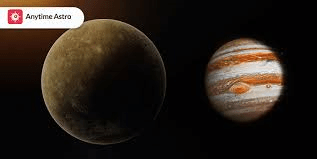
Early June brings a special treat: Mercury and Jupiter appear close together in the western sky just after sunset. On June 6, Mercury, shining at magnitude –1.5, stands about 3.7° west of Jupiter, which glows at magnitude –1.9. Both planets are visible low on the horizon about 30 minutes after sunset, but your window for observation is brief—they set within 25 minutes. For the best view, use binoculars and choose a spot with a clear western horizon. By June 8, Mercury and Jupiter are at their closest, with Mercury just 2° north of Jupiter. As the month progresses, Mercury’s disk grows from a tiny 5″ to a fatter 8″ crescent, making it an interesting target for telescopes134.
Venus—The Morning Star
June kicks off with Venus at its greatest western elongation on June 1, making it a brilliant “morning star.” Look for Venus in the eastern sky about an hour before sunrise. No telescope is needed—Venus is the third-brightest object in the night sky after the Sun and Moon. Its silvery glow is unmistakable, and it’s perfect for early risers and families wanting a gentle introduction to planet spotting43.
Mars—Leo’s Red Guest
Mars spends the month in the constellation Leo, visible in the western sky after sunset. On June 1, a waxing crescent Moon joins Mars, just 8° apart. Mars glows with a warm orange hue, making it easy to spot. By June 16, Mars has a close encounter with Regulus, Leo’s brightest star, standing just 48′ (less than a full degree) north of it. This pairing offers a beautiful color contrast—Mars’s orange against Regulus’s bluish-white. On June 29, the Moon returns to Leo, passing less than a degree from Mars. By month’s end, look for the galaxy pairing M95 and M96, just northeast of Mars—a treat for telescope users14.
Saturn and Neptune—A Distant Duo
Saturn is visible in the morning sky, rising higher as the month progresses. On June 16, early risers in the Eastern U.S. can catch the shadow of Saturn’s moon Titan transiting the planet’s disk starting at 4:11 a.m. EDT. By June 29, Neptune lies just 1° north of Saturn, making it easier to find with binoculars. Neptune shines at magnitude 7.8, and while its disk is tiny (just 2″ across), it’s a fascinating target for those with a telescope1.
Constellations and Stars: The Backbone of the Night Sky
The Summer Triangle
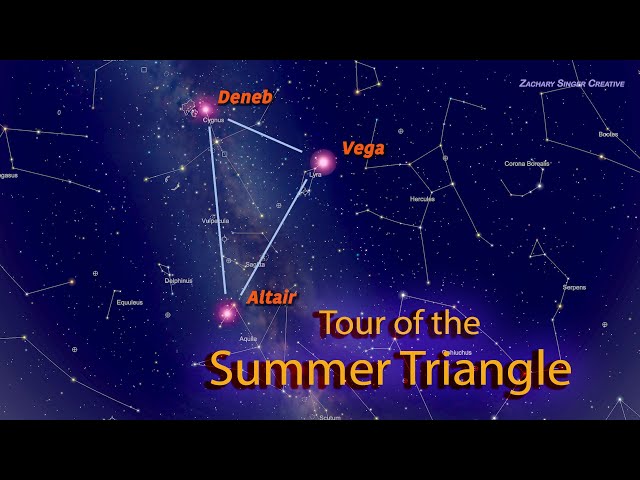
As darkness falls, look for the Summer Triangle—a giant asterism formed by three bright stars: Vega in Lyra, Deneb in Cygnus, and Altair in Aquila. This trio is visible all night and is a great starting point for beginners to navigate the sky23.
Boötes and Arcturus
Boötes, the Herdsman, is easily found by following the curve of the Big Dipper’s handle to Arcturus, one of the brightest stars in the sky. Arcturus shines with a golden hue and is a favorite among stargazers of all ages2.
Other Notable Constellations
Hercules: Home to the famous Hercules Cluster (M13), a globular cluster visible with binoculars or a small telescope.
Sagittarius and Scorpius: Rising in the southeast, these constellations are rich in star clusters and nebulae, especially for those with darker skies.
Ursa Major and Ursa Minor: The Big and Little Dippers are always visible in the north, helping orient you to the night sky2.
Capella in Auriga, Aquarius, Pegasus, Perseus, Andromeda, Capricornus, Cepheus, Ophiuchus, Cassiopeia, Draco: These constellations are visible at various times and offer a wealth of deep-sky objects for advanced observers2.
Special Celestial Events and Phenomena
June Solstice—The Longest Day
The summer solstice occurs on June 20 at 9:42 p.m. CDT (10:42 p.m. EDT), marking the official start of summer in the Northern Hemisphere. This is the longest day of the year, with up to 15 hours of daylight in some regions. While not a visual event, the solstice is a great time to observe the Sun’s path and reflect on Earth’s journey around it34.
Full Strawberry Moon
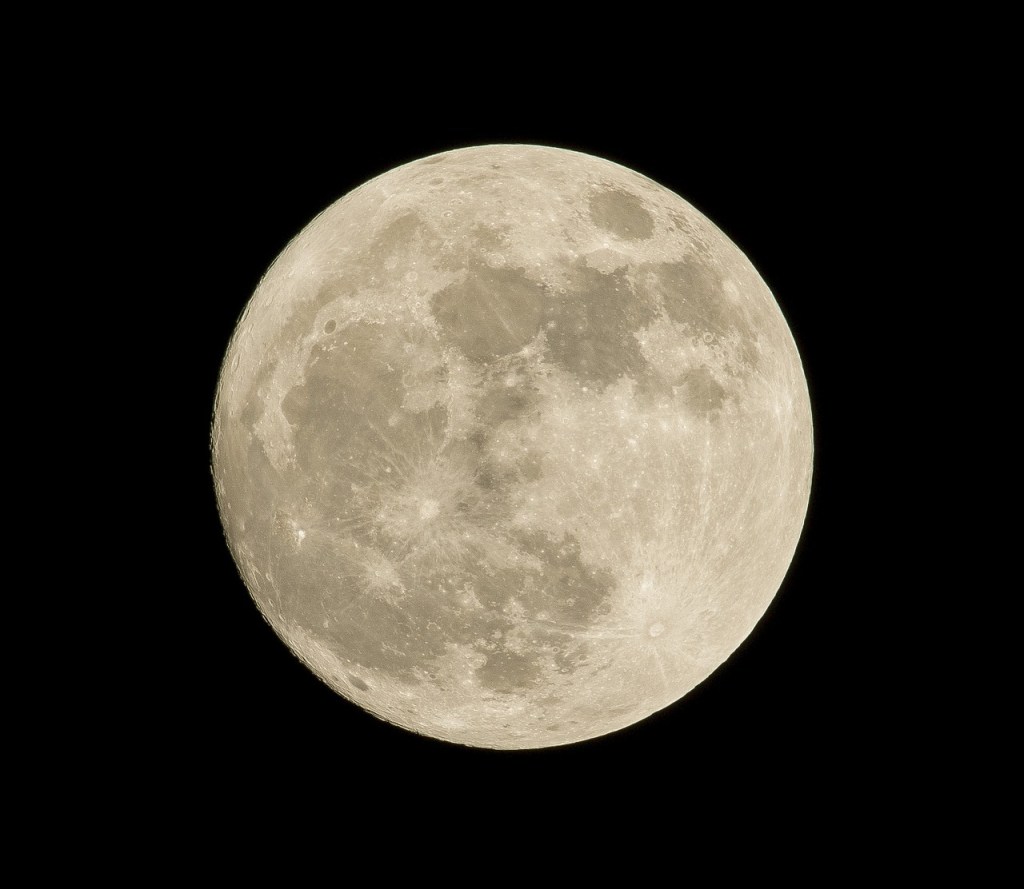
The full moon on June 11, known as the Strawberry Moon, rises at 3:45 a.m. and is a beautiful sight for early risers. Its name comes from the strawberry harvest season and is a highlight for families and photographers2.
Arietids Meteor Shower
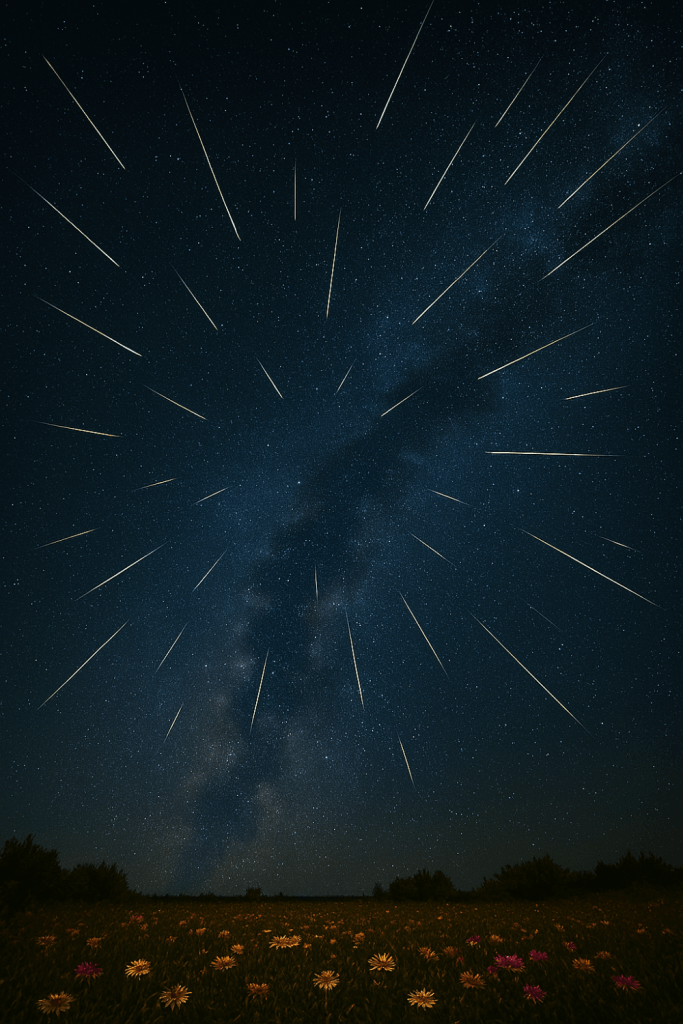
From June 7 to 10, the Arietids meteor shower peaks. This is one of the strongest daytime meteor showers, but a few meteors can be seen in the early morning hours before sunrise. Look east about 30–60 minutes before dawn for the best chance to spot a meteor4.
Moon and Pleiades
Screenshot
On June 23, the waning crescent Moon meets the Pleiades star cluster in the early morning sky. This delicate pairing is easily visible to the naked eye and makes for a lovely photo opportunity4.
New Moon—Dark Sky Delight
The new moon on June 25 brings some of the darkest skies of the month, ideal for observing faint stars, galaxies, and nebulae. This is the best time for deep-sky observing and astrophotography4.
Tips for Stargazing with the Family
Make It a Family Adventure
Stargazing is a wonderful way to spend time together. Pack a picnic, bring blankets, and let everyone take turns spotting planets, stars, and constellations. Use free apps like Sky Tonight or Stellarium to help identify what you see5.
Start Simple
Begin with the brightest objects—Venus, Jupiter, Mars, and the Summer Triangle. Use the Big Dipper to find Polaris, the North Star, and explore the constellations around it5.
Try a Star Wheel or Star Deck
Download a star wheel or use a “Star Deck” of cards to make learning the constellations fun and interactive for kids. These tools are easy to use and help build confidence in navigating the night sky5.
Observe the Moon’s Phases
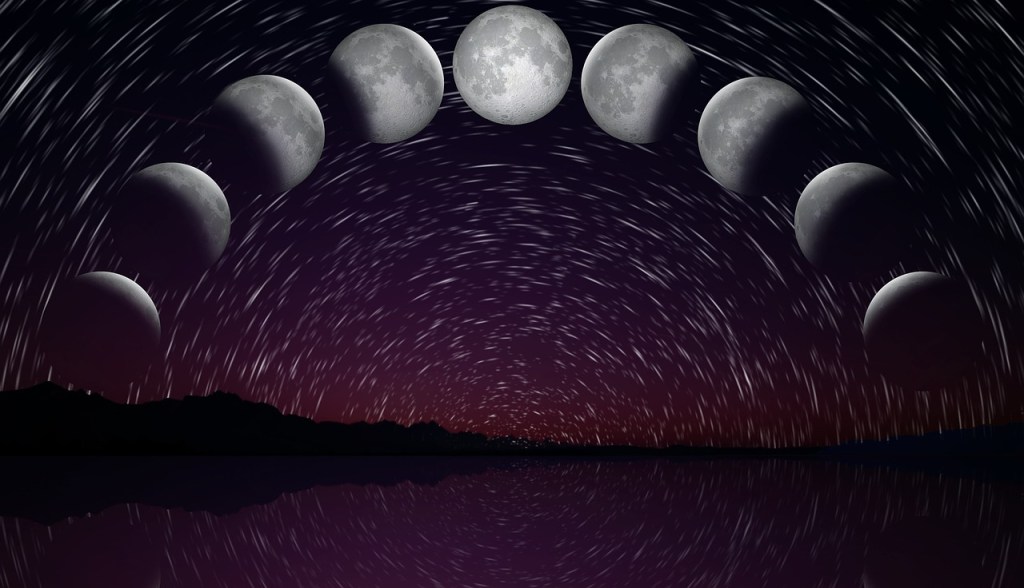
Follow the Moon throughout the month. Note how its shape changes and how it moves past different stars and planets. This is a great way to introduce the concept of lunar phases to children5.
Join a Star Party
Look for local astronomy clubs or star parties in your area. These events are family-friendly and often feature telescopes for public use, allowing everyone to see planets, star clusters, and nebulae up close5.
Summary Table: June 2025 Night Sky Highlights
Date/Event
What to See
Best Time to View
Equipment Needed
June 1
Venus at greatest elongation
Before sunrise, east
Naked eye
June 6–9
Mercury & Jupiter close
After sunset, west
Binoculars
June 11
Full Strawberry Moon
Early morning, east
Naked eye
June 16
Mars near Regulus
Before sunrise, east
Naked eye
June 16
Titan’s shadow on Saturn
Early morning, east
Telescope
June 20
Summer Solstice
All day
N/A
June 23
Moon near Pleiades
Before sunrise, east
Naked eye
June 25
New Moon
All night
Binoculars/telescope
June 29
Saturn & Neptune close
Early morning, east
Binoculars/telescope
Educational Activities for All Ages
Star Clocks and Sundials
Build a simple star clock or sundial to learn how ancient people told time using the Sun and stars. These projects are fun, educational, and require minimal materials5.
Astrophotography for Beginners
Try capturing the Moon, planets, or constellations with a smartphone or camera. Use a tripod for stability and experiment with different exposure settings to get the best results45.
Constellation Stories
Learn the myths behind the constellations. Share stories about Hercules, Leo, and the Summer Triangle to make stargazing even more engaging for children5.
Conclusion
June 2025 is packed with celestial wonders for everyone—from the bright planets and the Summer Triangle to meteor showers and the solstice. Whether you’re a beginner or an advanced astronomer, the night sky offers endless opportunities for discovery and learning. Gather your family, head outside, and let the stars inspire you.
On the evening of May 29, 2025, skywatchers across the United States and much of the Northern Hemisphere will be treated to a rare and whimsical celestial alignment: a “smiley face” formed by the twin stars Castor and Pollux in the constellation Gemini and a slender crescent Moon.
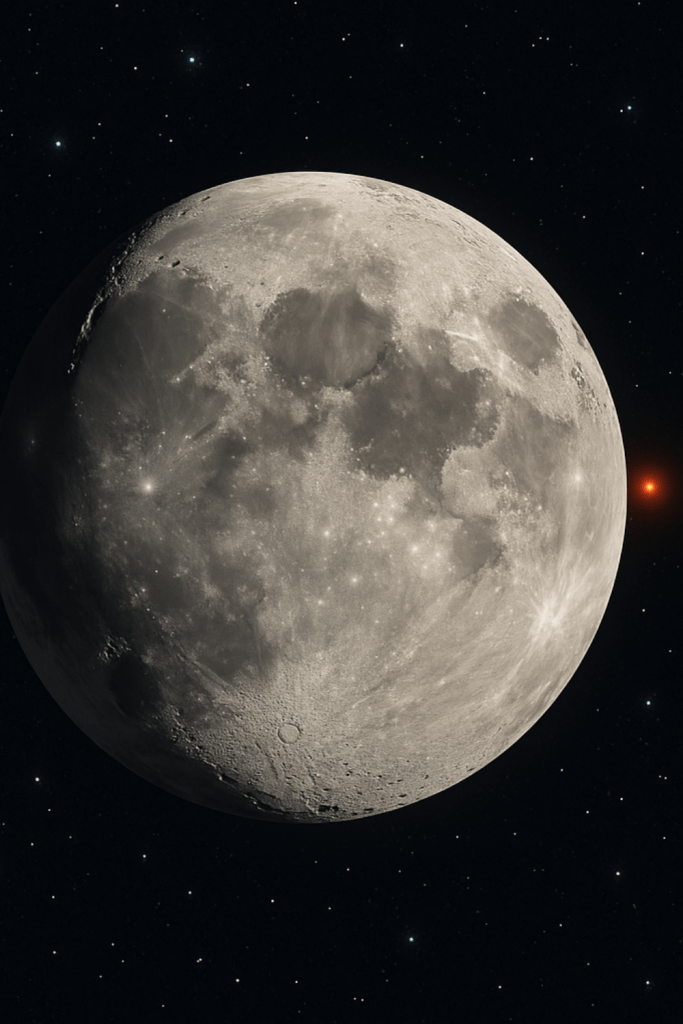
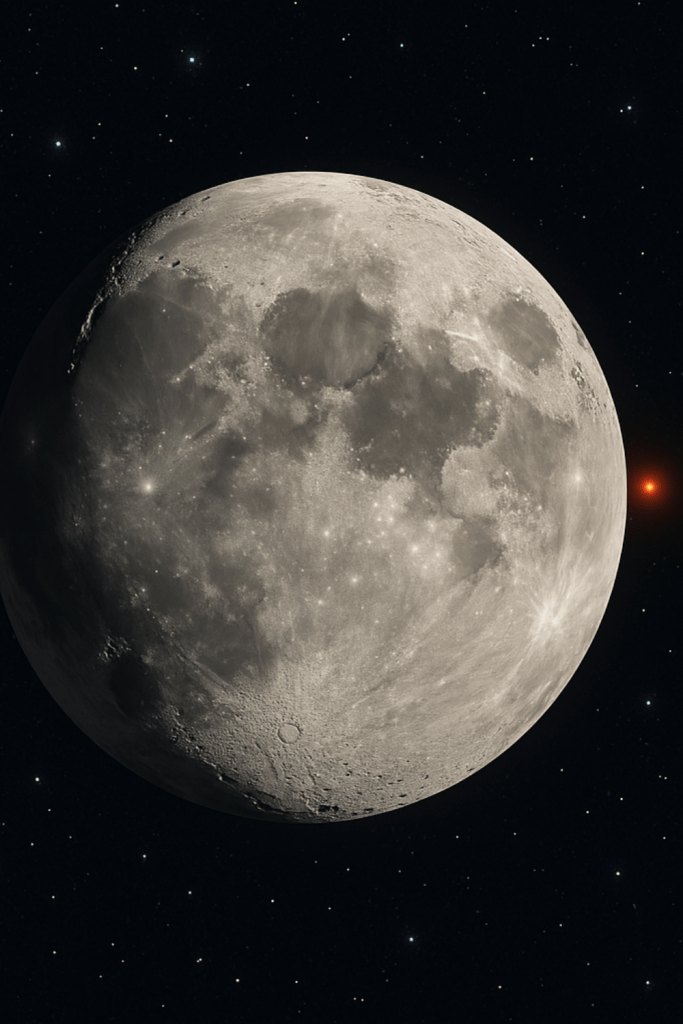
About 45 minutes after sunset, look toward the western horizon. The bright stars Castor and Pollux—representing the eyes—will be visible about 5 degrees above a thin, waxing crescent Moon, which takes the shape of a lopsided grin. Together, these celestial objects create the illusion of a cheerful face gazing back at you from the heavens145.
The “smiley face” will remain visible for several hours, with the Moon and stars gradually setting as the night progresses. The alignment is best viewed from a location with a clear western view, away from city lights. Binoculars are not required but can enhance the experience, especially for those hoping to spot fainter stars or enjoy the Moon’s delicate crescent in detail.
This delightful event is a reminder of the beauty and playfulness of the night sky, offering a perfect opportunity for families, photographers, and stargazers to enjoy a memorable moment under the stars14.
Building an HO scale model railroad is a fun, creative, and rewarding family project. This guide covers everything a beginner needs to know-from planning and preparing the roadbed to choosing the right track and tools, step-by-step installation, and long-term maintenance. Each section is easy to follow and designed to help you achieve smooth, reliable operation and a realistic look.
1. Planning Your Layout
Start by sketching your track plan on paper or using planning software. This helps you visualize your layout and ensures it fits your available space. Mark the centerlines for your track on your baseboard using a pencil for accurate placement later. A well-thought-out plan saves time and prevents mistakes down the line13.
2. Preparing the Baseboard
A sturdy, flat base is essential for a reliable layout. Use plywood or foam board supported by a simple wooden framework. Make sure the surface is level and strong enough to support your scenery, track, and trains3.
Tools you’ll need:
Saw (for cutting wood)
Drill and screwdriver
Measuring tape and ruler
Pencil and set square
3. Understanding HO Scale Track Types
HO scale (1:87.1) is the most popular choice for model railroaders, offering a balance of detail and manageable size1.
Code 100 vs. Code 83 Track
Track Type
Description
Pros
Cons
Code 100
Taller rail (0.100″)
Durable, easy for beginners, compatible with older trains
Less realistic appearance
Code 83
Lower, more prototypical rail (0.083″)
Realistic look, preferred for modern layouts
Slightly more delicate, not always compatible with vintage models
Code 100 is robust and forgiving, making it ideal for beginners.
Code 83 offers a more realistic look, perfect for those focused on detail.
Sectional vs. Flex Track
Sectional Track: Pre-formed, easy to assemble, ideal for beginners and temporary layouts.
Flex Track: Bendable, allows custom curves and more realistic layouts but requires careful cutting and fitting.
Integrated Roadbed Track
Some brands offer track with built-in roadbed (e.g., Bachmann EZ Track), simplifying installation for beginners and families.
4. Choosing and Preparing the Roadbed
The roadbed raises the track, provides sound dampening, and gives a realistic profile.
Roadbed Type
Pros
Cons
Foam
Lightweight, easy to shape, quiets noise
Slightly more expensive
Cork
Traditional, durable, easy to work with
Can dry out or crumble over time
Integrated Track
Simplifies installation, portable
Less realistic, limited flexibility
Foam (e.g., Woodland Scenics) is popular for its ease of use and sound dampening.
Cork is a classic, affordable choice.
Integrated roadbed track is best for quick setups and portability.
Step-by-Step: Preparing the Roadbed
Mark Your Track Path: Use your track plan to draw the centerline on your baseboard.
Cut and Fit the Roadbed: For curves, cut slits in the roadbed to help it bend smoothly. Dry-fit the roadbed along the marked centerline.
Secure the Roadbed: Apply white glue or double-sided tape to attach the roadbed. Press firmly and use pins or small weights while the glue dries. Ensure it’s level and follows the centerline.
Smooth the Surface: Once dry, check for bumps or gaps. Sand any rough edges or uneven spots gently.
5. Essential Tools for Accurate Track Laying
Track alignment gauges (for correct rail spacing)
Track cutters (for cutting track sections)
Needle-nose pliers (for bending rail ends and inserting joiners)
Small hammer or rubber mallet (for gently tapping in track nails or pins)
Measuring tape or ruler
Pencil/marker
Straightedge or flexible curve
Small level
Adhesive (white glue or double-sided tape)
Sandpaper or small file
6. Laying the Track: Step-by-Step
Position the Track: Lay track sections on the prepared roadbed, aligning with the centerline. Shape flex track as needed.
Connect and Secure: Join track sections using rail joiners. Use alignment gauges for correct spacing. Secure track with small nails, pins, or a dab of glue (avoid glue near moving parts).
Test and Adjust: Run a piece of rolling stock over the track to check for bumps or misalignments. Adjust before final securing.
(Optional) Ballasting: Spread model railroad ballast along the track for realism. Mist with a 50/50 water-glue mix (add a drop of dish soap) to secure, avoiding moving parts.
7. Maintenance and Repair Tips
Regular Cleaning: Use a soft cloth or track cleaning car to remove dust and dirt. Avoid harsh chemicals.
Inspect Joints: Check rail joiners and connections for gaps or looseness.
Check for Warping: Look for any warping or shifting in the roadbed or track, especially after temperature changes.
Repair as Needed: If a section becomes loose, re-glue or re-nail it. Replace damaged track or roadbed promptly.
Wheel and Coupler Checks: Make sure rolling stock wheels and couplers are clean and in good condition to prevent derailments.
Schedule Maintenance: Create a simple checklist to regularly inspect track, roadbed, and rolling stock.
8. Tips for Success
Start simple: Use sectional track and foam or cork roadbed for your first layout.
Test as you go to catch and fix issues early.
Take your time-patience leads to better results.
Involve family members in planning and assembly for a fun, shared project.
Suggested Images
Step-by-step photos: marking the baseboard, fitting roadbed, laying track, testing with rolling stock.
As spring turns to summer, the night sky offers a shifting tapestry of constellations and celestial events. May and June 2025 present a rich opportunity for stargazers in the Northern Hemisphere, with classic constellations, planetary visits, and special phenomena like meteor showers and a predicted nova. Here’s your guide to what to look for, when to look, and how to make the most of your nights under the stars.
May 2025: What to See and When
Cancer
Best time to view: Early May, after sunset and before midnight, in the western sky.
Highlights: Mars passes through Cancer, coming close to the Beehive Cluster (M44), a beautiful open cluster visible with binoculars or a small telescope.
Viewing tip: Use binoculars to spot the Beehive Cluster, especially when Mars is nearby for a striking pairing.
Leo
Best time to view: All month, high in the southwest after dusk.
Highlights: Mars moves into Leo in late May, near the bright star Regulus.
Viewing tip: Naked eye is sufficient for the main stars; a telescope will reveal double stars and galaxies like M65 and M66.
Gemini
Best time to view: Early evenings in May, low in the western sky.
Highlights: The twin stars Castor and Pollux are easy to spot.
Viewing tip: Naked eye for the constellation; binoculars for open clusters.
Corona Borealis
Best time to view: Late evenings, rising in the east.
Highlights: Site of the anticipated T Coronae Borealis nova, expected to flare up and become visible to the naked eye for a few days in May or June.
Viewing tip: Use a star chart or astronomy app to pinpoint the constellation and watch for the nova event.
Coma Berenices
Best time to view: Evenings in May, high in the east.
Highlights: Home to a loose star cluster visible with binoculars.
Ursa Major & Ursa Minor
Best time to view: All night, high in the northern sky.
Highlights: The Big Dipper (part of Ursa Major) and the Little Dipper (Ursa Minor) are prominent and useful for orientation.
Viewing tip: Naked eye; use the Big Dipper’s “pointer” stars to locate Polaris, the North Star.
June 2025: What to See and When
Boötes
Best time to view: Evenings and all night, high in the sky.
Highlights: Contains Arcturus, one of the brightest stars in the night sky.
Viewing tip: Naked eye for the constellation; binoculars for double stars.
Ursa Minor
Best time to view: All night, due north.
Highlights: Polaris, the North Star, marks the end of the Little Dipper’s handle.
Viewing tip: Naked eye; use as a reference point for finding other constellations.
Libra
Best time to view: Late evenings, low in the southern sky.
Highlights: Appears above the southern horizon for northern observers.
Viewing tip: Naked eye for the main stars; telescope for double stars.
Lupus
Best time to view: Late June, low in the south.
Highlights: Near Libra, contains several deep-sky objects.
Viewing tip: Binoculars or telescope required due to low altitude.
Ursa Major
Best time to view: All night, northern sky.
Highlights: Remains a key landmark for orientation and navigation.
Special Events and Objects (May–June 2025)
Mars & the Beehive Cluster (M44): Mars passes close to M44 in early May, creating a beautiful binocular sight.
T Coronae Borealis Nova: Predicted to erupt and become visible to the naked eye for a few days in May or June, a rare event not to be missed.
Eta Aquariid Meteor Shower: Peaks in early May, best viewed before dawn from a dark location.
Comet SWAN: May be visible in early May, near the Pleiades; binoculars recommended.
Best Practices for Stargazing
Find a dark site: Get away from city lights for the clearest views.
Use the right equipment:
Naked eye for major constellations and bright stars.
Binoculars for star clusters, bright comets, and special pairings.
Telescope for deep-sky objects and detailed planetary views.
Check the weather and moon phase: Clear, moonless nights are best.
Let your eyes adjust: Wait 20–30 minutes in the dark for optimal night vision.
Use star maps or astronomy apps: Tools like Stellarium or SkySafari can help you locate constellations and track events in real time.
Best times:
May: Start observing after sunset for western constellations; late evening for those rising in the east.
June: Wait until at least 11:30 p.m. for the sky to be fully dark, especially at higher latitudes.
The night sky is a cosmic treasure map, where stars, planets, and meteors hold clues to the mysteries of the universe. May 2025 promises to be an exceptionally exciting month for stargazers, offering dazzling meteor showers, planetary conjunctions, and lunar phenomena that will captivate enthusiasts of all ages. Whether you’re an astronomy novice, a seasoned observer, or a family looking for a fun outdoor activity, this guide will equip you with everything you need to make the most of May’s celestial wonders.
Introduction
May 2025 is a month of astronomical marvels. From the annual Eta Aquariids meteor shower to a rare conjunction of Venus and Jupiter, the night sky invites us to explore the universe like never before. Perfect for beginners and hobbyists, this month offers cosmic events that are easy to spot and fascinating to study. With little more than curiosity and a clear night, you can immerse yourself in the beauty of the cosmos.
This guide will break down each celestial event, the best times and locations for stargazing, tools to enhance your experience, and family-friendly tips to make stargazing an unforgettable adventure.
Key Celestial Events in May 2025
May is packed with astronomical phenomena that make the night sky more vibrant than ever. Here are the highlights:
1. The Eta Aquariids Meteor Shower
The Eta Aquariids meteor shower, linked to the famous Halley’s Comet, peaks on May 5–6, offering up to 30 meteors per hour. These meteors are fast, bright, and leave glowing trails behind them.
Family-Friendly Tips:
Best Viewing Times: After midnight until dawn in dark-sky areas.
Bring blankets, snacks, and chairs for a cozy outdoor viewing experience.
Turn it into a meteor-counting game for kids and make wishes on shooting stars.
2. Venus and Jupiter Conjunction
On May 23, two of the brightest planets, Venus and Jupiter, will almost “kiss” in the night sky as they align in a rare conjunction. The pairing will be visible just after sunset in the western sky.
Family-Friendly Fun:
Use binoculars or a telescope for an enhanced view.
Explain to kids that Venus is named after the Roman goddess of love, while Jupiter is named after the king of Roman gods—making the pairing magical.
Encourage the family to create stories about why the planets are “meeting.”
3. The Full Flower Moon
On May 14, the “Flower Moon,” named for spring’s blooming flowers, will rise in all its luminous glory. This full moon is perfect for family moonlit walks, photography, and storytelling.
Tips for Viewing:
Watch the moonrise when it’s near the horizon for dramatic views.
Use binoculars to observe craters and valleys for a closer look.
4. Lunar Occultation of Mars
On May 27, the moon will pass in front of Mars, temporarily hiding the Red Planet in an event known as a lunar occultation. This rare phenomenon is best viewed with a telescope.
Why It’s Special:
Watch Mars “disappear” and reappear behind the moon—an exciting event that demonstrates the motion of celestial objects.
5. Saturn’s Rings on Display
Throughout May, Saturn’s iconic rings will be visible in the early evening sky. This is a great opportunity to introduce kids to the wonders of the ringed planet.
Best Times and Locations for Stargazing
To make the most of these celestial events, timing and location are key.
Best Times for Stargazing in Eastern Standard Time
Early Evening: Perfect for spotting Venus, Jupiter, and Saturn.
Midnight to Dawn: Ideal for meteor showers and deep-sky observations.
Moon Phase Considerations: The new moon (May 8) is best for dark-sky viewing, while the full moon is perfect for lunar exploration.
Suggested Locations
Dark Sky Parks in the Eastern United States
Cherry Springs State Park, PA: One of the best dark-sky reserves in the country.
Assateague Island, MD/VA: Gorgeous beach settings for stargazing.
Blue Ridge Parkway, NC/VA: Scenic overlooks ideal for observing the cosmos.
Urban Areas
Parks or Rooftops: Seek out local parks or elevated rooftops where light pollution is minimal.
Apps to Locate Dark Sites: Use apps like Dark Sky Finder or SkySafari to locate dark-sky zones near you.
Tools for Observing the Night Sky
Binoculars
Binoculars are great for beginners and offer a simple way to observe celestial objects. Some excellent models include:
Celestron SkyMaster 15×60: Large aperture for stargazing (~$130). Optics Planet
Nikon Action EX 12×50: Waterproof and durable (~$180).
Orion UltraView 10×50: Wide field of view for general stargazing (~$160).
Telescopes
Telescopes allow detailed exploration of the night sky. Recommended models:
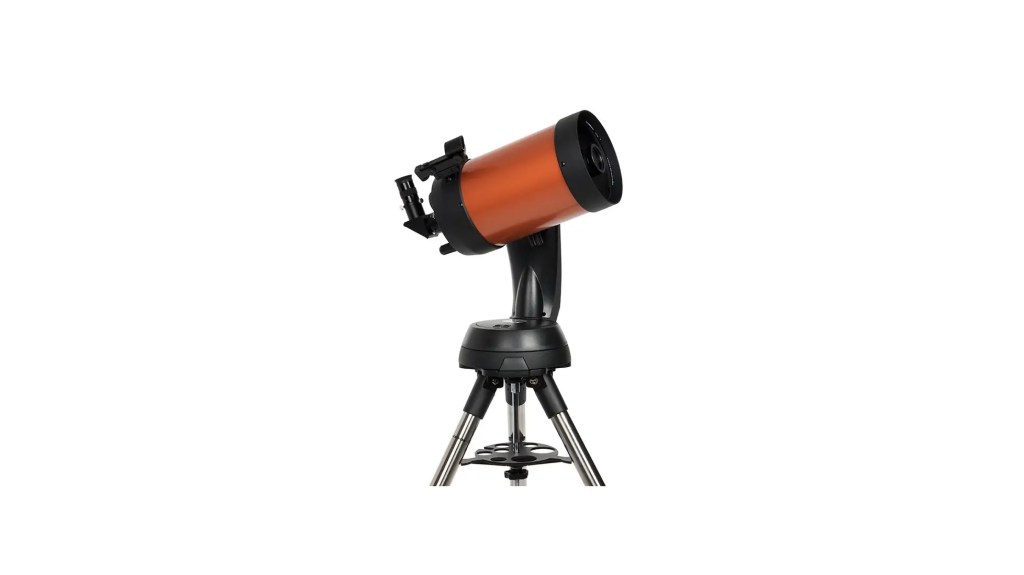
Celestron NexStar 6SE:
Celestron NexStar 6SE: Computerized telescope with GoTo technology (~$1,000).
Orion StarBlast 4.5 Astro Reflector Telescope: For moon and planetary viewing (~$270).
App
Technology can enhance your stargazing experience. Popular apps:
Stellarium Mobile Plus: Realistic star map (~$15).
SkySafari 7 Pro: Celestial tracking and telescope integration (~$20–$50).
Night Sky: AR stargazing and event notifications (free, premium available).
Stargazing Tips for Families
Stargazing with your family is a wonderful way to bond and inspire curiosity about the universe. Here are some tips to make your nights magical:
Make It a Treasure Hunt: Use star maps or apps to find constellations like Orion, Leo, or Ursa Major. Turn spotting meteors or planets into a friendly competition.
Tell Stories and Myths: Share legends about the constellations or let kids create their own stories about celestial objects.
DIY Projects:
Create glow-in-the-dark constellation maps or simple star wheels.
Make “Moon Rocks” or “Galaxy Cupcakes” for themed stargazing snacks.
Capture the Memories:
Keep a stargazing journal with drawings and notes.
Take photos of celestial events with a smartphone or camera.
Respect Nature: Encourage kids to protect the environment by using eco-friendly tools and learning about light pollution.
Conclusion
May 2025 is a month of celestial wonders, filled with opportunities to connect with the universe and create unforgettable memories. From dazzling meteor showers to rare planetary alignments, the night sky invites you to explore its mysteries. With the right tools, timing, and family-friendly tips, you can turn every stargazing session into an adventure.
So grab your binoculars, download a star-map app, and head outside—because the cosmos is waiting to be discovered!
Model railroading is more than creating tracks and running trains—it’s about building a miniature world that sparks imagination and invites viewers to explore its stories. One of the simplest and most effective ways to enhance your layout’s realism and give it a greater sense of depth is by using flats on the backdrop. Flats are a clever solution for adding layers, scenery, and visual interest to your layout, all while saving space and keeping things budget-friendly. Whether you’re a beginner dipping your feet into this rewarding hobby or a seasoned model railroader looking to elevate your setup, this guide will walk you through everything you need to know about flats—from what they are to how to prepare, install, and customize them.
What Are Flats in Model Railroads?
Backdrop flats, commonly referred to as “flats,” are shallow or two-dimensional models of buildings, scenery, or other features designed to sit against the backdrop of a layout. Instead of being fully three-dimensional, flats are either partially 3D or completely flat, creating the illusion of depth without occupying much space.
Flats work by tricking the eye through “forced perspective.” They blend the foreground (where 3D elements like tracks and buildings sit) with the background (the painted or printed scenery behind your layout). A row of flats depicting distant buildings, for instance, can make an urban layout feel like a sprawling city, even if the actual layout table is small.
Types of Flats
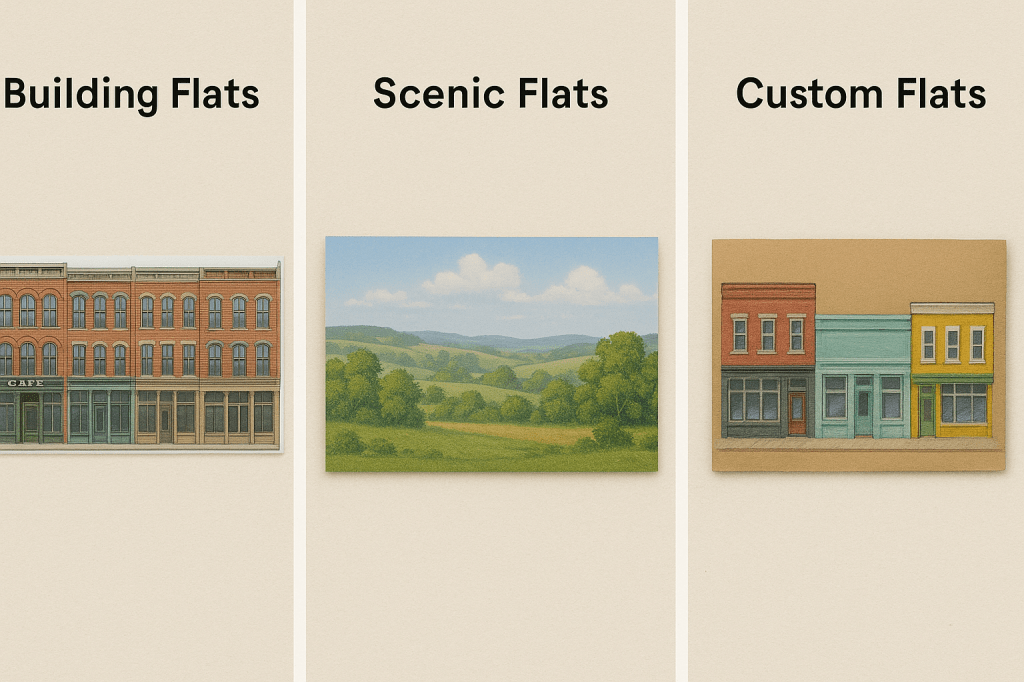
Building Flats These replicate structures such as factories, warehouses, houses, or skyscrapers. They’re ideal for creating cityscapes or industrial areas.
Scenic Flats These feature natural elements like hills, trees, or mountains, offering a perfect solution for rural or wilderness scenes.
Custom Flats Want something unique? Custom flats let you design elements to match your exact layout theme, whether it’s a vintage small town, futuristic city, or fantasy world.
Why Flats Are Important
Flats bridge the gap between your foreground and backdrop, creating a smooth transition that immerses viewers in the world you’re building. They’re also a space-saving marvel, allowing you to add complexity and character to layouts of any size.
Why Use Flats?
Flats aren’t just practical; they’re a game-changer for any model train enthusiast. Here’s why you should consider incorporating them into your layout:
1. Save Space
Layouts often have limited real estate, and flats allow you to pack in detail and depth without taking up valuable space. Instead of building a large factory, a flat on the backdrop can represent a distant industrial zone, leaving room for tracks, trains, and other scenery closer to the viewer.
2. Enhance Realism
Flats create the illusion of a larger world by layering scenery. By playing with scale and perspective, flats can make your layout feel expansive and immersive. For example, a backdrop featuring hills painted with scenic flats can suggest miles of open countryside stretching beyond the layout.
3. Budget-Friendly
Full-scale buildings and scenery can be expensive, but flats are often more affordable. Pre-made kits, printable flats, or DIY options can save you money while allowing for incredible creativity.
4. Expand Storytelling Opportunities
Every model railroad tells a story, and flats add rich context to your scene. A row of building flats on a cityscape could suggest bustling neighborhoods or industrial hubs, while scenic flats showing barns or forests evoke quiet rural charm.
5. Perfect for Beginners
Flats are easy to use and beginner-friendly. With pre-made options and print-and-mount designs widely available, you can quickly add depth to your layout without advanced modeling skills or tools.
Choosing Flats for Your Layout
Selecting the right flats depends on your layout’s theme, scale, and overall vision. Follow these tips to choose flats that will elevate your scene.
1. Match Flats to Your Theme
Urban Layouts: Use building flats like skyscrapers, shops, or factories.
Rural Layouts: Scenic flats featuring barns, trees, rolling hills, or mountain ranges work well.
Custom Layouts: Design flats that fit your unique theme, such as historic towns, futuristic cities, or fantasy villages.
2. Pay Attention to Scale
Flats must match the scale of your layout to maintain realism. For example:
HO Scale (1:87): The most common scale with plenty of pre-made options.
N Scale (1:160): Great for compact layouts. Flats should have fine details.
O Scale (1:48): Larger layouts need bigger flats with intricate textures to maintain proportionality.
3. Flat Materials
Pre-Made Kits: Plastic, resin, or cardstock kits from trusted brands like Walthers, Woodland Scenics, or Faller.
DIY Options: Create flats using foam board, cardboard, or printed images. More on DIY later!
Preparing and Installing Flats
1. Preparing the Backdrop
Proper preparation and installation ensure your flats look polished and cohesive.
Painted Backdrops: Create a gradient from light blue (sky) to white (horizon). Add clouds or distant hills for realism.
Printed Backdrops: Use photo-realistic backdrops featuring skies or landscapes from brands like Scenic Express or TrainJunkies.
2. Installing Flats
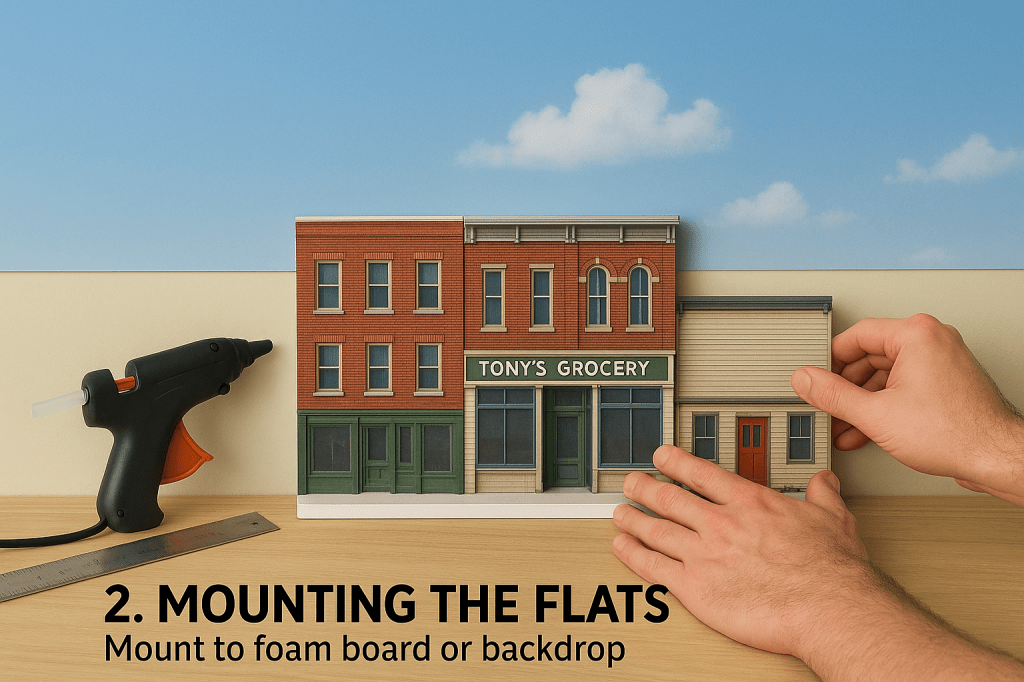
Use double-sided tape or spray adhesive for lightweight flats.
Heavier flats can be attached with Velcro for removability or mounted on a wooden frame for support.
Align flats with the backdrop’s horizon line to ensure a smooth transition between flat and background.
3. Blend Flats with the Foreground
Add bushes, fences, or roads at the base of the flats to hide edges and create a natural transition.
For scenic flats, use foam flocking or static grass to blend seamlessly.
Enhancing Flats for Realism
Simple flats can become stunning with the right enhancements:
Add Details:
Apply decals for windows, signs, or advertisements.
Weather them with chalk pastels or dry brushing to simulate age and wear.
Lighting:
Add LEDs behind building windows for a glowing effect.
Use strip lights or spotlights to cast shadows and create depth.
Play with Perspective:
Position taller, more detailed flats closer to the foreground and smaller, muted flats further back to mimic distance.
DIY Flats: Save Money and Add Personality
Creating your own flats is affordable, fun, and lets you add unique touches to your layout.
Steps for DIY Flats:
Print Templates: Use printable flats from sites like Railserve or Pinterest. Print on cardstock and mount on foam board for durability.
Hand-Paint Designs: Sketch buildings or landscapes on foam board and paint them with acrylics.
Layer for Depth: Add raised windows, doors, or signage for a 3D effect.
DIY flats let you recreate landmarks, add personal flair, and experiment with themes in a cost-effective way.
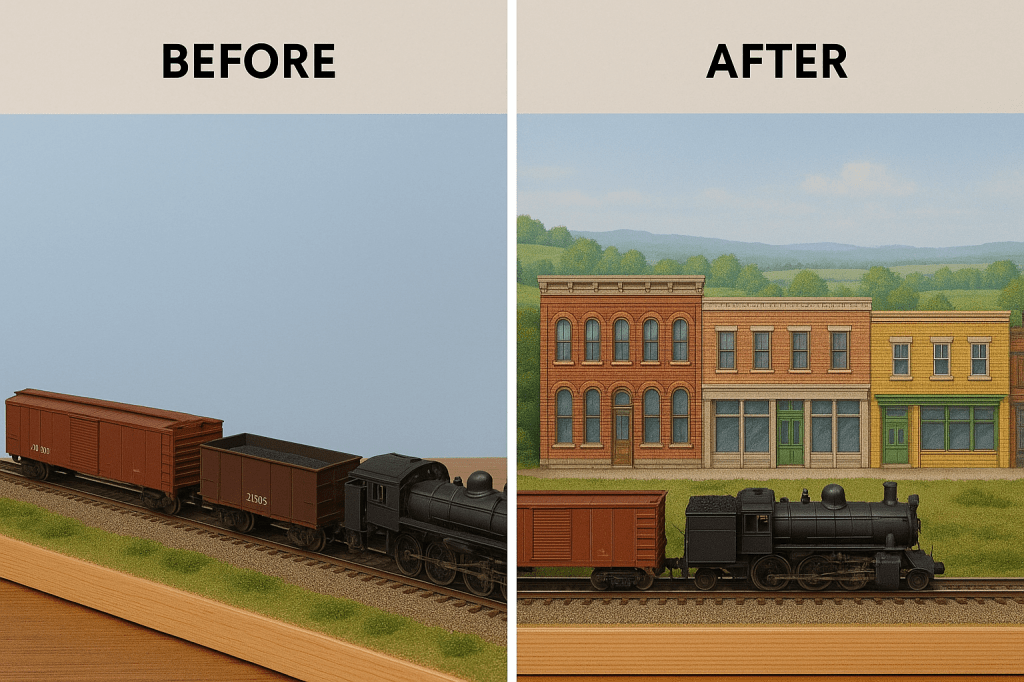
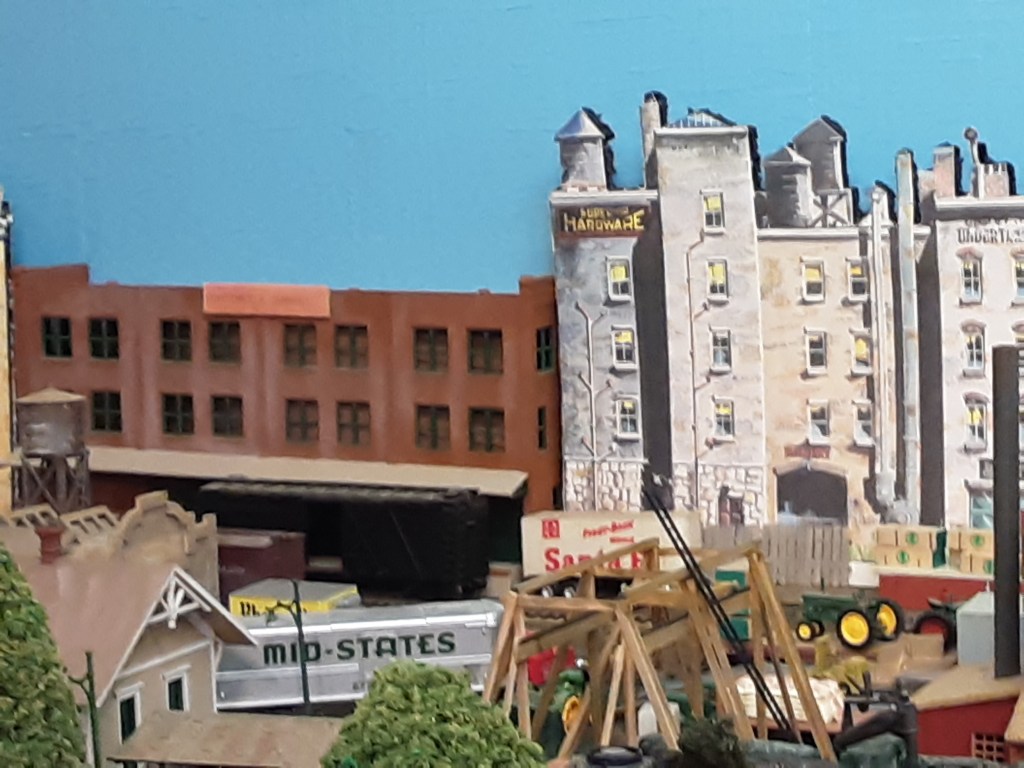
Photos from my layout showing the use of flats all of which are described above.
The photos above show how I use flats to enhance the depth of the layout. In the photo above I inserted a photo from google city scenes to add depth to the street continueing on.
Common Mistakes and How to Avoid Them
Misalignment: Ensure flats align with the backdrop’s horizon. Use a ruler to check placement.
Overcrowding: Space flats appropriately to avoid a cluttered look.
Ignoring Scale: Match flats to the scale of your layout to maintain realism.
Poor Blending: Use foliage or scenery to integrate flats with 3D elements.
Conclusion
Using flats is a transformative technique for model railroading, adding depth, realism, and personality to your layout without taking up extra space. From pre-made kits to DIY creations, flats bring your miniature world to life and immerse viewers in the story you’re telling. Whether you’re a beginner or an experienced model railroader, mastering the art of flats will elevate your layout to new heights. So, grab some flats, experiment with their placement, and watch your layout expand before your eyes!
Model railroading is an exciting and rewarding hobby, and the accessories you choose can make all the difference in bringing your layout to life. As technology advances, new tools and features emerge every year, enhancing both realism and functionality. In 2025, several innovative accessories have become must-haves for hobbyists looking to elevate their layouts. This family-friendly article explores the top five model train accessories for 2025, perfect for beginners and families alike.
1. Digital Command Control (DCC) Systems
What It Is:
Digital Command Control (DCC) systems allow you to operate multiple trains independently on the same track. In 2025, DCC systems have become more user-friendly, with wireless connectivity and app-based controls.
Why It’s a Must-Have:
Ease of Use: Modern DCC systems feature intuitive interfaces that make it easy for beginners to learn.
Enhanced Control: You can control speed, direction, lighting, and sound effects for each train individually.
Family Fun: App-based controls allow multiple users to operate trains simultaneously, making it a great activity for families.
Tips for Beginners:
Start with entry-level DCC systems like the NCE Power Cab or Digitrax Zephyr Express.
Use online tutorials and videos to learn how to program locomotives.
2. LED Lighting Kits
What It Is:
LED lighting kits are used to illuminate buildings, streetlights, and train interiors on your layout. In 2025, smart LED kits with programmable features have become increasingly popular.
Why It’s a Must-Have:
Realism: Lighting adds depth and atmosphere to your layout, especially during nighttime scenes.
Energy Efficiency: LEDs consume less power and last longer than traditional bulbs.
Customizable: Programmable kits allow you to adjust brightness and color for different scenes.
Tips for Beginners:
Use warm white LEDs for indoor lighting and cool white LEDs for outdoor areas.
Experiment with dimming effects to create realistic shadows.
3. Sound Modules
What It Is:
Sound modules provide realistic audio effects like train whistles, engine noises, station announcements, and ambient sounds. In 2025, sound modules have become more compact and versatile.
Why It’s a Must-Have:
Immersion: Sound effects bring your layout to life by adding an auditory dimension.
Customizable: Many sound modules allow you to upload custom audio files.
Family-Friendly: Kids love hearing realistic train sounds as they operate the layout.
Tips for Beginners:
Start with pre-programmed sound modules like those from SoundTraxx or MRC.
Place speakers strategically around your layout for even sound distribution.
4. Static Grass Applicators
What It Is:
Static grass applicators are tools used to create realistic grassy textures on your layout. In 2025, rechargeable applicators with adjustable voltage settings are trending.
Why It’s a Must-Have:
Realism: Static grass stands upright when applied correctly, mimicking real grass.
Versatility: Applicators can be used for fields, lawns, or overgrown areas.
Easy to Use: Modern applicators are lightweight and beginner-friendly.
Tips for Beginners:
Practice on a small area before applying static grass to larger sections of your layout.
Mix different shades of grass fibers for a more natural look.
5. Modular Scenery Kits
What It Is:
Modular scenery kits include pre-made components like hills, tunnels, rivers, and bridges that can be easily assembled and customized. These kits have become more detailed and lightweight in 2025.
Why It’s a Must-Have:
Time-Saving: Modular kits simplify the process of building complex terrain features.
Customizable: You can paint and add details to match your layout’s theme.
Family-Friendly: Assembly is straightforward and fun for all ages.
Tips for Beginners:
Choose kits that match the scale of your layout (e.g., HO or N scale).
Combine modular components with natural materials like rocks or twigs for added realism.
How These Accessories Enhance Your Layout
These top accessories not only improve the visual appeal of your model railroad but also make it more interactive and engaging. Here’s how they contribute:
Realism: DCC systems and sound modules create lifelike operations that mimic real-world railroads. LED lighting adds atmosphere while static grass enhances scenery detail.
Functionality: Modular kits save time while allowing you to focus on creative aspects of your layout.
Family Fun: All five accessories offer opportunities for collaboration—whether it’s programming trains or assembling scenery components together as a family.
Beginner Tips for Accessory Integration
If you’re new to model railroading, here are some tips to help you incorporate these accessories into your layout:
Start Small: Focus on one accessory at a time to avoid feeling overwhelmed.
Learn as You Go: Watch tutorials online or join local model railroading clubs for guidance.
Experiment: Don’t be afraid to try different techniques or configurations until you find what works best.
Involve the Family: Assign tasks like painting scenery or programming trains to make it a shared activity.
Final Thoughts
The world of model railroading continues to evolve with new technologies and innovations each year. In 2025, accessories like DCC systems, LED lighting kits, sound modules, static grass applicators, and modular scenery kits are helping hobbyists create layouts that are more realistic and engaging than ever before.
For beginners, these tools provide an excellent starting point while offering plenty of room for creativity and customization. Whether you’re building a bustling cityscape or a quiet countryside scene, these accessories will help bring your miniature world to life—and create wonderful memories along the way!
So gather your family, pick up these must-have items, and start crafting a model railroad layout that’s truly breathtaking!
References
Kalmbach Media (2025). Model Railroader Magazine. Various issues featuring reviews of model train accessories.[^1] Website: https://www.trains.com/mrr
Luke Towan (2025). YouTube Channel. Tutorials on integrating advanced techniques into model railroads.[^2] Link: https://www.youtube.com/@LukeTowan
[^1]: Kalmbach Media provides insights into modern tools like DCC systems that enhance model railroading layouts. [^2]: Luke Towan’s tutorials offer step-by-step guidance on using accessories like LED lighting kits effectively.
Model railroading is a rewarding hobby that allows you to create a miniature world filled with intricate details and personal touches. Over the years, advancements in technology have made it easier than ever to add unique and realistic elements to your layout. One of the most exciting innovations in recent years is 3D printing. With 3D printed details, you can customize your model railroad like never before, creating everything from tiny accessories to entire structures.
If you’re new to the world of 3D printing or wondering how to incorporate these details into your layout, this family-friendly guide will walk you through everything you need to know.
Why Use 3D Printed Details?
3D printing has revolutionized the model railroading hobby for several reasons:
Customization: You can create one-of-a-kind pieces that perfectly match your vision for your layout.
Affordability: Once you have access to a 3D printer or online printing service, producing small details is often more cost-effective than buying pre-made items.
Precision: 3D printers can produce highly detailed models that bring a level of realism difficult to achieve with traditional methods.
Accessibility: Many online platforms offer free or affordable 3D models designed specifically for model railroads.
Getting Started with 3D Printing for Model Railroads
Step 1: Accessing a 3D Printer
If you don’t own a 3D printer, don’t worry! You have several options:
Purchase a Printer: Entry-level resin printers like the Elegoo Mars or Anycubic Photon are affordable and perfect for small, detailed prints.
Use Online Services: Websites like Shapeways or Treatstock allow you to upload designs and order prints without owning a printer.
Local Makerspaces: Many libraries and community centers have 3D printers available for public use.
Step 2: Finding Models
There are countless ready-to-print models available online:
Free Resources: Websites like Thingiverse and Printables offer free downloadable files for model railroad accessories.
Paid Models: Platforms like MyMiniFactory or Cults3D provide high-quality designs for a small fee.
Custom Designs: If you have specific needs, consider designing your own models using software like Tinkercad (beginner-friendly) or Fusion 360 (advanced).
Step 3: Choosing Materials
For model railroading, two types of materials are commonly used:
PLA (Polylactic Acid): Affordable and easy to work with, PLA is great for larger pieces like buildings or terrain features.
Resin: Resin printers produce finer details, making them ideal for small accessories like figures or tools.
Incorporating 3D Printed Details into Your Layout
Now that you have access to 3D printed models, let’s explore how to use them effectively on your layout.
1. Buildings and Structures
One of the most popular uses of 3D printing in model railroading is creating custom buildings and structures. Whether it’s a train station, factory, or farmhouse, 3D printing allows you to design structures that fit perfectly into your layout.
Tips:
Print buildings in sections (walls, roofs) to make painting easier.
Add texture by using sandpaper or applying weathering techniques after painting.
Use LED lighting inside buildings for added realism.
2. Accessories and Props
Small details make a big difference when it comes to bringing your layout to life. With 3D printing, you can add accessories like:
Benches, streetlights, and mailboxes for urban scenes.
Barrels, crates, and tools for industrial areas.
Picnic tables, fences, and birdhouses for rural settings.
Tips:
Paint accessories in realistic colors using acrylic paints.
Group props together logically (e.g., crates near loading docks) to create believable scenes.
3. Vehicles
From cars and trucks to horse-drawn wagons, vehicles add movement and storytelling elements to your layout. Many hobbyists use 3D printing to create vehicles that match specific eras or themes.
Tips:
Add weathering effects like rust or dirt for used vehicles.
Use clear resin or transparent plastic sheets for windows.
4. Figures
Figures bring life and activity to any model railroad layout. With a resin printer, you can create highly detailed figures in various poses:
Workers loading cargo at an industrial site.
Families enjoying a picnic in the park.
Passengers waiting at the train station.
Tips:
Paint figures with fine brushes for precise details.
Place figures in contextually appropriate locations (e.g., workers near factories).
5. Terrain Features
Enhance your layout’s landscape with custom terrain features such as:
Rocks and cliffs
Bridges and tunnels
Water features like fountains or docks
Tips:
Combine printed terrain features with natural materials (e.g., real rocks) for added realism.
Use textured paints or flocking materials on terrain pieces.
6. Signage and Lettering
Custom signs are an easy way to add personality and storytelling elements to your layout. With a 3D printer, you can create:
Business signs for shops and factories
Street signs for urban areas
Custom lettering on buildings or vehicles
Tips:
Use contrasting paint colors to make lettering stand out.
Add weathering effects like chipped paint or grime.
Painting and Finishing Your Prints
To make your printed details look realistic, proper painting and finishing are essential:
Clean Your Prints: Remove any support material left over from printing and lightly sand rough edges.
Prime Before Painting: Apply a primer designed for plastic surfaces to help paint adhere evenly.
Use Acrylic Paints: Acrylic paints are easy to work with and come in a wide range of colors.
Add Weathering Effects: Use washes, dry brushing, or powders to simulate dirt, rust, or wear.
Seal Your Work: Apply a matte or gloss sealant to protect your painted pieces.
Family-Friendly Fun with 3D Printing
One of the best things about using 3D printed details is that it’s a fun activity the whole family can enjoy! Here’s how everyone can get involved:
Kids can help paint small accessories like benches or barrels.
Teens can learn basic design skills using beginner-friendly software like Tinkercad.
Adults can handle more complex tasks like assembling buildings or operating the printer.
Working together not only makes the process faster but also creates lasting memories as you build something special as a family.
Final Thoughts
Incorporating 3D printed details into your model railroad layout is an exciting way to add customization and realism while keeping costs manageable. Whether you’re creating unique buildings, adding lifelike figures, or enhancing terrain features, the possibilities are endless with this innovative technology.
For beginners, start small—experiment with simple accessories before moving on to larger projects like custom structures. With time and practice, you’ll be amazed at what you can achieve!
So fire up that printer (or order from an online service), gather some paints and brushes, and start bringing your miniature world to life—one detail at a time!
References
Kalmbach Media (2025). Model Railroader Magazine. Various issues featuring tips on using technology in model railroading.[^1] Website: https://www.trains.com/mrr
[^1]: Kalmbach Media provides insights into modern tools like 3D printing that enhance model railroading layouts. [^2]: Luke Towan’s tutorials offer step-by-step guidance on painting and finishing techniques specific to 3D printed scenery elements.
The universe is a vast and fascinating place filled with mysteries that have captivated humans for centuries. From enigmatic black holes to the possibility of alien life, space holds secrets that challenge our understanding of science and inspire curiosity in people of all ages. In this family-friendly article, we’ll explore some of the most intriguing space mysteries, explain them in simple terms, and discuss what scientists are doing to uncover their secrets.
1. What Are Black Holes?
Black holes are among the most mysterious objects in the universe. They form when massive stars collapse under their own gravity, creating a region where gravity is so strong that nothing—not even light—can escape.
Scientists have discovered different types of black holes:
Stellar black holes form from dying stars.
Supermassive black holes sit at the centers of galaxies, including our Milky Way.
Intermediate black holes are a rare type that falls between the other two categories.
One of the biggest mysteries about black holes is what happens inside them. The center of a black hole, called the singularity, is a point where gravity becomes infinite and space-time breaks down. Scientists use mathematical models to study these regions, but no one knows for sure what lies beyond the event horizon—the boundary around a black hole where escape becomes impossible[^1].
2. Are We Alone in the Universe?
The question of whether life exists beyond Earth is one of humanity’s greatest mysteries. Scientists search for alien life by studying planets outside our solar system, known as exoplanets.
To find habitable worlds, researchers look for planets in the “Goldilocks zone”—a region around a star where conditions are just right for liquid water to exist. NASA’s Kepler Space Telescope and its successor, the James Webb Space Telescope, have identified thousands of exoplanets[^2].
One intriguing candidate is Proxima Centauri b, an Earth-sized planet orbiting our closest neighboring star. While scientists haven’t found direct evidence of alien life yet, they continue to study atmospheres and chemical compositions to look for signs like oxygen or methane that might indicate biological activity[^3].
3. The Mystery of Dark Matter
When astronomers observe galaxies, they notice something strange: The stars within them move as if there’s far more mass than we can see. This invisible material is called dark matter, and it makes up about 27% of the universe[^4].
Dark matter doesn’t emit light or energy, which means scientists can’t see it directly. Instead, they detect its presence through its gravitational effects on visible objects like stars and galaxies.
Despite decades of research, scientists still don’t know what dark matter is made of. Some theories suggest it could be composed of exotic particles that interact weakly with ordinary matter[^5]. Experiments like CERN’s Large Hadron Collider aim to uncover its secrets by studying particle collisions at high energies.
4. What Are Fast Radio Bursts?
Fast Radio Bursts (FRBs) are mysterious flashes of radio waves coming from deep space. These bursts last only milliseconds but release as much energy as the Sun does in an entire day[^6].
FRBs were first discovered in 2007, and since then, astronomers have detected hundreds more using radio telescopes like Canada’s CHIME Observatory. Some FRBs seem to repeat from the same location, while others occur only once[^7].
What causes FRBs? Scientists think they might be produced by neutron stars (the dense remnants of supernova explosions), but other theories suggest exotic phenomena like magnetars or even advanced alien civilizations[^8].
5. The Enigma of Time Travel
Time travel has fascinated humans for centuries and often appears in science fiction stories. But is it possible according to science?
Einstein’s theory of relativity suggests that time isn’t fixed—it can stretch or compress depending on how fast you’re moving or how close you are to a massive object like a black hole[^9]. This means traveling into the future is theoretically possible if you move at near-light speeds or experience intense gravitational fields.
However, traveling into the past presents paradoxes (like changing events before they happen) that make it much harder to explain scientifically. While time travel remains a mystery, it continues to inspire both scientists and storytellers alike!
6. Why Do Galaxies Collide?
Galaxies are enormous collections of stars, gas, and dust held together by gravity—but they don’t stay still! Over billions of years, galaxies can collide and merge into larger structures[^10].
One famous example is the Andromeda Galaxy, which is on a collision course with our Milky Way Galaxy. In about 4 billion years, these two galaxies will merge into one giant galaxy called “Milkomeda”[^11].
Galactic collisions might seem chaotic, but they rarely result in star collisions because stars are so far apart relative to their sizes. Instead, these events create new star-forming regions and reshape galaxies’ appearances over time[^12].
7. The Mystery of Cosmic Inflation
The Big Bang theory explains how the universe began about 13.8 billion years ago—but scientists believe something extraordinary happened just moments after: cosmic inflation. During this period, the universe expanded faster than the speed of light[^13].
Why did inflation occur? Scientists don’t fully understand what caused this rapid expansion or why it stopped after such a short time (less than a trillionth of a second). Studying cosmic microwave background radiation—the faint glow left over from the Big Bang—helps researchers learn more about inflation’s effects on today’s universe[^14].
Fun Activities for Families
Want to explore space mysteries at home? Here are some engaging activities:
Black Hole Simulation: Use marbles and bowls to simulate how objects fall into a black hole’s gravity well!
Alien Planet Design: Create your own exoplanet with features like oceans or diamond rain (inspired by real discoveries).
Dark Matter Hunt: Use flashlights and shadows to explain how invisible forces affect visible objects!
Time Travel Debate: Discuss whether you’d rather visit the future or change history—and why!
Conclusion
Space mysteries remind us how vast and complex our universe truly is—and how much more we have yet to discover! Whether it’s black holes swallowing light or galaxies colliding over billions of years, each mystery challenges us to think bigger and ask deeper questions about existence itself.
As scientists continue exploring these phenomena with cutting-edge technology like telescopes and particle accelerators, we gain new insights into our cosmic origins—and perhaps even clues about our future among the stars! So grab your telescope or stargazing app tonight—you never know what wonders await just beyond Earth’s atmosphere!