Pictures In The Sky

One of the earliest activities we engaged in when we first got into astronomy is the same one we like to show our children just as soon as their excitement about the night sky begins to surface. That is the fun of finding constellations. But finding constellations and using them to navigate the sky is a discipline that goes back virtually to the dawn of man. In fact, we have cave pictures to show that the more primitive of human societies could “see pictures” in the sky and ascribe to their importance.

Constellations also have been important in culture and navigation long before we had sophisticated systems of navigation. Early explorers, particularly by sea, relied exclusively on the night sky to help them find their way to their destination. In fact, when “Columbus sailed the ocean blue in 1492″ and “discovered” America, he could not have done it without astronomy and the help of navigation of the cosmos, much of which is made possible because of the important constellations.

When learning to find the great constellations in the sky, we use the “find one, you found them all” system. That is because the easiest constellation to find will guide us to the rest of them. That constellation is The Big Dipper. Look to the northern sky on a clear night and widen your field of vision from just focusing on one star and it will pretty much jump out at you. In will look like a big kitchen pot or ladle, right side up in the fall, upside down in the spring.

When you have the big dipper under control, you can pretty easily find the North Star. This is the star that those ancient sailors depended on the most to find their way to land. Start with the far edge of the bowl of the Big Dipper, the side that is opposite the handle. There are two stars that make up that side of the bowl. So start at the bottom of the pot and mentally draw a line to the top star of the bowl. These two stars are “pointing” to the North Star. Just keep following that line, curving a bit with the sky and the bright star that you come to is the North Star. You can impress your friends or family if you know the scientific name for this star is Polaris.

The North Star can then take you to The Little Dipper. The key here is that Polaris is the tip of the handle of The Little Dipper and the bowl hangs down from the handle like it was hanging up in the kitchen. Be patient with this one as the stars that make up The Little Dipper are dimmer than The Big Dipper. But it pretty cool once you find it.

These are the obvious starting places but from The Little Dipper you can find the constellation known as “The Swan” or Cygnus. Just use the same system you used to find The North Star but continue drawing that line that started in those pointer stars in the bowl of The Big Dipper. Go about half as far as you went to find Polaris and you are there. You will see a trapezoid of stars about as big as The Big Dipper. This trapezoid forms the tail of The Swan.

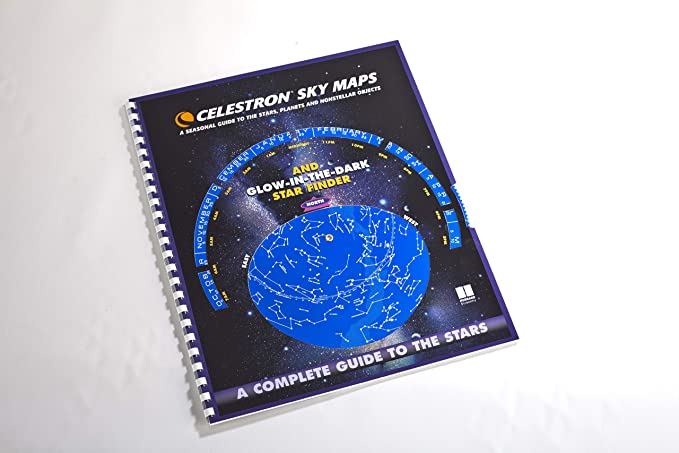
That line that we are drawing from the pointer stars is our roadmap to another well known constellation which is Cassiopeia. If you use that line and imagine you are directly under the two pointer stars, you will se a big “W” just off to the left of the line. This is the constellation Cassiopeia, the wife of the king of Egypt, Cepheus, in Greek mythology. There are so many more wonderful constellations to find and a good star map can continue your search.

Like Cassiopeia, all of the constellations have wonderful stories and myths related to Greek culture. It is just as fun to find the star clusters themselves as it is to enjoy the rich culture related to that constellation. For all of the signs of the zodiac, for example, there is a related constellation in the sky. So whether you are serious about astrology or not, its fun to find the constellation that relates to your “sign” (or that of your children) and be able to see how the ancients related to these pictures in the sky.

Scenery – Six steps

Part 1

Many people’s first introduction to model railroading is with a simple circle or oval on a sheet of plywood. No scenery, no landscaping and maybe not even any buildings or vehicles

It doesn’t take long, however, to get the urge to start adding accessories to the railroad to make it more realistic. For many people, this become a lifelong endeavor, and can grow to very large proportions

There are many options for landscaping a railroad. You can add things like grass, trees, lakes or rivers alongside the track. Or you can get a little more in depth and add hills and valleys for your train to travel through, and tunnels through the mountains.

There are many methods and articles for scenery. I have read many articles, attended a few seminars (classes) and and discussed these methods at our club meetings. We have come up with our own methods for scenery. The six steps that work best for us. These steps are not hard and fast rules, merely a suggestion that will help you get to the point where you are not looking at a train running on plywood.

Step 1 The base, for this example, will be a 4 x 8 sheet of Fiberboard. A reasonable starting point. The track plan can be what ever you wish, an oval or something a little different from the internet or magazine. Our emphasis here will be scenery.

If you drive through the neighborhood or around town the main point you will see is that it is not level. Some grade changes are everywhere. (Work in small areas in the beginning, this will help you get experience and the learning process will be easier.) The first thing to do is plan what you you would like to have and where you want it. Then map a small area and begin. This is very easily done by clumping newspaper in piles and draping paper towels dipped in a plaster of paris mix and draping the wet towels over the clumped newspaper. A second method would be to use extruded Styrofoam stacked and carved to form the hills, then use the plaster cloth to form the terrain use Woodland Scenics Plaster Cloth. It’s not very messy. Using the plaster cloth can be used for small grades or larger hills. As the plaster is drying you can smooth the hill by using wet fingers and rubbing lightly for the smooth surface. You will find if you experiment you can have the terrain you desire.

The picture to the above shows two levels, the engine sits about 1.5 inch above the lower level. The blue Styrofoam hides the elevation. As you can see it does not need to be neatly cut. Rolled up newspaper also works well. Its only function is to support the plaster cloth. The styrofoam was glued in place with Elmers white glue

Plaster cloth can be cut to fit any size and location.

Here you see a cut piece of plaster cloth in place. I place the cut plaster cloth in a plastic dish to soak for several minutes then put it in place.

Here another sheet of plaster cloth has been put in place to complete the coverage of the Styrofoam. Use as many sheets as necessary to cover the area.

I like to place two layers of plaster cloth for strength. Then using wet fingers smooth the plaster as you can see in the picture the holes have disappeared by smoothing the plaster adding to the strength. The Styrofoam allows for smooth surface and smooth finish.

Rolled up newspaper will allow for a more hilly finish as the plaster cloth will follow the contours easily.

Here another sheet of plaster cloth has been put in place to complete the coverage of the Styrofoam. Use as many sheets as necessary to cover the area.

Once you are satisfied with the area you are working, paint with an earth color spray or brush whichever you desire. I find spray cans are faster and easier.

If you are working in an area where track has been placed you will want to mask the track as I did.

For this example I used a black spray paint to lightly cover the area.

At this point I walk away to let the paint and plaster dry. Doesn’t take very long.

Step 2 is spreading earth or sifted dirt onto to the wet paint. If you have let the paint dry fear not, you can use a spray on glue. 3M and Elmer’s both make a great product, I have used both. Spray the area with the glue and use a tea strainer to cover the area with earth, gently tap the strainer as you cover the area. You can use the Fine Turf or sifted dirt. The dirt can come from your back yard. Let it dry then put it through a tea strainer. let it sit for a day or two then use it on your scene. If it gets a little thick in areas don’t be concerned, you can smooth it out with a small brush or let it go. At this point you can spray the area with an inexpensive hair spray. That will hold everything in place.

At this point the two levels are connected by a rolling hill, covered in dirt.

In the next installment we will add grass, weeds bushes and shrubs to make the area appear to be ready for trees, people and vehicles. Bringing the railroad to life.

Continue to Part 2.

WINE MAKING WITH CONCENTRATES

By Adventures in Homebrewing

If you are just starting out, wine concentrates offer an easy way for you to get rolling. They come with simple, easy-to-follow directions that eliminate all of the guess-work for even the first-time winemaker. In most cases, the wine making concentrates also come with all of the additional home wine making ingredients that are called for, pre-measured and ready for use. By offering concentrated juices in this way all of the variables have been eliminated, so you have to work hard to make a mistake.

In short, wine making concentrates provide you with an easy, consistent way to make impressive grape wines with remarkable flavor, body and character. And what’s more, you can create these bottles of wine for a fraction of what they would cost you at the store, as little as $4.00 a bottle. Tremendous wines that are worthy of recognition by friends and family.

So, go right ahead and dive into the interesting and rewarding hobby of home wine making. By doing so you will be joining the thousands of happy people who make and enjoy their own wines everyday with pride.

WHAT KIND OF WINES CAN I MAKE?

With wine concentrates there is a larger variety available to you than if you were to try to purchase or grow your own grapes. Currently, we offer over 200 different wine making juices from all over the world: France, Germany, Spain, Italy, Australia, Chile, Argentina, Canada and California. From Cabernet to Chianti it’s all there for your choosing. It’s an incredible selection that allows one to make a medley of wines that never gets tiring.

And unlike growing your own grapes, these wine concentrates are available all throughout the year. So you can make your wine whether it be April or August. These concentrates will consistently make wines that are comparable to any $10 to $15 bottle of wine you buy at the store, and in the case of our higher-end juices such as Cellar Craft Showcase Collection, they will make wines that equal the $15 to $50 range.

HOW DO YOU USE WINE MAKING CONCENTRATES?

Getting started with a batch of wine from concentrate is very quick and easy. It is simply a matter of pouring the wine concentrate into your wine making fermentation vessel, adding water and then adding the wine yeast and any other home wine making ingredients that are called for by the accompanying directions. After that it’s only matter of siphoning the wine off of the sediment from time to time as directed (“racking”) and adding any additional ingredients that may be called for along the way. The whole process usually takes anywhere from 30 to 45 days, from beginning to bottling, depending on the brand of wine concentrate you purchased. Your primary role in the whole process is to simply watch and wait.

WHAT COMES WITH THE CONCENTRATE?

Of the 14 different brands of wine making concentrate we offer, 11 of them come with all the ingredients you will need. All you need to do is add water. With the other 3 brands, these juices will have directions that call for wine making ingredients that you will need to buy separately.

INGREDIENT KITS:

These brands are considered “ingredient kits” because of their inclusion of everything you will need to make 6 gallons (30 bottles) of wine. They come with: the wine yeast, the nutrients, the clarifiers and such, all pre-measured in little packets. The sugars and fruit acids are already incorporated into the concentrate and have been balanced for superior flavor and character. Depending on the type of wine you are making, you may also receive flavor enhancement items such as oak powder to give a barrel-aged effect, dried elderflowers to develop the wines bouquet and dried elderberries to add body and depth to the wine. Very clear and complete directions are included, making these ingredient kits a powerfully, simple way to make incredible wines starting with your very first batch.

OTHER CONCENTRATES:

The other three brands do not come with any ingredients. They are simply the concentrated juice. These brands are as follows: SunCal Vineyards,  Alexander Sun Country and County Fair Premium Fruit Bases.  All three of these brands come with directions that explain what other ingredients you will need. You can also find this information on our web site within the description of each concentrate. The items that are called for are basically the following: Yeast Nutrient,  Acid Blend,  Wine Tannin,  Wine Yeast, and sometimes Pectic Enzyme or Bentonite. These concentrates will also need sugar added to them as well.

WHAT EQUIPMENT WILL I NEED?

One of the things that makes wine making so attractive is that you don’t have to spend a lot of money to get started, and if you already are buying wine at the store it can actually save you money. But there are some fundamental pieces of home wine making equipment you will need before making your first batch.

Obviously you will need a fermentation container for fermenting the juice. You will also need to be able to fit the container with an air-lock. This is to allow gases to escape without letting stuff back into the wine during fermentation. And, you will need some hose for siphoning your wine off of the sediment. All very simple items.

Beyond this you will also want to get a wine hydrometer. The hydrometer will allow you to determine the alcohol level of your wine, and it will help you to track the progress of your wine’s fermentation. An invaluable tool!

You may also want a second fermentation container to make it easier when you are transferring the wine off the sediment. Otherwise, you can temporarily move the wine into a couple of large cooking pots, just long enough to rinse out the fermentation container and then transfer the wine back to it.

There may be other items that may pique your interest like stirring paddles, testing jars and bottle brushes, but this is the basics of what you will need to get started.

ADDITIONAL WINE MAKING INFO

Here are a few articles on our website that may be of interest to you. They are more specific articles about making wine. https://www.homebrewing.org/Wine-Making-Articles_ep_123-1.html?AffId=785

Fermentation 101  

Corking Your Wine Bottles  

Wine Bottle Storage And Temperature

LEARN MORE ABOUT:

Making Wine From Grapes

Making Wine From Fruits  

Making Wine From Kits

Be sure to check out our selection of wine making equipment and wine making supplies available online.

TELESCOPES

Reflecting Telescope Information

When viewing distant objects through the use of a telescope, the most important part of that telescope is called the objective. The objective is that component of the telescope that has the ability of gathering the light that is available. Obviously, the larger the objective the greater is the capacity of the telescope to gather light which in turn allows the viewed image to be better visualized.

In addition, there are two types of telescopes. One type of telescope is called the refractor telescope and the other is known as the reflecting telescope. The difference between these two telescopes is how the light is captured.

Celestron – 70mm Travel Scope – Portable Refractor Telescope – Fully-Coated Glass Optics – Ideal Telescope for Beginners – BONUS Astronomy Software Package
Celestron – PowerSeeker 127EQ Telescope – Manual German Equatorial Telescope for Beginners – Compact and Portable – Bonus Astronomy Software Package – 127mm Aperture

Refracting and Reflecting Telescope

The refracting telescope obtains the light through its objective that is made out of glass. Basically, in this type of telescope, the glass lens is situated towards the front of the telescope. As the light is captured by the objective, it is then refracted or deflected through a lens which allows for the viewed image to be magnified. Examples of this type of telescopic equipment include scopes that are used on rifles, binoculars and spyglasses.

A reflecting telescope uses a mirror as its objective. This mirror is located towards the distal end of the telescope. In addition, the mirror has a concave shape. The curvature of the mirror allows for the midpoint of the mirror to be the focal point for all of the light that strikes each part of the surface of the bowl-like mirror. This reflection is then captured by the lens to view the item of interest.

Advantages Of The Reflecting Telescope

There are several advantages to the use of a reflecting telescope. The major advantage is that distortion of what is being viewed is minimal. This is because, through the use of the mirror, the wavelengths are all reflected consistently. This advantage also leads to the reflecting telescope being less expensive than the refracting telescope.

In addition, through the use of the mirror as the objective, the support for this mirror can be all along the posterior portion of the telescope. This allows for the housing to be very large which will accommodate a larger mirror. Larger mirrors mean more light which results in increased visibility.

Disadvantages

However, as with anything else, there are a few disadvantages in the use of a reflecting telescope. One of those disadvantages is size. This is due to the fact that these types of telescopes can accommodate larger mirrors. This results in the telescope itself being larger which may prove to be an issue when storing or relocating the reflecting telescope.

In addition, because of the use of mirrors, there may need to be occasional adjustments made so that optimum light alignment is maintained.

The World Of Refractor Telescopes

Refractor telescopes are some of the oldest telescopes available, utilized at around the beginning of the 15th century and still around today the refractor telescope is quite possibly one of the oldest telescopes in use today. Made up of concave lenses that allow the light to be refracted and images to appear bright and larger than looking at it with the normal eye the refractor telescope can greatly aid in seeing stars, planets and moons.

These telescopes are made up of convex lenses and an eyepiece lens similar to binoculars, these refractors gather light and bend it in order to view objects at a distance, which is particularly useful when looking at stars and the night sky Refractor telescopes may seem complicated and are made up of lenses that are concave and refract the light.

The telescope come in a variety of versions; the Galilean telescope which is named after its creator was one of the first versions and was improved upon by Johannes Kepler with the Keplerian Telescope, which is a refractor telescope that utilized a convex eyepiece as opposed to a concave of the Galilean model. The decades and centuries since have observed newer inventions and different lenses, with the achromatic refractors invented in the mid 16th century and later with apochromatic refractors.

Pros and Cons of Refractor Telescopes

Telescope for Kids & Adults – 70mm Aperture 500mm AZ Mount Fully Multi-Coated Optics Astronomical refracting Portable Telescopes, with Tripod Phone Adapter, Carrying Bag, Remote Control

I stated previously that refractor telescopes have been around a long time and with that comes a definite plus since there is a definitive ability to know what the pros and cons of the telescope. These telescopes have obviously come a long was since the 15th century yet the technology has increased to a point in which the refractors have improved yet the size of refractor telescopes pose a problem in the fact that the larger the refractor lens the more chance that it can have defects or begin to sag.

While technology continues to grow and there is no telling where refractor lenses in telescopes will go to in the future one thing for sure is that refractor telescopes have been around for centuries and thus show no decline in their use by many of astronomers. So no matter what telescope you choose to utilize to view the universe or neighborhood, you can not dismiss the value of the refractor telescope and the impact that its utilization has had on astronomy and the search of the skies.

An Introduction To Black And White Photography

You know, there is something that is definitely more artistic about black and white photography. I know I am getting a little away from the overall concept of digital photography. But as a photographer, you will no doubt run into the phenomenon that is black and white photography.

I can remember vividly a photography named Michael Zagaris who is the team photographer of the San Francisco 49ers. He said that he was just captivated by the use of black and white photography. The way the light and the shading are so much more evident. This helps contribute to the overall feeling and emotion of the moment that the black and white photo captures.

Some of you may be saying to yourselves that color photography has surely taken the place of black and white photography, and I would say that for the most part you are correct. An interesting note here is that black and white photography still holds a degree of nostalgia in most photographers, amateur and professional alike.Perhaps one reason for this nostalgia is of course that photography was first taken on black and white film. Not only that, but many photography students are tasked with taking black and white photos when they are in their first photography classes. I know in my first digital photography class I was astounded at the very idea. Only later when the photos were developed did I truly start to appreciate black and white photos.

Therefore if you are an amateur or even experienced photographer, I would encourage you to give black and white photography a try. I think you will be pleasantly surprised at the level of sophistication it takes to really pull off a great black and white photo. After that you may be able to take in some advanced photos such as adding one stream of color. You may have seen these kinds of photos before when the photographer allows one color to be very evident in a black and white photo. For instance I can remember a picture of a little girl in a black and white photo, but the coat she was wearing was bright pink. It was great moment to capture.

As for taking the black and white photos themselves, more advanced digital cameras have gray-scale mechanisms that allow to this. Also you can have the color picture converted by using a digital photography software such as “Photoshop.” Give yourself a chance in black and white photography. I think you will be pleasantly surprised in the results.

My personal favorite is Ansel Adams. Be sure to check out his work and photos taken in the National Parks.

Beermaking Basics

Consider all of the styles and brands of beer on the market today. Now, add in all of the different beers from international brewers. The selection available can be mind-boggling; but what’s even more surprising is that all that beer is made from similar brewing systems. It’s a system that you can learn and perfect to become your own brew master.

The brewing process is fairly simple, but creating the perfect pint does take a little practice. Here are the beermaking basics:

1. Make a Clean Start: Wash, rinse and sanitize each and every piece of your fermenting and brewing equipment before you begin. Bacteria can easily spoil your home brew, and make you very ill.

2. Measure Carefully. Choose your recipe and follow the measurements exactly.

3. Mix It In: After the boil has stabilized, you’ll need to add hops, malt, moss and other flavours or additions that your recipe calls for. Be sure that you have enough of the right ingredients before you start brewing. Most recipes call for boiling water as the first step, followed by the additions of some ingredients. Using the right ingredients in the correct amounts, and adding them in the right order, will make all the difference to your final product.

Keep It Cool: Once your mixture has been prepared, you’ll need to let it fully cool. Once it has cooled, you’ll add yeast and any remaining ingredients. The mixture will be poured into a fermenting bucket, where it will stay for a period of time. Different types of beer require various fermenting times, so be sure to follow your recipe carefully.

Bottle It Up: When the fermenting process is complete, pour you home brew into clean and sterilized bottles, and cap them securely.

You now have tasty home brew to enjoy anytime you want.

After you’ve learned the beermaking basics, you’ll find it’s an easy process that you can master in your home. Once you’ve perfected your talents and your recipe, you may never go back to commercial brews again.

More Articles on How to Brew Beer at Adventures in Homebrewing.

Our Neighbors In Space

We have a special feeling toward the other planets that circle our sun. Maybe it’s all the science fiction stories about visiting the moon, Mars and other planets. But we love to think about those planets that make up what we call “the solar system.” that do what our planet does but do it very differently indeed.

The planets of our solar system have taken on personalities and mythical appeal in our literature and arts. It is easy to find artists who render their vision of the planets that make up our society of planets near our sun. The names of the planets, Mercury, Venus, Earth, Mars, Jupiter, Saturn, Uranus, and Neptune are all from our cultural past being gods from Greek and Roman mythology. But the solar system is not just made up of these planets. The solar system is a very busy place indeed.

In 2006, there was quite a bit of controversy as scholars and astronomers agreed to downgrade Pluto and remove its status as a planet. So you have to wonder, what is it that makes something a planet and what happened to Pluto? It didn’t just go away so it must still be out there. A planet, by scientific definition is any object in orbit around a sun, that has formed into some kind of round object is a planet as long as it has cleared away any other orbiting items around it. By cleared away, that doesn’t mean it has destroyed all space debris etc. For example, our planet has not “cleared away” the moon but it has captured it into its own orbit so we classify as a planet. That’s a relief huh?

There are many objects floating around in our solar system other than the planets we know of. It’s an interesting piece of trivia that in addition to the planets there are 165 moons orbiting around those nine planets. Some of those moons are so advanced that some scientists have suspected that they might have supported life at some point.

In addition to the regular planets and moons, there are dwarf planets, asteroid belts and routine visits by comets that create a lot of traffic in our cosmic corner of the universe. The two known dwarf planets that exist on the outer rim of our solar system are Eries and Ceres. So when Pluto’s status was changed to be removed from the list of planets, it simply joined those two bodies as dwarf planets but still a solid citizen of the community of celestial bodies around our sun.

In addition to these larger bodies, there is an asteroid belt that exists between Mars and Jupiter that most of the asteroids that we see in our night sky come from. There is another belt of large objects further out called the Kuiper belt as well as a “bubble” in space called a heliopause and there is a suspected additional belt outside the known solar system called the Oort belt that we think is the origin of a lot of large asteroids and comets that frequent our solar system and come to orbit our sun.

As fascinating as these many celestial bodies who are our neighbors in space is the origin of our solar system. We have to break it down to simple terms to understand the terms but we know that the early history of the solar system and the universe was one of great bodies of gas and clouds of matter eventually cooling and heating, exploding and spinning off stars and other massive space giants that became more stars, galaxies and solar systems. It was from this erratic activity that our sun separated from the gasses and carried with it the material that became our solar system. The gravity of the sun captured sufficient matter that it began to go through the process of forming, cooling, exploding and separating. This is what happened as the planets all went through he same process eventually establishing stable orbits and small objects falling into orbit around them.

When you think of how powerful and out of control this process is, it’s amazing to step back and see the beauty of the organization of our solar system today. The more detail you learn about the history of our solar system, the more you will enjoy your explorations of the planets with your telescope. That that discovery is part of the fun of astronomy.

Scenery – Six steps

Part 2

There are many methods and articles for scenery. I have read many articles, attended a few seminars (classes) and and discussed these methods at our club meetings. We have come up with our own methods for scenery. The six steps that work best for us. These steps are not hard and fast rules, merely a suggestion that will help you get to the point where you are not looking at a train running on plywood.

In part 1 I demonstrated how I use the plaster cloth over the styrofoam or the crumpled paper to create a contour on the land. Then I used the fine turf after lightly painting the surface to simulate the earth. At this point I am ready to start with the addition of the grass. Return to read Part 1.

Since the area has been idle for several days to allow it to dry I sprayed spray adhesive on the area to be covered with grass.

Step 3 is fine green Grass, Woodland Scenics and Scenic Express make several shades of green and burnt grass. Again sprinkle lightly covering all or most of the area. Again if this appears too thick is some area you can work a brush to lightly smooth or let it go.

.

In the photo above you will see more grass on the top and bottom (flat surfaces). Grass isn’t very thick on the slope we’ll fix this shortly. The white areas will be covered with ballast as will the cork roadbed. I’ll cover track and ballast in a later post. I have used several methods and I will demonstrate what I do. I believe in easy.

Step 4 is coarse foam. Again this product is available from both companies. Sprinkle SPARRINGLY. LIGHTLY.

At this point I want to introduce wet water. I prefer water with several drops of dish soap (Dawn or something similar). This is applied with an eye dropper or a spray bottle. This is applied to the area prior to applying a 50/50 mix of water and white glue (Elmers). The wet water helps the glue saturate the the material and hold it to the painted base. You can see this work by first placing a drop of the 50/50 mix on you grass, it will sit there. Put a drop of wet water on the glue and it will penetrate the material.

Cover the area you just completed with wet water followed by the 50/50 glue mix and let it dry.

Step 5 Clump foliage. This clump foliage can be placed or not, it resembled small shrubs. If you do use it, place a small circle of white glue where it will be placed and place the clump there. The glue should be about the same size as the clump and dries clear. Again this step is a personal touch, use it or not.

Above you will see a scene I have on my layout where all the products I have mentioned in part 1 & 2 have been used. In addition to the use of small rocks/pebbles the various trees will be discussed in part three.

Step 6 Trees to be covered in a future article (Part 3 )

Till the next post on trees.

.

Fifteen Tips For Better Photography

Keep an eye on the weather
Weather conditions can play a big part in setting the mood of your shot. Rather than waiting for the bright light of the midday sun, a misty morning in a forest can be the perfect time of day for that mood-shot.

Take your time to choose the subject
Take your time to choose the subject, then spend time walking around the subject looking for the best angle and lighting.

Take your time to set up the shot
Don’t be afraid to take your time to set up your shot. Although it can get a bit frustrating if you have your loved ones tagging along and they’re sitting and waiting impatiently for 20 minutes for you to take a single shot of a piece of driftwood on the beach!

Don’t always choose brightly-colored subjects
Subjects with muted colors can sometimes produce excellent results. A field of wheat of similar yellow-brown colour can produce striking results when accompanied by a low-sun and long shadows.

Movement diffusion
If you have a camera that allows you to shoot with a manual shutter speed – try slowing the speed and increasing the F-stop. Then move your camera when taking the shot. Some very effective arty-type images can be produced with blur effects.

Movement diffusion
If you have a camera that allows you to shoot with a manual shutter speed – try slowing the speed and increasing the F-stop. Then move your camera when taking the shot. Some very effective arty-type images can be produced with blur effects.

Don’t always choose brightly-colored subjects
Subjects with muted colors can sometimes produce excellent results. A field of wheat of similar yellow-brown color can produce striking results when accompanied by a low-sun and long shadows.

Movement diffusion
If you have a camera that allows you to shoot with a manual shutter speed – try slowing the speed and increasing the F-stop. Then move your camera when taking the shot. Some very effective arty-type images can be produced with blur effects.

Movement diffusion
If you have a camera that allows you to shoot with a manual shutter speed – try slowing the speed and increasing the F-stop. Then move your camera when taking the shot. Some very effective arty-type images can be produced with blur effects.

Overexpose your subject
Not too good to do all the time, but experiment with results by over-exposing the subject.

Try macro photography
Grab a magnifying glass and see if you can focus your camera through the glass onto a small subject. It just may work! And may open up a whole new range of subjects for you!

Shoot through wet glass
Try spraying water onto a window, then take a shot through the window to a subject outside. (wet the outside of the window – not the inside of your home!)

Color balance
Try balancing color by having subject and the surrounding detail in similar colors.

Silhouettes
Silhouettes usually have a small range of colors, but can produce some of the most beautiful images. Shooting a silhouette involves having the background brighter then the subject in the foreground.

Experiment with patterns
We’ve all seen those amazing images of the red and orange leaves of maple trees in the fall/autumn. Thousands of leaves – all of a similar shape and color – but very awe-inspiring and beautiful.

Compliment colors
Two strikingly-different colors can be beautiful too. Picture an image of your girlfriend or wife in a red dress sitting on a field of green grass. Or your boyfriend or husband in a red shirt walking through a field of waist-high wheat stalks. Complimentary colors that will bring more attention to the subject.

Use a color filter
If your camera can be fitted with colored filters – try your hand. Although this effect can be made quite easily these days with photo and image-editing software.

Sunrise is better than sunset
Wake up before sunrise one day and go on a photography expedition. If you’ve not done it before you’ll be pleasantly-surprised by the contrasting light and shadows. But remember you’ll only have a very short window of time in which to shoot (usually less than an hour) before the sun rises too high and you lose the light.

Use a flash in daylight
Use your flash during the daytime to fill a close subject with light. This will produce better results where the background is brighter than your subject and the automatic shutter speed on your camera shoots too fast to effectively show the detail of your subject.

A Train Set For Christmas

I received my first model train set when I was just 11 years old. It came at Christmas and was set up around the tree like a silver train track wreath. There were two engines (although if I remember correctly one was just for show), five boxcars, two flatbeds and a caboose. The engines were old black CN locomotives with that bold red CN logo on the sides, while the boxcars were nondescript brown and black. The Caboose, now that was a deep rich red, as they should, be and was my favorite car of them all. To me, that Christmas will always be remembered for that red caboose.

Of course you’d think that at that moment I began to love trains and became a model train enthusiast. Well not exactly. I played with that oval track and those model trains for a good while, but as all thing in childhood, I moved on to, to me, bigger and better thing: my new bike, the pogo stick, girls, and of course cars.

It wasn’t until I had my own kids that the memories of that HO train set came flooding back to me. How I would sit there and watch it go round that oval click track! How my father seemed to always be there, sitting and watching my fun! How I felt as I pretended to be the engineer lugging a load to the next town on the route! I even imagined how my father must have felt as he picked out what he hoped was the perfect model train set to go around the tree that year.

It was these memories that prompted me to get my own kids their first HO model train kit for Christmas this year. To see their faces light up as they see that train going round the tree will be priceless and to watch them pretend to be engineers is going to lighten my heart.

Of course, this is the moment that made me a true model train enthusiast. So as I buy my children their first model train set, I will be looking for my second. The basement corner is looking to me more and more like that train yard near my old home out west. I really cant wait to get to work on my new HO model train layout and conscript the boys into helping. Maybe they will become model train enthusiasts like me. I certainly hope so.

If you are reading this article and thinking that you and your children might want a model train set for Christmas, then I recommend you follow my lead. The HO model trains are the most popular scale with model railroad enthusiasts. This 1:87 scale allows you to fit a good sized track into an average size space. There is also lots of accessories and scenery available for this model. If you have limited space you may want to consider an N scale layout. This 1:160 scale is small enough that you put a fairly complex layout in a small space. Of course your focus will be more on the layout and not the locomotive and cars themselves. However if you have lots of space, you may want to use the larger O scale. At a 1:48 scale your focus will definitely be on the engine and rolling stock and not the layout. However you really need a large space for these train sets. Whatever you decide, I hope you and your family soon discover the joys of model railroading!