The Ultimate Guide to Model Train Scales: Finding the Right Fit for Your Family Layout

Stepping into the world of model railroading is an exciting journey full of creativity, engineering, and family fun. However, when you first walk into a hobby shop or browse online stores, one of the first terms you’ll encounter is “scale.”

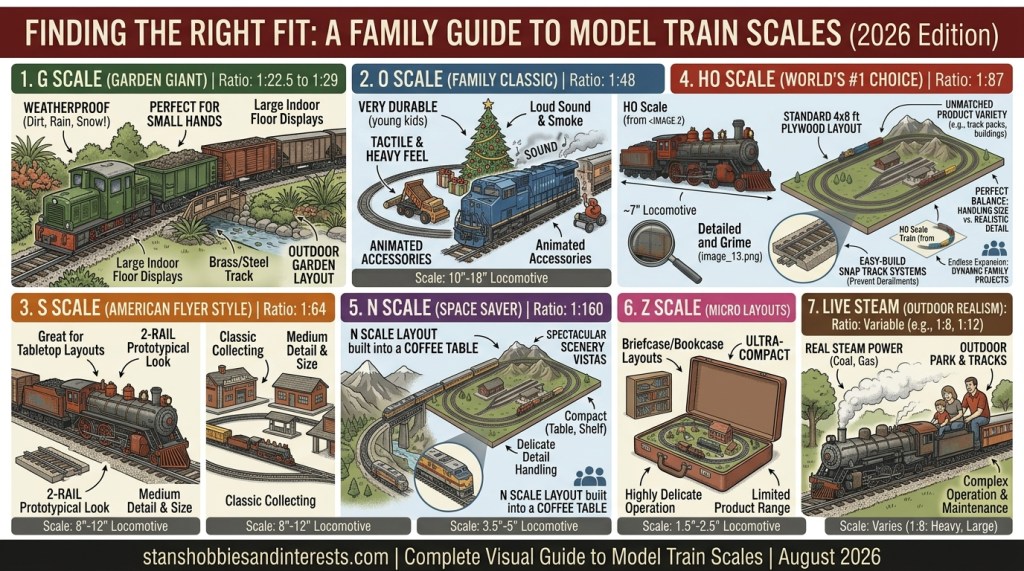
Simply put, scale refers to the proportion of a model train relative to its real-world prototype (often called “prototype scale” or 1:1). Choosing the right scale is the single most important decision you will make when starting out, as it dictates how much space you need, how easy the trains are to handle, and what products are available.

Whether you have a spare bedroom, a small shelf, or a sprawling basement, this comprehensive 2026 beginner’s guide breaks down the world’s most popular model train scales—their sizes, pros, cons, and space requirements—so you can pick the perfect scale for your home!

Model Train Scales at a Glance

Scale NameRatio / ProportionTypical Size (Locomotive Length)Best Space RequirementIdeal Operator Age
G Scale1:22.5 to 1:2918 – 24+ inchesLarge basements or outdoor gardensAll ages (Great for small hands)
O Scale1:4810 – 16 inchesLiving room floor / Large spare roomAges 5 to adults
S Scale1:648 – 12 inchesMedium spare roomGeneral hobbyists
HO Scale1:87 (World’s #1)6 – 10 inches4×8 ft table / Small roomAges 8 to adults
N Scale1:1603.5 – 5 inchesCoffee table / Compact shelf / DeskAges 10 to adults
Z Scale1:2201.5 – 2.5 inchesBriefcase / Bookcase shelfOlder teens and adults

1. HO Scale (1:87 Ratio) — The World’s Most Popular Choice

HO Scale stands for “Half O” because it is roughly half the size of traditional O scale trains. Representing a 1:87 ratio, HO scale is the undisputed heavyweight champion of the model railroading world, making up over 60% of the entire hobby market.
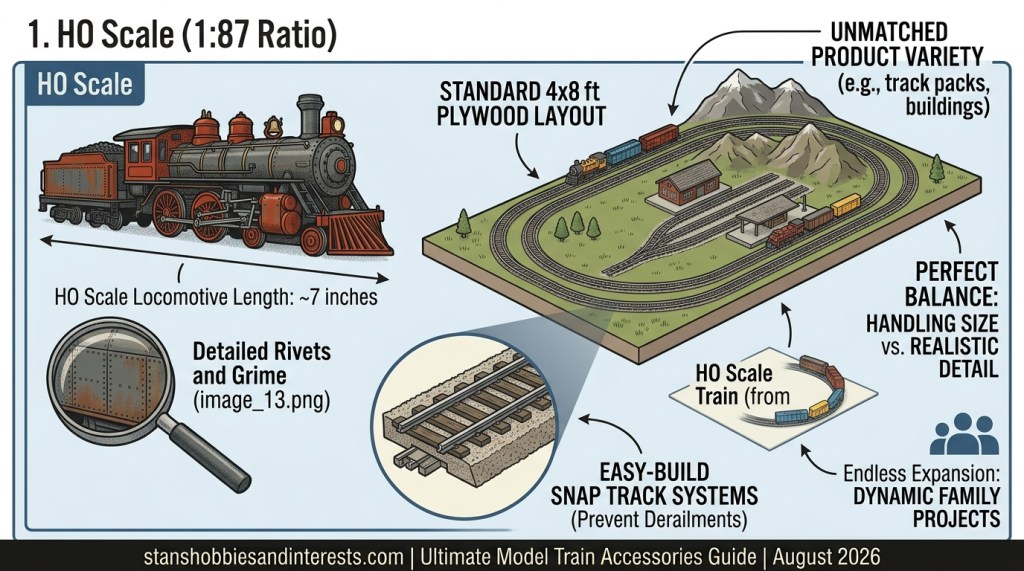
   
  • Size: A standard diesel or steam locomotive is roughly 6 to 9 inches long.
  • Space Needed: A standard 4×8 foot sheet of plywood provides ample space for a complete oval layout with sidings, freight yards, and detailed scenery.
  • Product Availability: Unmatched. Virtually every railroad line, building kit, freight car, track variation, and digital sound accessory ever created is available in HO scale.
  • Pros:
    • Perfect balance of handling size and detail.
    • Huge selection of budget-friendly starter sets and advanced digital equipment.
    • Easy to assemble track systems with built-in roadbeds (like Bachmann E-Z Track or Kato Unitrack).
  • Cons:
    • Requires a dedicated table or board space (harder to fit on narrow bookshelves).
  • Best For: Families with children ages 8 and up who want a balance between high detail, affordable starter options, and endless expansion potential.

2. N Scale (1:160 Ratio) — The Compact Space Saver
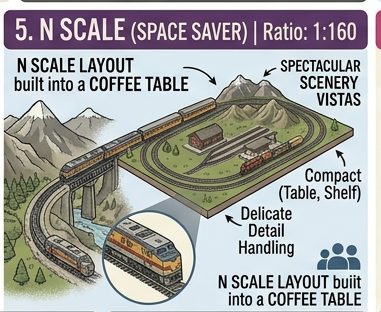
At nearly half the size of HO scale, N Scale (1:160 proportion) allows modelers to build sweeping landscapes and long, realistic trains in very tight spaces.

  • Size: A locomotive is roughly 3.5 to 4.5 inches long—about the size of a finger.
  • Space Needed: A complete layout with loop tracks, switching yards, and mountains can fit on a 2×4 foot hollow-core door, a coffee table, or a narrow wall shelf.
  • Product Availability: Very strong and growing rapidly. Modern manufacturing allows N scale locomotives to feature incredible detail and working digital sound decoders.
  • Pros:
    • You can run long freight trains without taking over a room.
    • Excellent for urban apartments or homes with limited extra space.
    • Scenery dominates the layout, creating breathtaking mountain and landscape vistas.
  • Cons:
    • Tiny wheels and delicate detail parts require patient handling and good eyesight.
    • Re-railing cars on track can be challenging for young children.
  • Best For: Older kids (10+), teens, and adults who love scenery or have limited indoor space.

3. O Scale / O-Gauge (1:48 Ratio) — The Heavyweight Family Classic
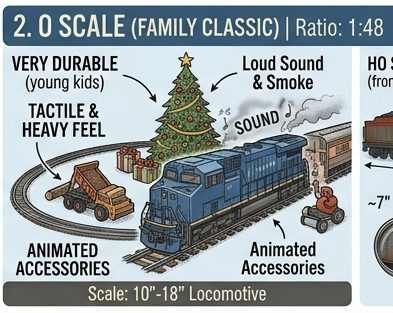
When people think of classic Christmas train sets around the holiday tree, they are usually thinking of O Scale (1:48 proportion), popularized by brands like Lionel. O scale trains are large, heavy, and extremely tactile.

  • Size: Locomotives range from 10 to 18 inches long and feel substantial in hand.
  • Space Needed: Requires significant room. A basic track circle usually needs at least a 4×4 foot footprint, while a multi-train layout often requires a large basement or full spare room.
  • Product Availability: Excellent, especially for ready-to-run sets, animated accessories (like operating log loaders and flashing crossing gates), and classic American railroad names.
  • Pros:
    • Nearly indestructible; perfect for younger children to handle without breaking fine parts.
    • Great built-in action features, smoke generators, and loud, realistic sound systems.
    • Easy to place on tracks without frustration.
  • Cons:
    • Trains and tracks are significantly more expensive than HO or N scale.
    • Track takes up a large footprint on floors or tables.
  • Best For: Families with young children (ages 5–8), holiday floor displays, and lovers of classic 20th-century toy trains.

4. G Scale (1:22.5 to 1:29 Ratio) — The Garden & Living Room Giant
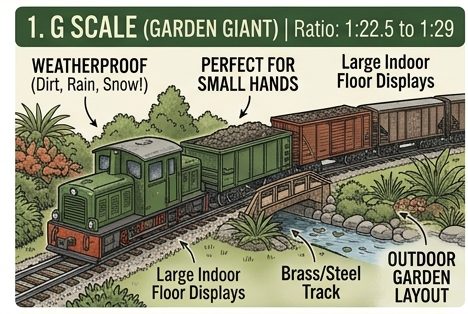
G Scale (short for “Garden Scale”) is the giant of the model train world. Built from weather-resistant plastics and heavy brass or stainless steel rails, these trains are designed to operate both indoors and outdoors in real gardens!

  • Size: Locomotives are 18 to 24+ inches long and weigh several pounds.
  • Space Needed: Ideal for outdoor backyards, large patios, or surrounding the floor of a spacious living room.
  • Product Availability: Good, with major brands like LGB, Bachmann, and USA Trains specializing in rugged garden locomotives, outdoor track, and durable rolling stock.
  • Pros:
    • Weatherproof: Can run through outdoor garden beds, dirt, rain, and snow!
    • Extremely durable and easy for toddlers and grandparents alike to operate.
    • Makes an incredible visual centerpiece for landscaping or holiday displays.
  • Cons:
    • Requires a large financial investment per locomotive and track section.
    • Bulky to store indoors when not in use.
  • Best For: Outdoor landscaping enthusiasts, backyard hobbyists, and family floor displays.

5. Z Scale (1:220) & S Scale (1:64) — Niche & Specialty Sizes
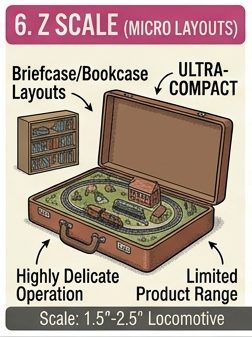
  • Z Scale (1:220): One of the smallest micro-scales in existence. Locomotives are barely 2 inches long! You can build a complete operating Z scale railroad inside a briefcase or a picture frame. However, parts are delicate and selection is limited compared to HO or N.
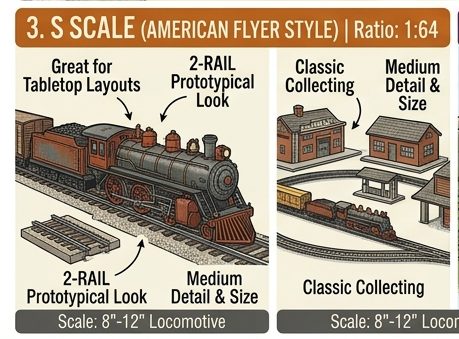
  • S Scale (1:64): Famous for American Flyer trains, S scale sits directly between O and HO scale. It offers a great tactile feel with classic 2-rail track, though product variety is smaller and mostly catered to specialized collectors.
How to Choose the Right Scale: A Quick Decision Checklist

To narrow down your choice, answer these three quick questions:

  1. How much space do you have available?
    • Shelf or small corner: N Scale
    • 4×8 Foot Table or Spare Room: HO Scale
    • Large Floor / Basement: O Scale
    • Backyard / Garden: G Scale
  2. Who will be operating the trains?
    • Young children (Ages 3–7): O Scale or G Scale (durable and easy to place on rails).
    • School-age kids & Parents (Ages 8+): HO Scale (the ultimate family compromise).
    • Teens & Detail Builders: HO Scale or N Scale.
  3. What is your budget and product goal?
    • If you want the widest variety of track, building kits, cars, and budget options, stick with HO Scale.

Final Thoughts: Finding Your Family’s Perfect Scale

There is no single “best” scale in model railroading—only the scale that best fits your family’s space, budget, and imagination. Whether you choose the compact efficiency of N scale, the unmatched variety of HO scale, or the grand presence of O gauge, building a model railroad creates a hands-on learning environment and lasting memories for years to come.

Until then, happy modeling, and keep those trains rolling!

A Beginner’s Guide to Seeing Planets in Your Backyard Telescope!

There is an unforgettable magic the first time you steer a telescope across the dark void and watch a distant world swim into focus. You are no longer looking at a glossy photograph or a high-tech simulation; you are looking at live, raw photons that bounced off another planet millions of miles away and traveled through deep space to reach your eye.

For families and newcomers, jumping into planetary observing is one of the most rewarding hobbies on Earth. But how do you go from staring at a confusing tube on a tripod to tracking the cloud bands of Jupiter or the icy rings of Saturn?

Whether you are using a modest starter scope or optimizing a classic reflector, this comprehensive guide will give you the essential science, practical tips, and gear know-how to turn your backyard into a front-row seat for the solar system.

The Big Secret: Why Stars Twinkle and Planets Don’t

Before you even touch a focuser, the absolute first step to finding a planet is knowing how to spot one with your naked eye.

Have you ever wondered why stars flicker rapidly while some bright “stars” shine with a smooth, rock-steady light? It comes down to physics and optical distance:

  • Point Sources vs. Disk Sources: Stars are so unfathomably far away that even through the world’s largest telescopes, their light arrives at Earth as a microscopic point. As that tiny needle of light passes through our turbulent atmosphere, atmospheric motion bends it back and forth, making it “twinkle”.
  • Planetary Disks: Planets are much closer to Earth. Through a optic system, they are physical disks. Because the light comes from a wider beam rather than a single point, our atmosphere cannot easily distort the entire beam at once.
  • The Golden Rule: If you see a bright object high in the sky that refuses to twinkle, you are almost certainly looking at a planet!

All planets move along a predictable highway across the night sky known as the ecliptic—the imaginary line representing the flat plane of our solar system. The Sun, Moon, and all major planets travel along this exact path through the constellations of the Zodiac.

What Can You Actually See Through a Backyard Scope?

It is vital to set realistic expectations. Backyard astronomy is not about massive Hubble-style images; it is about delicate, razor-sharp real-time details that reward patient observation.

1. Jupiter: The King of Planets

Jupiter is the undisputed champion for beginner astronomers. Even through a small 60mm telescope, Jupiter reveals its distinct dark reddish-brown Equatorial Belts and bright white zones.

  • The Jovian Dance: With almost any telescope, you will immediately notice up to four bright specks lined up alongside the planet. These are the Galilean Moons—Io, Europa, Ganymede, and Callisto. If you sketch their positions night after night, you can watch them physically orbit Jupiter, just as Galileo did in 1610!
  • Advanced Target: Try tracking the Great Red Spot—a giant storm larger than Earth itself that has raged for centuries. Because Jupiter rotates rapidly (one full day takes under 10 hours!), the Red Spot crosses the front of the disk every night.

2. Saturn: The Jewel of the Solar System

If you want to spark a lifelong love of science in a child, show them Saturn. Even at 30x to 50x magnification, Saturn’s icy ring system snaps into sharp contrast against the deep black of space.

  • What to Look For: On nights with steady atmospheric conditions, look for the subtle gap within the main rings known as the Cassini Division. You will also easily spot Saturn’s giant moon Titan, shimmering nearby like a solitary star.
  • Pro Tip: Earth periodically passes through Saturn’s ring plane, turning the rings edge-on and making them temporarily appear to vanish! Observing how the angle of the rings shifts from year to year is a incredible long-term family project.

3. Venus & Mercury: The Inner Phases

Because Venus and Mercury orbit closer to the Sun than Earth does, we view them from the side. As a result, they display crescent, half, and gibbous phases just like our Moon!

  • Venus: Glowing as the brilliant “Evening Star” or “Morning Star,” Venus is the brightest natural object in the sky after the Moon. While dense sulfuric acid clouds prevent us from seeing surface features, tracking its dramatic changing crescent phases over several months is breathtaking.

4. Mars: The Red Planet

Mars is famously challenging because its distance from Earth changes dramatically. During “opposition” events (when Earth and Mars are closest), a small telescope under high magnification can reveal the stark white polar ice caps and dark surface markings like Syrtis Major.

3 Essential Tips for Crisp Planetary Views

┌─────────────────────────────────────────────────────────────────┐
│ PLANETARY OBSERVING CHECKLIST │
├─────────────────────────────────────────────────────────────────┤
│ [ ] Let your telescope cool down outdoors (30–60 mins) │
│ [ ] Observe from grass instead of warm concrete decks │
│ [ ] Check atmospheric “seeing” (are stars steady overhead?) │
│ [ ] Start with a lower power eyepiece, then boost magnification │
└─────────────────────────────────────────────────────────────────┘

Getting a great view is less about buying the biggest telescope and more about mastering light and atmosphere.

For great information on starter telescopes visit either Amazon or Optics Planet.

1. Let Your Optics Equalize (Thermal Equilibrium)

Glass and metal expand and contract with temperature changes. If you carry a warm telescope straight out of a heated house into the cool night air, internal thermal currents will blur your views like heat waves rising off a summer highway. Set your telescope outside 30 to 60 minutes before observing to let the mirror or lens adjust.

2. Avoid Thermal Plumes (Location Matters)

Never set up your tripod on an asphalt driveway or a wooden deck that has been baking in the summer sun. These surfaces radiate heat upwards all night, creating severe atmospheric distortion. Set up your tripod on grass or bare dirt whenever possible!

3. Do Not Over-Magnify!

The biggest trap for beginners is buying cheap eyepieces that promise “600x Magnification!” On most nights, Earth’s atmospheric turbulence caps usable magnification at around 150x to 200x, regardless of your telescope’s size.

A smaller, sharp, razor-clear planetary image at 100x magnification will always reveal more detail than a large, blurry, washed-out image at 300x!

Gear Up: Essential Accessories for Planetary Astronomy

To get the most out of your backyard sessions, having the right auxiliary gear makes all the difference:

  • Quality Plössl or Planetary Eyepieces: Upgrading from the basic plastic eyepieces bundled with starter telescopes to mid-range dedicated eyepieces dramatically improves contrast and color fidelity. Wide-Field Planetary Eyepieces.
  • Barlow Lenses: A high-quality 2x Barlow lens instantly doubles the magnification of every eyepiece you own without sacrificing eye relief. 2x Achromatic Barlow Lenses.
  • Color Planetary Filters: Threading colored glass filters onto your eyepiece cuts down intense planetary glare and enhances subtle surface features—a #80A Blue filter brings out Jupiter’s cloud belts, while a #23A Light Red filter boosts contrast on Martian ice caps. Planetary Eyepiece Color Filter Sets.
  • Manual Drive Motors & Slow-Motion Knobs: Because Earth rotates, planets will quickly drift out of your field of view at high magnification. Adding a simple clock-drive tracking motor or upgraded slow-motion control cables keeps targets smoothly centered. Telescope Tracking Motors & Mount Upgrades.

Step Outside and Look Up!

You don’t need a degree in astrophysics or an observatory dome on your roof to explore the solar system. Armed with a basic scope, a little thermal preparation, and an eager curious mindset, your family can step out into the yard tonight and witness real cosmic wonders.

Grab your star chart, let your optical tube cool down, and enjoy your journey across the night sky!

To help you get your telescope pointed in the right direction, here is a fantastic video breakdown on aligning finder scopes and star-hopping to solar system targets: How to Use a Beginner Telescope.

This video provides an excellent visual demonstration of setting up a beginner telescope, aligning the finder, and using star charts to locate targets easily.

Clear skies and happy hunting!