Picking Your First Locomotive: A Family Guide to Smarter Model Railroading Expansion


Introduction

Upgrading your starter train set is a major milestone for every new model railroad family. While your original set likely came with a dependable locomotive, expanding your roster brings diversity, improves play, and sets the stage for more realistic operations as your layout and interest grow. But faced with so many brands and models, how do you choose your first new locomotive? This article will empower parents and kids to select a locomotive that looks great, runs reliably, and fits their goals—so everyone enjoys the next stage of the journey.

Understanding Scales and Compatibility

Before selecting, double-check your train’s scale (HO, N, O, etc.) so the new locomotive matches both your track and existing rolling stock. Mixing scales is a frequent rookie mistake—so read the box or manual if you’re unsure.

Choosing Locomotive Types

  • Steam vs. Diesel: Steam engines have classic, old-time charm, perfect for vintage scenes and younger kids who love “Thomas”-like engines. Diesels and electrics are rugged, easy to run, and suit modern layouts.
  • Passenger vs. Freight: Think about what you want to haul most. Passenger locos pair with elegant coaches for family travel scenes. Freight engines are ideal for operational games—delivering cargo across your budding empire.

Key Features to Consider

  • Ease of Maintenance: Choose models with simple, accessible mechanisms so families can keep them clean and running.
  • Durability: Young children may be hands-on. Opt for sturdy mechanisms and robust body shells, especially for entry-level use.
  • Control System Compatibility: If you plan to switch from DC (traditional) to DCC (digital), look for “DCC-ready” locomotives for easy future upgrades.

Top Picks for Starter Family Locomotives

  • Bachmann, Lionel, and Kato are all beginner-friendly brands with strong reputations for reliability and support.
  • Consider local railroad favorites or engines seen in your area for personal connections and history learning.

For a look at various steam and diesel locomotives check here.

Color, Style, and Storytelling

Involve the whole family in picking a color or type. Vote on favorites or research real-life trains that inspire your adventures—this sparks creative energy and deeper play.

Testing, Running, and Learning

Once purchased, test your new loco at different speeds, on curves, over switches, and hauling cars. Practice running two engines if your system allows, encouraging teamwork and gentle competition.

Wrapping Up

With the right locomotive, your family’s model railroad will gain energy, realism, and fun. Remember, upgrading is about play—enjoy the journey, and grow your skills together

The Ultimate Model Railroad Gift Guide: Top Accessories to Wish for Christmas 2025

Here’s a comprehensive, family-friendly article about the newest accessories for model railroading in 2025, with expanded descriptions, organized references, and annotated footnotes for deeper insight. The recommended gifts are divided for beginners and advanced modelers to make holiday shopping easy and rewarding.


The world of model railroading keeps evolving, and 2025 brings exciting new accessories for every level of hobbyist. Whether it’s a first train set under the tree or cutting-edge upgrades for a sprawling rail empire, this year’s releases offer better realism, easier setup, and more immersive experiences. Here’s a look at the hottest accessories—perfect for Christmas surprises—with detailed descriptions, credible references, and clear, organized lists. For more information.


Accessories for Beginners

Designed to spark imagination, streamline layout setup, and encourage family participation, these products are ideal for newcomers and young engineers.

Starter Train Sets

Description:
Starter sets from top brands like Bachmann and Lionel now come in fresh themes—holiday, classic American railroads, and even licensed children’s favorites such as “Thomas Saves Santa’s Sleigh.” These sets offer reliable engines, robust couplers, and snap-together tracks, making them perfect for quick holiday assembly. Most sets include plug-and-play features, sound modules, and detailed rolling stock to keep interest high for new users. More information Click here

Reference:
Model Train Stuff highlights new arrivals and regular updates to starter sets, available in most popular scales (HO, N, O, and more).Information

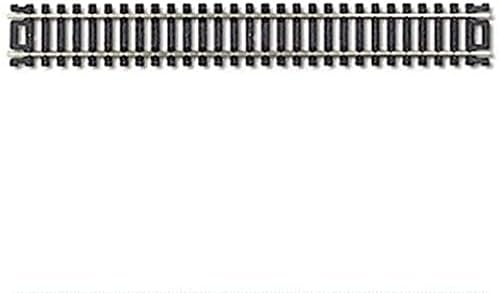
Plug-and-Play Track Systems.

Description:
Track systems like Kato’s Unitrack and Bachmann’s E-Z Track have updated connectors in 2025, offering even sturdier fit and faster setup. These modular tracks reduce errors and help beginners create layouts efficiently, ideal for small spaces or temporary holiday displays. Recent upgrades include more realistic ballast textures and integrated electronic connection ports, making layout expansion easy.More information. Where to Buy
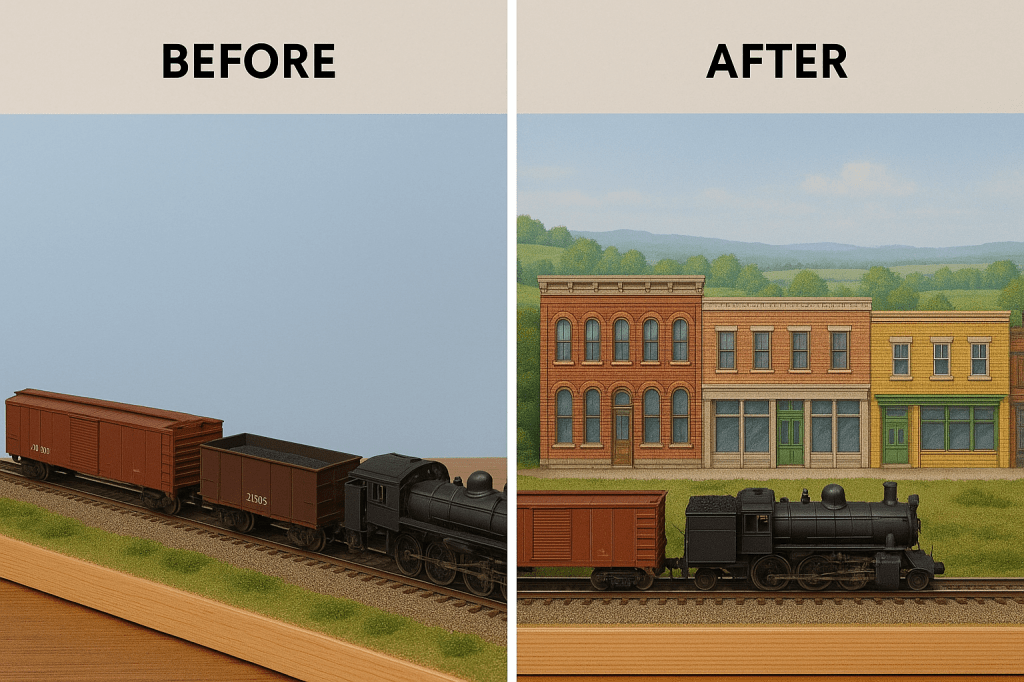
Prelit Buildings

Description:
LED-lit structures by Woodland Scenics and Lionel can plug straight into both DC and DCC power systems. No additional wiring knowledge required—simply place on the layout and connect to your starter set’s power terminal. Buildings now feature animated holiday scenes and synchronized window lighting, making village setups magical.More info. Purchase

Scenic Mini-Packs

Description:
New scenery bundles include flocked snow mats, holiday market figures, mini trees, lamp posts, and even removable candy cane decorations for tracks. These packs allow beginners and families to easily enhance layouts with seasonal charm and character, often without the need for glue or specialty tools.Information. Buy
Reference:
Midwest Model Railroad and Model Train Stuff offer affordable packs and variety for all scales—especially popular for family layouts and first-timers.More info.

Animated Accessories

Description:
Animated crossing gates, passenger platforms with moving figures, and sound-equipped signal towers bring layouts alive without technical hassle. These accessories arrive pre-assembled and feature simple “plug and play” connectors or battery operation, making them ideal for younger hobbyists looking for action and excitement.More listings Buy
Reference:
Micro-Mark and other major accessory retailers showcase these animated features and their easy installation guides.Info

Railroad Signs and Billboards

Description:
Clip-on signs with seasonal messages, directional arrows, or playful graphics are now available in most scales. Reversible designs let hobbyists swap themes for different holidays, adding personalization to any layout.Article Purchase

Reference:
TrainWorld’s latest billboard sets are highly rated for creative family layouts and seasonal displays.More Info


Accessories for Advanced Modelers

For those seeking deeper realism, precision control, and advanced layout management, these new releases deliver professional-grade features and innovation.

Smart DCC Systems

Description:
Digital Command Control (DCC) systems continue to evolve. The newest units for 2025 feature wireless connectivity to dedicated apps, voice-control commands, easy firmware updates, and direct integration with home automation (Alexa/Google Home). Advanced multiplexing allows up to 10 locomotives on a single channel, with individual accessory control and real-time monitoring of track voltage and engine performance.Additional Info. Purchase.
Reference:
Model Train Stuff’s “Just Arrived” and “Preorder” sections highlight the emerging DCC controllers and their technical specs.More Info

Sound Decoders and Upgraded Locos

Description:
LokSound, TCS, and Soundtraxx have released new sound chips and sound-equipped locomotives with refined sampling, customizable sound libraries, and environmental effects (rain, wind, crossing bells). The latest decoders support manual and automatic adjustments for dynamic volume, speaker type, and “sound zone” operation based on engine location on the track.modeltrainstuff+1 Buy dcc equiped locomotives Buy
Reference:
Industry reviews praise these modules for bringing “mainline realism” to even small home layouts.modeltrainstuff

Programmable Lighting Sets

Description:
Addressable RGB LEDs now feature ultra-thin wires and glue-free mounting clips, letting advanced modelers illuminate entire city blocks, animate trackside scenes, and synchronize train headlights and building interiors. Updated controllers interface with DCC throttles, enabling “layout-wide” light shows or real-time intensity adjustments.micromark Buy
Reference:
Micro-Mark’s 2025 catalog lists compatible kits for expansion on existing and new layouts.micromark

Bluetooth Turnout Motors

Description:
2025 brings mobile-app-enabled turnout motors—mountable without soldering or drilling—so users can change switch positions from phones or tablets. This innovation empowers operators to manage complex yard operations or puzzle layouts without crawling under benchwork, a frequent challenge in traditional designs.modeltrainstuff+1 Coming.
Reference:
Featured on Model Train Stuff’s accessory page and in online user reviews for quick installation.modeltrainstuff

Weathering Tools Kits

Description:
Weathering is an art, and this year’s kits include new airbrush-compatible applicators, “seasonal” pigment packs (rust, soot, snow, autumn leaves), and video tutorials. These make realistic car, building, and landscape aging possible for every modeler, without risk of permanent damage.charlesro+1 Purchase
Reference:
MegaHobby and Micro-Mark showcase popular brands and their step-by-step guides for advanced finishing.charlesro+1

3D Printed Accessories

Description:
With high-resolution 3D printing now accessible, hobbyists can order or design ultrafine detail figures, rare vehicles, and custom structures—precisely scaled to their layout’s era or geographical setting. 2025’s offerings include build-your-own kits or “made to order” pieces from new boutique print shops.megahobby Buy
Reference:
ModelTrainStuff and MegaHobby’s partnership with accessories designers means an ever-changing catalog of exclusive items.megahobby+1

High-Definition Cameras

Description:
“Cab ride” cameras and layout monitors have moved to true HD/4K, with streaming and instant sharing features. Modelers can now capture inside-the-train perspectives or broadcast their club’s switching puzzle challenges live—and even analyze operations for improvement.modeltrainstuff Buy


Reference:
Midwest Model Railroad’s tech section features trending video and control products for advanced users.modeltrainstuff

Automated Car Routing Systems

Description:
Using RFID or Bluetooth tags, layouts can now have every car digitally tracked. Integration with management apps and sensors allows real-time switch lists, “favorited” operational plans, and automated accidental routing fixes, which streamlines puzzle play or full-operation sessions.trains
Reference:
Trains.com’s planning bundles and digital operations guides introduce these systems for both club and home layouts.trains


Final Touches and Gift Suggestions

Stocking Stuffers:
Don’t forget utility items: specialty hobby knives, extra brushes, track cleaning pads, repositionable signage, and era-specific detail packs are always appreciated—even by experienced hobbyists.charlesro

Gift Bundles:
Family-oriented “starter scenery plus a new animated accessory” packs, e-gift cards from favorite retailers, and new-release books on creative layout design and railroad history make for ideal group or solo gifts that inspire and educate.


References & Footnotes

** Model Train Stuff: Shop for trains, accessories, and newly launched gadgets, offering up-to-date listings and periodic sales for every skill level.transum+1
** Midwest Model Railroad: Resource for affordable trains, skill-building tips, and trending layout tools, with accessible advice for beginners and advanced users.
robotimeonline+1
** Micro-Mark & MegaHobby: Specializing in weathering tools, animated accessories, and model building packs for creative upgrades.escaperoomgeeks+2
** TrainWorld: Leading source of seasonal and family-oriented model railroading products, including billboard and signage options for 2025.
happilyevermom+1
** Trains.com: Guide to digital management systems, advanced planning materials, and the latest railroad trends for serious enthusiasts.parents.highlights+1
** Retailer and manufacturer product reviews: Cited throughout for specific features, innovations, and practical installation tips.
bloomberg


May every model railroader’s wish list find inspiration and delight from the newest 2025 accessories—and may your holiday layouts shine brighter and run smoother than ever!trainworld+3

  1. https://www.modeltrainstuff.com
  2. https://micromark.com/collections/model-trains
  3. https://www.trainworld.com/gifts/christmas-trains.html
  4. https://www.trainworld.com/gifts.html
  5. https://www.modeltrainstuff.com/train-layout/
  6. https://charlesro.com/ultimate-christmas-guide-for-model-trains/
  7. https://www.megahobby.com/categories/model-railroading.html
  8. https://shop.trains.com/products/great-model-railroads-and-model-railroad-planning-2025-bundle
  9. https://www.transum.org/Software/Shunting/Default.asp?Level=1
  10. https://www.robotimeonline.com/blogs/all-blogs/family-puzzle-time-how-to-make-it-a-fun-experience-1
  11. https://midwestmodelrr.com
  12. https://escaperoomgeeks.com/diy-puzzles/
  13. https://happilyevermom.com/puzzle-activities-for-kids/
  14. https://parents.highlights.com/7-family-games-to-play-anywhere
  15. https://www.bloomberg.com/company/stories/get-ready-for-bloombergs-summer-of-puzzles-2025/

Introduction to Puzzle Layouts in Model Railroading: A Beginner’s Guide

Introduction to Puzzle Layouts in Model Railroading: A Beginner’s Guide

Puzzles, also known as switching in the US, is a fascinating and engaging aspect of model railroading that focuses on organizing and rearranging train cars within a yard or station area. For beginners, a puzzle layout offers a hands-on way to experience the operational side of railroading beyond simply running trains in loops or point-to-point tracks.

What is a Puzzle Layout?

A puzzle layout is a type of model railway designed primarily for the purpose of sorting, assembling, and disassembling trains rather than continuous running. It typically features sidings, yards, and multiple tracks where freight or passenger cars can be moved around, detached, and reattached in specific sequences to simulate real railway operations6.

Why Choose a Puzzle Layout?

  • Operational Interest: Unlike simple loop layouts, shunting layouts provide a puzzle-like challenge where you manage the placement and order of cars. This adds depth and realism, making the hobby more interactive and rewarding28.
  • Space Efficiency: Many puzzle layouts are compact, making them ideal for hobbyists with limited space. Despite their small size, they offer complex operational possibilities2.
  • Learning Real Railway Practices: Puzzles mimics real-world railway logistics where freight cars are sorted in classification yards or stations for delivery to various destinations. This helps beginners understand how goods and passengers are moved efficiently by rail78.

Basic Concepts of Switching

  • Organizing Trains: Switching involves arranging cars in a required sequence for departure. For example, brake wheels must be at the rear, and cars destined for different locations are sorted accordingly8.
  • Sidings and Yards: These are the tracks off the main line where cars are temporarily parked or rearranged. A typical puzzle layout will have several sidings to represent different industries or destinations28.
  • Operations: The process includes detaching cars from incoming trains, moving them to the correct sidings (such as goods sheds, coal yards, or cattle docks), and assembling outbound trains with the correct cars8.

Getting Started with a Simple Switching Layout

For beginners, starting with a simple switching layout is recommended. This can be as small as a shelf or table-top design with a few sidings and a small yard. The goal is to create a scenario where you receive a mixed train and then sort the wagons according to their destinations or cargo types.

  • Example Layout: A small branch line with a goods yard and a passenger platform can provide a variety of switching tasks, such as dropping off freight cars and picking up passengers1.
  • Operating Potential: Even simple layouts can offer hours of engagement by simulating real railway tasks like mixed passenger and goods trains, prioritizing passenger cars, and managing slow speeds to avoid mistakes1.

Tips for Enjoying Switching

  • Plan Your Traffic: Decide on the era, location, and type of traffic your layout will represent. This determines the kinds of cars and operations you’ll have2.
  • Use Switching Puzzles: Popular puzzles like Timesaver or Inglenook Sidings can help beginners practice switching techniques in a structured way6.
  • Patience and Practice: Switching can be complex and sometimes frustrating, but it is also very rewarding as you master the skills of organizing trains efficiently8.

Conclusion

A switching layout is an excellent introduction to model railroading for beginners who want more than just running trains around a loop. It combines operational realism, strategic thinking, and hands-on fun. By starting small and focusing on the basics of sorting and organizing cars, you can develop a deeper appreciation for the art and logistics of railroading.

Once you start switching, your layout will provide hours of pleasure and a rich understanding of how real railways work behind the scenes8. Enjoy the challenge and the satisfaction of creating order from the complexity of rail traffic!

This introduction is designed to spark interest and provide a clear understanding of what switching layouts are and why they are a rewarding choice for beginner model railroaders.

  1. https://www.youtube.com/watch?v=ZDqQxj4zPUc
  2. http://www.wymann.info/ShuntingPuzzles/small-layouts.html
  3. https://www.youtube.com/watch?v=awbeVHaZL3U
  4. https://www.reddit.com/r/modeltrains/comments/1ccpwqc/what_do_you_think_about_my_shunting_layout_plan/
  5. https://ercim-news.ercim.eu/en68/special/railyard-shunting-a-challenge-for-combinatorial-optimisation
  6. https://en.wikipedia.org/wiki/Model_railroad_layout
  7. https://www.dbcargo.com/rail-de-en/logistics-news/abc-rail-freight-transport-techniques-12984250
  8. https://www.modelrailforum.com/threads/beginners-guide-shunting.21933/
  9. https://homepages.cwi.nl/~lex/files/PlanningOfShuntTracks.pdf
  10. https://www.youtube.com/watch?v=2Q1O25XoHaE
  11. https://www.trainshop.co.uk/blog/post/1400-shunting-yards-designing-a-track-plan-for-realistic-operations.html

Complete Beginner’s Guide to Laying Track for an HO Scale Layout

Building an HO scale model railroad is a fun, creative, and rewarding family project. This guide covers everything a beginner needs to know-from planning and preparing the roadbed to choosing the right track and tools, step-by-step installation, and long-term maintenance. Each section is easy to follow and designed to help you achieve smooth, reliable operation and a realistic look.

1. Planning Your Layout

Start by sketching your track plan on paper or using planning software. This helps you visualize your layout and ensures it fits your available space. Mark the centerlines for your track on your baseboard using a pencil for accurate placement later. A well-thought-out plan saves time and prevents mistakes down the line13.

2. Preparing the Baseboard

A sturdy, flat base is essential for a reliable layout. Use plywood or foam board supported by a simple wooden framework. Make sure the surface is level and strong enough to support your scenery, track, and trains3.

Tools you’ll need:

  • Saw (for cutting wood)
  • Drill and screwdriver
  • Measuring tape and ruler
  • Pencil and set square

3. Understanding HO Scale Track Types

HO scale (1:87.1) is the most popular choice for model railroaders, offering a balance of detail and manageable size1.

Code 100 vs. Code 83 Track

Track TypeDescriptionProsCons
Code 100Taller rail (0.100″)Durable, easy for beginners, compatible with older trainsLess realistic appearance
Code 83Lower, more prototypical rail (0.083″)Realistic look, preferred for modern layoutsSlightly more delicate, not always compatible with vintage models
  • Code 100 is robust and forgiving, making it ideal for beginners.
  • Code 83 offers a more realistic look, perfect for those focused on detail.

Sectional vs. Flex Track

  • Sectional Track: Pre-formed, easy to assemble, ideal for beginners and temporary layouts.
  • Flex Track: Bendable, allows custom curves and more realistic layouts but requires careful cutting and fitting.

Integrated Roadbed Track

Some brands offer track with built-in roadbed (e.g., Bachmann EZ Track), simplifying installation for beginners and families.

4. Choosing and Preparing the Roadbed

The roadbed raises the track, provides sound dampening, and gives a realistic profile.

Roadbed TypeProsCons
FoamLightweight, easy to shape, quiets noiseSlightly more expensive
CorkTraditional, durable, easy to work withCan dry out or crumble over time
Integrated TrackSimplifies installation, portableLess realistic, limited flexibility
  • Foam (e.g., Woodland Scenics) is popular for its ease of use and sound dampening.
  • Cork is a classic, affordable choice.
  • Integrated roadbed track is best for quick setups and portability.

Step-by-Step: Preparing the Roadbed

  1. Mark Your Track Path:
    Use your track plan to draw the centerline on your baseboard.
  2. Cut and Fit the Roadbed:
    For curves, cut slits in the roadbed to help it bend smoothly. Dry-fit the roadbed along the marked centerline.
  3. Secure the Roadbed:
    Apply white glue or double-sided tape to attach the roadbed. Press firmly and use pins or small weights while the glue dries. Ensure it’s level and follows the centerline.
  4. Smooth the Surface:
    Once dry, check for bumps or gaps. Sand any rough edges or uneven spots gently.

5. Essential Tools for Accurate Track Laying

  • Track alignment gauges (for correct rail spacing)
  • Track cutters (for cutting track sections)
  • Needle-nose pliers (for bending rail ends and inserting joiners)
  • Small hammer or rubber mallet (for gently tapping in track nails or pins)
  • Measuring tape or ruler
  • Pencil/marker
  • Straightedge or flexible curve
  • Small level
  • Adhesive (white glue or double-sided tape)
  • Sandpaper or small file

6. Laying the Track: Step-by-Step

  1. Position the Track:
    Lay track sections on the prepared roadbed, aligning with the centerline. Shape flex track as needed.
  2. Connect and Secure:
    Join track sections using rail joiners. Use alignment gauges for correct spacing. Secure track with small nails, pins, or a dab of glue (avoid glue near moving parts).
  3. Test and Adjust:
    Run a piece of rolling stock over the track to check for bumps or misalignments. Adjust before final securing.
  4. (Optional) Ballasting:
    Spread model railroad ballast along the track for realism. Mist with a 50/50 water-glue mix (add a drop of dish soap) to secure, avoiding moving parts.

7. Maintenance and Repair Tips

  • Regular Cleaning:
    Use a soft cloth or track cleaning car to remove dust and dirt. Avoid harsh chemicals.
  • Inspect Joints:
    Check rail joiners and connections for gaps or looseness.
  • Check for Warping:
    Look for any warping or shifting in the roadbed or track, especially after temperature changes.
  • Repair as Needed:
    If a section becomes loose, re-glue or re-nail it. Replace damaged track or roadbed promptly.
  • Wheel and Coupler Checks:
    Make sure rolling stock wheels and couplers are clean and in good condition to prevent derailments.
  • Schedule Maintenance:
    Create a simple checklist to regularly inspect track, roadbed, and rolling stock.

8. Tips for Success

  • Start simple: Use sectional track and foam or cork roadbed for your first layout.
  • Test as you go to catch and fix issues early.
  • Take your time-patience leads to better results.
  • Involve family members in planning and assembly for a fun, shared project.

Suggested Images

  • Step-by-step photos: marking the baseboard, fitting roadbed, laying track, testing with rolling stock.
  • Close-ups of track types (Code 100 vs. Code 83).
  • Examples of foam and cork roadbed installation.

References

  1. Train scale guide – Webflow1
  2. How to Build a Model Railway | Step-by-Step Guide for Beginners & Railfans – YouTube3
  3. Walthers Model Railroading Products5

With these steps, you’ll be on your way to building a smooth-running, reliable HO scale railroad that the whole family can enjoy!

For Model Railroad Supplies check amazon.com

Citations:

  1. https://uploads-ssl.webflow.com/65f0212e0d7ed90e8f284129/681956687209e4ec9278c24d_58250850358.pdf
  2. https://lancemindheim.com/model-railroad-blog/
  3. https://www.youtube.com/watch?v=ZbPkf5B4zXo
  4. https://www.tiktok.com/discover/how-to-put-together-train-tracks
  5. https://www.walthers.com/about-us

Answer from Perplexity: pplx.ai/share

Adding Depth to Your Model Train Layout by Using Flats on the Backdrop

Model railroading is more than creating tracks and running trains—it’s about building a miniature world that sparks imagination and invites viewers to explore its stories. One of the simplest and most effective ways to enhance your layout’s realism and give it a greater sense of depth is by using flats on the backdrop. Flats are a clever solution for adding layers, scenery, and visual interest to your layout, all while saving space and keeping things budget-friendly. Whether you’re a beginner dipping your feet into this rewarding hobby or a seasoned model railroader looking to elevate your setup, this guide will walk you through everything you need to know about flats—from what they are to how to prepare, install, and customize them.

What Are Flats in Model Railroads?

Backdrop flats, commonly referred to as “flats,” are shallow or two-dimensional models of buildings, scenery, or other features designed to sit against the backdrop of a layout. Instead of being fully three-dimensional, flats are either partially 3D or completely flat, creating the illusion of depth without occupying much space.

Flats work by tricking the eye through “forced perspective.” They blend the foreground (where 3D elements like tracks and buildings sit) with the background (the painted or printed scenery behind your layout). A row of flats depicting distant buildings, for instance, can make an urban layout feel like a sprawling city, even if the actual layout table is small.

Types of Flats

  1. Building Flats
    These replicate structures such as factories, warehouses, houses, or skyscrapers. They’re ideal for creating cityscapes or industrial areas.
  2. Scenic Flats
    These feature natural elements like hills, trees, or mountains, offering a perfect solution for rural or wilderness scenes.
  3. Custom Flats
    Want something unique? Custom flats let you design elements to match your exact layout theme, whether it’s a vintage small town, futuristic city, or fantasy world.

Why Flats Are Important

Flats bridge the gap between your foreground and backdrop, creating a smooth transition that immerses viewers in the world you’re building. They’re also a space-saving marvel, allowing you to add complexity and character to layouts of any size.

Why Use Flats?

Flats aren’t just practical; they’re a game-changer for any model train enthusiast. Here’s why you should consider incorporating them into your layout:

1. Save Space

Layouts often have limited real estate, and flats allow you to pack in detail and depth without taking up valuable space. Instead of building a large factory, a flat on the backdrop can represent a distant industrial zone, leaving room for tracks, trains, and other scenery closer to the viewer.

2. Enhance Realism

Flats create the illusion of a larger world by layering scenery. By playing with scale and perspective, flats can make your layout feel expansive and immersive. For example, a backdrop featuring hills painted with scenic flats can suggest miles of open countryside stretching beyond the layout.

3. Budget-Friendly

Full-scale buildings and scenery can be expensive, but flats are often more affordable. Pre-made kits, printable flats, or DIY options can save you money while allowing for incredible creativity.

4. Expand Storytelling Opportunities

Every model railroad tells a story, and flats add rich context to your scene. A row of building flats on a cityscape could suggest bustling neighborhoods or industrial hubs, while scenic flats showing barns or forests evoke quiet rural charm.

5. Perfect for Beginners

Flats are easy to use and beginner-friendly. With pre-made options and print-and-mount designs widely available, you can quickly add depth to your layout without advanced modeling skills or tools.

Choosing Flats for Your Layout

Selecting the right flats depends on your layout’s theme, scale, and overall vision. Follow these tips to choose flats that will elevate your scene.

1. Match Flats to Your Theme

  • Urban Layouts: Use building flats like skyscrapers, shops, or factories.
  • Rural Layouts: Scenic flats featuring barns, trees, rolling hills, or mountain ranges work well.
  • Custom Layouts: Design flats that fit your unique theme, such as historic towns, futuristic cities, or fantasy villages.

2. Pay Attention to Scale

Flats must match the scale of your layout to maintain realism. For example:

  • HO Scale (1:87): The most common scale with plenty of pre-made options.
  • N Scale (1:160): Great for compact layouts. Flats should have fine details.
  • O Scale (1:48): Larger layouts need bigger flats with intricate textures to maintain proportionality.

3. Flat Materials

  • Pre-Made Kits: Plastic, resin, or cardstock kits from trusted brands like Walthers, Woodland Scenics, or Faller.
  • DIY Options: Create flats using foam board, cardboard, or printed images. More on DIY later!

Preparing and Installing Flats

1. Preparing the Backdrop

Proper preparation and installation ensure your flats look polished and cohesive.

  • Painted Backdrops: Create a gradient from light blue (sky) to white (horizon). Add clouds or distant hills for realism.
  • Printed Backdrops: Use photo-realistic backdrops featuring skies or landscapes from brands like Scenic Express or TrainJunkies.

2. Installing Flats

  • Use double-sided tape or spray adhesive for lightweight flats.
  • Heavier flats can be attached with Velcro for removability or mounted on a wooden frame for support.
  • Align flats with the backdrop’s horizon line to ensure a smooth transition between flat and background.

3. Blend Flats with the Foreground

  • Add bushes, fences, or roads at the base of the flats to hide edges and create a natural transition.
  • For scenic flats, use foam flocking or static grass to blend seamlessly.

Enhancing Flats for Realism

Simple flats can become stunning with the right enhancements:

Add Details:

  • Apply decals for windows, signs, or advertisements.
  • Weather them with chalk pastels or dry brushing to simulate age and wear.

Lighting:

  • Add LEDs behind building windows for a glowing effect.
  • Use strip lights or spotlights to cast shadows and create depth.

Play with Perspective:

  • Position taller, more detailed flats closer to the foreground and smaller, muted flats further back to mimic distance.

DIY Flats: Save Money and Add Personality

Creating your own flats is affordable, fun, and lets you add unique touches to your layout.

Steps for DIY Flats:

  1. Print Templates: Use printable flats from sites like Railserve or Pinterest. Print on cardstock and mount on foam board for durability.
  2. Hand-Paint Designs: Sketch buildings or landscapes on foam board and paint them with acrylics.
  3. Layer for Depth: Add raised windows, doors, or signage for a 3D effect.

DIY flats let you recreate landmarks, add personal flair, and experiment with themes in a cost-effective way.

Photos from my layout showing the use of flats all of which are described above.

The photos above show how I use flats to enhance the depth of the layout. In the photo above I inserted a photo from google city scenes to add depth to the street continueing on.

Common Mistakes and How to Avoid Them

  1. Misalignment: Ensure flats align with the backdrop’s horizon. Use a ruler to check placement.
  2. Overcrowding: Space flats appropriately to avoid a cluttered look.
  3. Ignoring Scale: Match flats to the scale of your layout to maintain realism.
  4. Poor Blending: Use foliage or scenery to integrate flats with 3D elements.

Conclusion

Using flats is a transformative technique for model railroading, adding depth, realism, and personality to your layout without taking up extra space. From pre-made kits to DIY creations, flats bring your miniature world to life and immerse viewers in the story you’re telling. Whether you’re a beginner or an experienced model railroader, mastering the art of flats will elevate your layout to new heights. So, grab some flats, experiment with their placement, and watch your layout expand before your eyes!

References

  1. Walthers Model Railroading (2025). Building and Scenic Flats.
    Website: https://www.walthers.com
  2. Woodland Scenics (2025). Backdrop Design Techniques.
    Website: https://woodlandscenics.woodlandscenics.com
  3. TrainJunkies Backdrops (2025). Printed Backdrops and Scenic Flats.
    Website: https://www.trainjunkies.com
  4. RailServe (2025). Downloadable Flats & Templates.
    Website: https://www.railserve.com

Bringing Your Model Railroad Layout to Life with 3D Printed Details: A Beginner’s Guide

Model railroading is a rewarding hobby that allows you to create a miniature world filled with intricate details and personal touches. Over the years, advancements in technology have made it easier than ever to add unique and realistic elements to your layout. One of the most exciting innovations in recent years is 3D printing. With 3D printed details, you can customize your model railroad like never before, creating everything from tiny accessories to entire structures.

If you’re new to the world of 3D printing or wondering how to incorporate these details into your layout, this family-friendly guide will walk you through everything you need to know.


Why Use 3D Printed Details?

3D printing has revolutionized the model railroading hobby for several reasons:

  1. Customization: You can create one-of-a-kind pieces that perfectly match your vision for your layout.
  2. Affordability: Once you have access to a 3D printer or online printing service, producing small details is often more cost-effective than buying pre-made items.
  3. Precision: 3D printers can produce highly detailed models that bring a level of realism difficult to achieve with traditional methods.
  4. Accessibility: Many online platforms offer free or affordable 3D models designed specifically for model railroads.

Getting Started with 3D Printing for Model Railroads

Step 1: Accessing a 3D Printer

If you don’t own a 3D printer, don’t worry! You have several options:

  • Purchase a Printer: Entry-level resin printers like the Elegoo Mars or Anycubic Photon are affordable and perfect for small, detailed prints.
  • Use Online Services: Websites like Shapeways or Treatstock allow you to upload designs and order prints without owning a printer.
  • Local Makerspaces: Many libraries and community centers have 3D printers available for public use.

Step 2: Finding Models

There are countless ready-to-print models available online:

  • Free Resources: Websites like Thingiverse and Printables offer free downloadable files for model railroad accessories.
  • Paid Models: Platforms like MyMiniFactory or Cults3D provide high-quality designs for a small fee.
  • Custom Designs: If you have specific needs, consider designing your own models using software like Tinkercad (beginner-friendly) or Fusion 360 (advanced).

Step 3: Choosing Materials

For model railroading, two types of materials are commonly used:

  1. PLA (Polylactic Acid): Affordable and easy to work with, PLA is great for larger pieces like buildings or terrain features.
  2. Resin: Resin printers produce finer details, making them ideal for small accessories like figures or tools.

Incorporating 3D Printed Details into Your Layout

Now that you have access to 3D printed models, let’s explore how to use them effectively on your layout.

1. Buildings and Structures

One of the most popular uses of 3D printing in model railroading is creating custom buildings and structures. Whether it’s a train station, factory, or farmhouse, 3D printing allows you to design structures that fit perfectly into your layout.

Tips:

  • Print buildings in sections (walls, roofs) to make painting easier.
  • Add texture by using sandpaper or applying weathering techniques after painting.
  • Use LED lighting inside buildings for added realism.

2. Accessories and Props

Small details make a big difference when it comes to bringing your layout to life. With 3D printing, you can add accessories like:

  • Benches, streetlights, and mailboxes for urban scenes.
  • Barrels, crates, and tools for industrial areas.
  • Picnic tables, fences, and birdhouses for rural settings.

Tips:

  • Paint accessories in realistic colors using acrylic paints.
  • Group props together logically (e.g., crates near loading docks) to create believable scenes.

3. Vehicles

From cars and trucks to horse-drawn wagons, vehicles add movement and storytelling elements to your layout. Many hobbyists use 3D printing to create vehicles that match specific eras or themes.

Tips:

  • Add weathering effects like rust or dirt for used vehicles.
  • Use clear resin or transparent plastic sheets for windows.

4. Figures

Figures bring life and activity to any model railroad layout. With a resin printer, you can create highly detailed figures in various poses:

  • Workers loading cargo at an industrial site.
  • Families enjoying a picnic in the park.
  • Passengers waiting at the train station.

Tips:

  • Paint figures with fine brushes for precise details.
  • Place figures in contextually appropriate locations (e.g., workers near factories).

5. Terrain Features

Enhance your layout’s landscape with custom terrain features such as:

  • Rocks and cliffs
  • Bridges and tunnels
  • Water features like fountains or docks

Tips:

  • Combine printed terrain features with natural materials (e.g., real rocks) for added realism.
  • Use textured paints or flocking materials on terrain pieces.

6. Signage and Lettering

Custom signs are an easy way to add personality and storytelling elements to your layout. With a 3D printer, you can create:

  • Business signs for shops and factories
  • Street signs for urban areas
  • Custom lettering on buildings or vehicles

Tips:

  • Use contrasting paint colors to make lettering stand out.
  • Add weathering effects like chipped paint or grime.

Painting and Finishing Your Prints

To make your printed details look realistic, proper painting and finishing are essential:

  1. Clean Your Prints: Remove any support material left over from printing and lightly sand rough edges.
  2. Prime Before Painting: Apply a primer designed for plastic surfaces to help paint adhere evenly.
  3. Use Acrylic Paints: Acrylic paints are easy to work with and come in a wide range of colors.
  4. Add Weathering Effects: Use washes, dry brushing, or powders to simulate dirt, rust, or wear.
  5. Seal Your Work: Apply a matte or gloss sealant to protect your painted pieces.

Family-Friendly Fun with 3D Printing

One of the best things about using 3D printed details is that it’s a fun activity the whole family can enjoy! Here’s how everyone can get involved:

  • Kids can help paint small accessories like benches or barrels.
  • Teens can learn basic design skills using beginner-friendly software like Tinkercad.
  • Adults can handle more complex tasks like assembling buildings or operating the printer.

Working together not only makes the process faster but also creates lasting memories as you build something special as a family.


Final Thoughts

Incorporating 3D printed details into your model railroad layout is an exciting way to add customization and realism while keeping costs manageable. Whether you’re creating unique buildings, adding lifelike figures, or enhancing terrain features, the possibilities are endless with this innovative technology.

For beginners, start small—experiment with simple accessories before moving on to larger projects like custom structures. With time and practice, you’ll be amazed at what you can achieve!

So fire up that printer (or order from an online service), gather some paints and brushes, and start bringing your miniature world to life—one detail at a time!


References

  1. Kalmbach Media (2025). Model Railroader Magazine. Various issues featuring tips on using technology in model railroading.[^1]
    Website: https://www.trains.com/mrr
  2. Thingiverse (n.d.). Free Downloadable Models.
    Website: https://www.thingiverse.com
  3. Woodland Scenics (n.d.). Scenery Techniques.
    Website: https://woodlandscenics.com
  4. Luke Towan (2025). YouTube Channel. Tutorials on integrating advanced techniques into model railroads.[^2]
    Link: https://www.youtube.com/@LukeTowan
  5. Elegoo Official (2025). Resin Printers for Beginners.
    Website: https://www.elegoo.com

[^1]: Kalmbach Media provides insights into modern tools like 3D printing that enhance model railroading layouts.
[^2]: Luke Towan’s tutorials offer step-by-step guidance on painting and finishing techniques specific to 3D printed scenery elements.


Nature’s Little Helpers: Inexpensive Ways to Create Stunning Scenery for Your Model Railroad (Family-Friendly Edition!)

One of the most exciting parts of building a model railroad is creating a miniature world that feels real. The scenery – the trees, the ground, the rocks, the little details – is what breathes life into your layout and gives it its unique personality.

You might think that creating impressive scenery requires expensive materials from hobby stores. But guess what? You can create amazing landscapes using everyday items from your home and backyard! Not only is this budget-friendly, but it’s also a fantastic way to get the whole family involved in the creative process.

Let’s explore some fun and inexpensive ways to make trees and ground cover for your model railroad.

From Backyard to Background: Making Trees

Trees are essential for adding depth and realism to your model landscape. Here’s how to create them without breaking the bank:

Twiggy Wonders

Your backyard is a goldmine for tree-making materials!

  1. Gather: Collect small twigs and branches of varying shapes and sizes. The more variety, the better!
  2. Prepare: Let the twigs dry out completely. This will help prevent them from warping later.
  3. Customize: You don’t necessarily need to paint them, because they are already the right color! For a more realistic effect, you can drybrush them with lighter or darker shades of brown or green.
  4. Plant: Use white glue to fix them to the layout.

These twig trees work perfectly for small trees and shrubs or can be cut down to resemble logs. This is a cost-effective way to give your model railroad a realistic edge.

Skewer Logs

Did you know that wooden meat skewers from the supermarket aren’t just for kebabs?

  1. Cut: Cut the skewers into varying lengths to resemble logs.
  2. Texturize: Use sandpaper or a knife to create a rough bark-like texture.
  3. Stain: Apply a wood stain or diluted brown paint to give the logs a weathered look.
  4. Arrange: Glue the logs together to create log piles or use them individually to add details to your forest floor.

Sea Foam Forests (and Shrubs!)

Sea Foam, also known as “Forest in a Box,” is a lightweight, twiggy material sold at many hobby stores. But it’s still relatively inexpensive and very versatile.

  1. Prepare: Break off small pieces of Sea Foam and shape them into tree-like forms.
  2. Add Structure: Fine brass wire can be used to strengthen the trunks and branches. Torn-up pieces of masking tape can be wound around the tree trunk to add some width. This can then be sealed with a mixture of wall filler and PVA white glue.
  3. Adhesive: Spray with adhesive.
  4. Foliage: Sieve on some flock (described below.) It is usually best to mix a few little pieces together rather than use just one piece for an entire tree.
  5. Secure: You can then spray the trees all over with matt varnish, or spray them (upside down) with a mix of white glue and water. You then leave them to dry overnight.

Lichen Landscapes

Lichen is a readily available natural material that works wonders for both trees and shrubs.

  1. Gather (or Buy): You may be able to gather lichen from your yard or a park. Make sure it’s okay to do so, and only take what you need. You can also purchase bags of lichen at craft or hobby stores.
  2. Prepare: Break off small pieces and shape them into tree or shrub forms.
  3. Customize: You can purchase it in a range of colors that can be used separately or mixed together. Glue the lichen to your layout to create lush foliage and undergrowth.

From Kitchen to Countryside: Making Ground Cover

Ground cover adds texture and color to your model landscape, creating the illusion of grass, dirt, and other natural surfaces. Here are some easy and affordable ways to make it:

Mulberry Magic

If you have a mulberry tree nearby, you’re in luck!

  1. Gather: Collect fresh mulberry leaves.
  2. Dry: Dry them in a microwave oven.
  3. Blend: After they are dried out, drop them in a kitchen blender and you have instant ground cover!
  4. Store: Keep it in a plastic bag for when you need it.

The best thing is; it costs you virtually nothing to make. The only disadvantage with making your own ground cover is you will not necessarily know how long it will last when compared to the bought stuff.

Herbal Harvest

Dried herbs from your kitchen spice rack can be transformed into realistic ground cover.

  1. Gather: Collect different herbs, such as thyme, oregano, and parsley.
  2. Crush: Crush the herbs into fine pieces using a mortar and pestle or a rolling pin.
  3. Mix: Combine different herbs to create varying shades of green and brown.
  4. Apply: Sprinkle the crushed herbs onto your layout, using diluted white glue to secure them in place. Make sure to lay some newspaper underneath, as it can be a messy process.

This is a quick and easy way to add texture and color to your model landscape.

A Word About Store-Bought Scenery

There’s nothing wrong with purchasing scenery materials from hobby stores! In fact, a lot of model railroaders use a mix of ready-to-use grasses from the hobby store, and combine this with there own home made grass recipe. Many of the ground cover products from a hobby store will have been treated to help them maintain their color and withstand temperature and humidity variances over time. Some of them are non-flammable and nontoxic, so you need to decide what is important to you.

Final Thoughts

Creating scenery for your model railroad should be a fun and enjoyable process for the whole family. By using inexpensive and readily available materials, you can create a realistic and immersive landscape without breaking the bank.

Remember, there’s no right or wrong way to create scenery. Experiment with different materials and techniques to discover what works best for you. Let your imagination run wild and create a miniature world that reflects your unique vision!

As Robert Anderson says, “You just need to be a little creative in your approach. Have fun!”

Now go forth and transform your model railroad layout into a stunning landscape using these inexpensive and family-friendly techniques!

Citations:

References

Here are some helpful resources and references that inspired or support the ideas in the article “Nature’s Little Helpers: Inexpensive Ways to Create Stunning Scenery for Your Model Railroad”:

  1. Woodland Scenics
    Woodland Scenics offers a wide range of products for model railroad scenery, including trees, ground cover, and foliage materials. Their website also provides tutorials and videos on creating realistic landscapes.
    Website: www.woodlandscenics.com
  2. Model Railroader Magazine
    A trusted resource for model railroad enthusiasts, Model Railroader Magazine frequently publishes articles and tips on scenery-building techniques, including DIY methods for trees and ground cover.
    Website: www.trains.com/mrr
  3. YouTube Tutorials
    Many hobbyists share their creative scenery-making techniques on YouTube. Channels like “Luke Towan” and “Marklin of Sweden” provide step-by-step guides for crafting trees, shrubs, and ground cover using inexpensive materials.
  4. National Model Railroad Association (NMRA)
    The NMRA provides educational resources for model railroaders, including tips for creating realistic scenery and using natural materials effectively.
    Website: www.nmra.org
  5. Backyard Inspiration
    Observing nature firsthand is one of the best ways to gather materials and ideas for your model railroad scenery. Twigs, leaves, lichen, and other natural items can be collected responsibly from your own backyard or local parks.
  6. DIY Craft Blogs
    Websites like Instructables and Pinterest are great sources for DIY ideas, including using household items like coffee grounds or herbs to create realistic ground cover.
  7. Books on Model Railroading Scenery
    • “Basic Scenery for Model Railroaders” by Lou Sassi: A beginner-friendly book with practical advice on creating scenery using affordable materials.
    • “How to Build Realistic Model Railroad Scenery” by Dave Frary: A comprehensive guide that includes techniques for making trees, ground cover, and other landscape elements.

These references provide additional guidance and inspiration for creating stunning scenery on your model railroad layout while keeping it budget-friendly and family-focused!


Easy-to-Build Model Industries for Beginners

Adding industries to your model railroad layout brings it to life and provides engaging operational possibilities. For beginners, starting with simple yet effective industries is key. Here are some easy-to-build model industries that will enhance your layout without overwhelming you:

Grain Elevator

A grain elevator is a classic rail-served industry that’s visually striking and operationally significant2.

Key Elements:

  • Tall cylindrical silos
  • Loading/unloading area
  • Small office building

Materials Needed:

  • Plastic tubing or PVC pipe for silos
  • Styrene sheets for walls and roofs
  • Small-scale ladders and railings

Construction Steps:

  1. Cut plastic tubing to desired heights for silos
  2. Create a base and top for silos using styrene sheet
  3. Build a small office structure using styrene
  4. Add details like ladders, conveyor belts, and signage

Operation:

  • Receive covered hoppers of grain
  • Ship out processed products in boxcars

A grain elevator provides excellent opportunities for switching operations and adds vertical interest to your layout5.

Lumber Yard

A lumber yard is easy to model and offers varied operational possibilities3.

Key Elements:

  • Stacks of lumber
  • Loading dock
  • Small office or shed

Materials Needed:

  • Stripwood or basswood sheets for lumber stacks
  • Styrene for the loading dock and office
  • Glue and paint

Construction Steps:

  1. Cut stripwood into various lengths for lumber stacks
  2. Glue strips together to form stacks of different sizes
  3. Build a simple loading dock from styrene
  4. Construct a small office or shed

Operation:

  • Receive flatcars of raw lumber
  • Ship out finished products in boxcars

Team Track

A team track is versatile and perfect for beginners, accommodating various car types without complex structures.

Key Elements:

  • Simple track siding
  • Small loading area
  • Optional small storage shed

Materials Needed:

  • Track and ballast
  • Styrene or cardstock for the loading area
  • Optional kit for a small shed

Construction Steps:

  1. Lay a siding track parallel to your mainline
  2. Create a small paved area using styrene or textured cardstock
  3. Add details like pallets, crates, and barrels
  4. Optionally, build a small storage shed nearby

Operation:

  • Load and unload various car types (boxcars, flatcars, gondolas)
  • Simulate different small businesses using the same track

Small Factory or Warehouse

A generic industrial building offers flexibility in operations and is simple to construct.

Key Elements:

  • Rectangular building with loading docks
  • Parking area
  • Signage

Materials Needed:

  • Styrene sheets for walls and roof
  • Window and door castings
  • Acrylic paints

Construction Steps:

  1. Cut styrene sheets for walls and roof
  2. Add windows and doors
  3. Create loading docks on one side
  4. Paint and weather the structure
  5. Add signage and details like air conditioning units and downspouts

Operation:

  • Receive raw materials in various car types
  • Ship out finished products in boxcars or flatcars

Coal Dealer

A small coal yard with a simple unloading trestle provides opportunities for hopper car operations.

Key Elements:

  • Elevated track or small trestle
  • Coal pile
  • Small office or scale house

Materials Needed:

  • Styrene or balsa wood for the trestle
  • Fine gravel or commercial coal material
  • Small kit for the office

Construction Steps:

  1. Construct a simple elevated track or trestle
  2. Create a coal pile using fine gravel or commercial coal material
  3. Build a small office or scale house
  4. Add details like fencing and equipment

Operation:

  • Receive hopper cars of coal
  • Simulate local delivery operations

Tips for Building Model Industries

  1. Start Small: Begin with one or two industries and expand as you gain confidence and skills.
  2. Research: Look at photos of real industries for inspiration and accuracy.
  3. Use Kits: Many manufacturers offer kits for beginners that can be easily assembled.
  4. Weathering: Add realism by lightly weathering your structures and surrounding areas.
  5. Lighting: Consider adding simple LED lighting to bring your industries to life at night.
  6. Scenery: Integrate your industries into the landscape with appropriate ground cover, trees, and details.
  7. Operations: Plan how your industries will interact with your trains to create interesting operating sessions.

Conclusion

Building model industries for your railroad layout doesn’t have to be daunting. These easy-to-build options provide a great starting point for beginners. They offer a balance of simplicity in construction and interest in operation. As you become more comfortable with modeling techniques, you can add more details or expand to more complex industries.

Remember, the key to enjoying model railroading is to have fun and be creative. Don’t worry about perfect realism at first – focus on creating a layout that you enjoy operating and looking at. With these simple industries, you’ll be well on your way to creating an engaging and operational model railroad that will provide hours of enjoyment.

As your skills grow, you can always modify or replace these starter industries with more complex ones. The beauty of model railroading is that your layout can evolve with your skills and interests. So start simple, enjoy the process, and watch your miniature world come to life!

Citations:

  1. https://www.indeed.com/career-advice/finding-a-job/how-to-find-model-jobs
  2. https://www.scarm.info/blog/tutorials-and-examples/ho-scale-grain-elevator/
  3. https://www.armballast.com/modeling-a-lumber-operation-and-sawmill-a-detailed-guide/
  4. https://www.brandonandrephoto.com/blog/fashion-industry-101-a-guide-for-beginner-models
  5. https://www.youtube.com/watch?v=_BjVEAfxi9I
  6. https://www.youtube.com/watch?v=1yzfPK5LQwc
  7. https://www.reddit.com/r/modelmakers/comments/17wywax/whats_the_best_model_brand_in_your_opinion_for/
  8. https://forum.trains.com/t/grain-elevator-placement/315078

Answer from Perplexity: pplx.ai/share

Planning a Scene for your Railroad Layout: A Cementary near a Church

Creating a captivating model railroad diorama featuring a cemetery near a church is an excellent way to add depth and atmosphere to your layout. This scene can evoke a sense of history, tranquility, and even a touch of mystery. Here’s a comprehensive guide to creating a church cemetery diorama that will fit nicely in a small space..

Planning Your Church Cemetery Diorama

The layout of the Cemetery showing the location of the figures, the wall around the base.

Start by envisioning the overall scene. Consider including:

  • A small, weathered church building
  • Various tombstones and grave markers
  • A winding path or two
  • Old trees and vegetation
  • A low stone wall or iron fence

Research reference photos of old European churches with surrounding cemeteries for inspiration[1][4].

Building the Base

Use a piece of MDF or plywood as your foundation. For a small diorama, aim for a size around 2 feet by 3 feet. Seal the base with shellac to prevent warping[2].

Creating the Terrain

Use extruded polystyrene (XPS) foam to build up the terrain. Shape it to create gentle slopes and uneven ground typical of old cemeteries. Cover the foam with a mixture of wood filler and finely sieved soil to add texture[2].

Constructing the Church

For the church, consider using a 3D-printed model or a kit. Weather it to look old and slightly worn. Add details like stained glass windows, a bell tower, and weathered stonework[1].

The church has been placed next to the backdrop. The church was purchased prebuilt from a hobby shop as part of an estate sale. Being placed next to the backdrop only the rear of the church is visible, the front of the church seen fron another aisle has a wedding leaving the front. The building is doing double duty. It was in an article in Model Railroader years ago.

Adding Tombstones and Grave Markers

Create a variety of tombstones using XPS foam or resin castings. Include different shapes and sizes to represent various eras. Weather them to look old and worn:

  • Inscribe dates and simple designs
  • Use wood filler to add texture
  • Paint with grays and add washes to enhance details[2]

As you will see below the Tombstones I used are a kit that came from Woodland Scenics. The tombstones are glued to the base using Elmers white glue. The next step was to sprinkel grass throughout the grave sites thinly then to add clumps to show weeds.

Vegetation and Scenery

This material has been purchased butg has not been completed to date. I am currently working on getting this completed.

Add trees, bushes, and ground cover to create a realistic environment:

  • Use twisted wire covered with foliage material for gnarly old trees
  • Add moss and ivy to tombstones and the church walls
  • Create patches of longer grass in less-tended areas
  • Include small details like fallen leaves or wildflowers[1][2]

The Cemetery Path

My path will come down the center, the path will be scale gravel grass will be sprinkled around the tombstones.

Create a winding path through the cemetery using fine gravel or sand. This adds visual interest and helps define different areas of the scene.

Fencing or Walls

As shown in the video above the stone wall is around the base and a shrub wall will be above the stone wall.

Surround your cemetery with a low stone wall or wrought iron fence. This helps frame the scene and adds to the historical atmosphere[2].

Painting and Weathering

Use a combination of craft paints and weathering techniques to bring your scene to life:

  • Paint the church and tombstones in various shades of gray and brown
  • Apply washes to enhance details and create a weathered look
  • Use dry brushing to highlight raised areas
  • Add subtle green tones to represent moss and lichen[2]

Adding Final Details

Incorporate small elements to enhance the realism:

  • Place miniature candles or flowers near some graves
  • Add a few scattered leaves on the ground
  • Include a small bench or two for visitors
  • Consider adding a few carefully placed figures to bring the scene to life[5]

Lighting (Optional)

For added atmosphere, consider incorporating subtle lighting:

  • Use small LEDs to create a soft glow from church windows
  • Add a few “candles” near graves for a somber effect

Conclusion

Creating a church cemetery diorama allows you to capture a serene yet slightly eerie atmosphere in a compact space. Focus on weathering, vegetation, and small details to bring your scene to life. With patience and attention to detail, you can create a stunning miniature world that tells a story of history, remembrance, and the passage of time.

Remember, the key to a successful diorama is in the details and the atmosphere it evokes. Take your time, experiment with different techniques, and most importantly, enjoy the creative process of bringing this miniature world to life.

To add to the slightly eerie atmosphere I have the Grim Reaper walking in the Cemetery.

I will update this article as I complete the diorama.

Citations:
[1] https://www.youtube.com/watch?v=xXW9huBTfNg
[2] https://daggerandbrush.de/unrested-souls-how-to-make-a-graveyard-themed-diorama-base-part-i/
[3] https://www.etsy.com/market/cemetery_diorama
[4] https://www.pinterest.com/pin/church-cemetery–12173861478666003/
[5] https://www.reddit.com/r/dioramas/comments/1gdo6ab/164_old_church_with_cemetery/
[6] https://www.etsy.com/market/graveyard_diorama
[7] https://www.pinterest.com/pin/778770960601616311/
[8] https://www.youtube.com/watch?v=S8z4iASx3zY

Model Railroading: A Great Family-Friendly Hobby (Updated for 2025)

Model railroading is a hobby that has captivated people of all ages for generations. This unique craft allows enthusiasts, from novices to professionals, to develop small-scale railway systems complete with miniature trains and intricate scenery. With no skill or age restrictions, it’s an ideal activity for bringing families together. Let’s explore why model railroading remains a fantastic family-friendly hobby in 2025.

Everyone Can Participate

One of the most appealing aspects of model railroading is its inclusivity. Individuals of all ages, from young children to seniors, can participate and find enjoyment. Building a model railroad fosters teamwork and collaboration within the family. Each member can contribute to different aspects of the project, whether it’s designing the layout, constructing buildings, laying track, or adding scenery. This shared effort creates a sense of accomplishment and strengthens family bonds.

Educational Value

Model railroading offers significant educational opportunities. The hobby encompasses various subjects, including history, engineering, and design. Researching prototype railroads and their historical context deepens knowledge of transportation history and technological advancements. Constructing the model railroad itself involves practical engineering skills such as electrical wiring, track design, and spatial planning. These hands-on activities encourage problem-solving, critical thinking, and creativity.

Therapeutic Value

Beyond its educational benefits, model railroading can also be incredibly therapeutic. The hobby provides a means of stress relief and relaxation. The focus and concentration required in model railroading can help individuals detach from daily worries and immerse themselves in a positive and engaging activity. The creative process of designing and building a miniature world can be deeply satisfying, fostering a sense of accomplishment and well-being.

Endless Possibilities

Model railroading offers endless possibilities for customization and creativity. Enthusiasts can create their own unique worlds, designing layouts that reflect their personal interests and preferences. The choice of era, location, and type of trains allows for endless variation. Adding scenery, buildings, and other details allows for further personalization, making each model railroad a one-of-a-kind creation.

Long-Lasting Hobby

Model railroading is a hobby that can span a lifetime. Many enthusiasts begin their journey in childhood and continue to enjoy the hobby throughout their lives. Model railroading creates lasting memories and provides an opportunity to pass on a cherished tradition to future generations. Additionally, the hobby fosters connections with other enthusiasts through clubs, online forums, and model railroad shows, creating a supportive community of like-minded individuals.

What’s New in 2025?

  • Digital Command Control (DCC) is More Accessible: DCC systems are more user-friendly and affordable, making it easier for families to control multiple trains independently and add sound effects to their layouts.
  • 3D Printing Revolutionizes Customization: 3D printers have become more accessible, allowing modelers to create custom parts, buildings, and details that were previously difficult or impossible to find.
  • Augmented Reality (AR) Integration: New AR apps allow users to overlay virtual scenery and details onto their physical layouts, creating a blended reality experience that enhances immersion and realism.
  • Focus on Sustainability: There’s growing interest in using sustainable materials and practices in model railroading, such as recycled cardboard, biodegradable ground cover, and energy-efficient LED lighting.
  • Emphasis on Realistic Operations: More modelers are focusing on replicating real-world railroad operations, including switching maneuvers, freight car routing, and timetable-based operation.

Conclusion

In conclusion, model railroading remains a rewarding and family-friendly hobby in 2025. It provides opportunities for learning, creativity, relaxation, and connection. With its endless possibilities and long-lasting appeal, model railroading is sure to provide hours of entertainment and enjoyment for families for years to come. Now is the perfect time to gather your family, spark your imagination, and embark on the exciting journey of building your own miniature world. The innovative technologies and techniques available today make it easier than ever to create a truly immersive and engaging model railroad experience.

Citations:
[1] https://stanshobbiesandinterests.com/2023/09/18/model-railroading-a-great-family-friendly-hobby/