The one thing we love the most in the world of astronomy is a good mystery. And if there was ever a mysterious and yet very powerful force of nature that we witness in the night skies, it is the coming of the mighty comet.
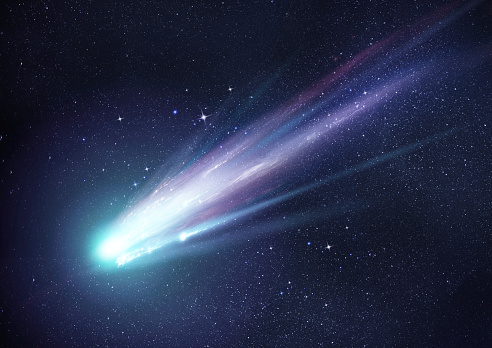
The arrival of a comet within view of Earth is an event of international importance. Witness the huge media attention that the Haley or Hale-Bopp have had when they have come within view The sight of these amazing space objects is simultaneously frightening and awe inspiring.
Above all, it is during these comet viewings that the astronomer comes out in all of us. But what is a comet? Where did it come from? And how does it get that magnificent tail?
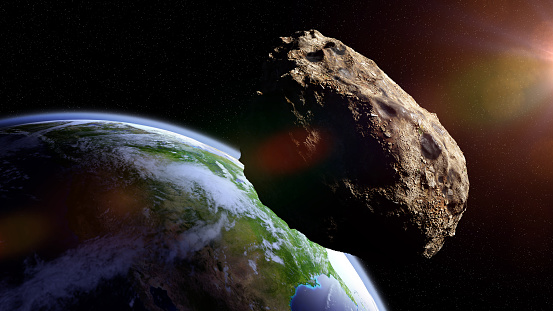
We should never confuse comets with asteroids. Asteroids are small space rocks that come from an asteroid belt between Mars and Jupiter. While still quite stunning to see, they pale in comparison to the arrival of a comet. Asteroids also have received considerable study by the scientific community.
Not as much is known about comets. As a rule, comets are considerably larger than asteroids. The composition of a comet is a mixture of nebulous, gasses, ice, dust and space debris. One scientist called the composition of a comet as similar to a “dirty snowball” because the composition is so diverse and changeable. The center or nucleus of a comet is usually quiet solid but the “snowball” materials often create a “cloud” around that nucleus that can become quite large and that extends at great lengths behind the comet as it moves through space. That trailing plume is what makes up the comet’s magnificent tail that makes it so exciting to watch when a comet comes within view of Earth.
The origins of comets is similarly mysterious. There are a number of theories about where they come from but it is clear that they originate from outside our solar system, somewhere in deep space. Some have speculated they are fragments left over from the organization of planets that get loose from whatever gravitational pull and are sent flying across space to eventually get caught up in the gravity of our sun bringing them into our solar system.
Another theory is that they come from a gaseous cloud called the Oort cloud which is cooling out there after the organization of the sun. As this space debris cools, it gets organized into one body which then gathers sufficient mass to be attracted into the gravity of our solar system turning into a fast moving comet plummeting toward our sun. However, because of the strong gravitational orbits of the many planets in our solar system, the comet does not always immediately collide with the sun and often takes on an orbit of its own.
The life expectancy of comets varies widely. Scientists refer to a comet that is expected to burn out or impact the sun within two hundred years as a short period comet whereas a long period comet has a life expectancy of over two hundred years. That may seem long to us as earth dwellers but in terms of stars and planets, this is a very short life as a space object indeed.
Scientists across the globe have put together some pretty impressive probes to learn more about comets to aid our understanding of these visitors from beyond. In 1985, for example, the United States put a probe into the path of the comet Giacobini-Zinner which passed through the comets tail gathering tremendous scientific knowledge about comets. Then in 1986, an international collation of scientists were able to launch a probe that was able to fly close to Haley’s comet as it passed near Earth and continue the research.
While science fiction writers and tabloid newspapers like to alarm us with the possibility of a comet impacting the earth, scientists who understand the orbits of comets and what changes their paths tell us this is unlikely. That is good because some comets reach sizes that are as big as a planet so that impact would be devastating. For now, we can enjoy the fun of seeing comets make their rare visits to our night sky and marvel at the spectacular shows that these visitors from beyond put on when they are visible in the cosmos.