Easy-to-Build Model Industries for Beginners

Adding industries to your model railroad layout brings it to life and provides engaging operational possibilities. For beginners, starting with simple yet effective industries is key. Here are some easy-to-build model industries that will enhance your layout without overwhelming you:

Grain Elevator

A grain elevator is a classic rail-served industry that’s visually striking and operationally significant2.

Key Elements:

  • Tall cylindrical silos
  • Loading/unloading area
  • Small office building

Materials Needed:

  • Plastic tubing or PVC pipe for silos
  • Styrene sheets for walls and roofs
  • Small-scale ladders and railings

Construction Steps:

  1. Cut plastic tubing to desired heights for silos
  2. Create a base and top for silos using styrene sheet
  3. Build a small office structure using styrene
  4. Add details like ladders, conveyor belts, and signage

Operation:

  • Receive covered hoppers of grain
  • Ship out processed products in boxcars

A grain elevator provides excellent opportunities for switching operations and adds vertical interest to your layout5.

Lumber Yard

A lumber yard is easy to model and offers varied operational possibilities3.

Key Elements:

  • Stacks of lumber
  • Loading dock
  • Small office or shed

Materials Needed:

  • Stripwood or basswood sheets for lumber stacks
  • Styrene for the loading dock and office
  • Glue and paint

Construction Steps:

  1. Cut stripwood into various lengths for lumber stacks
  2. Glue strips together to form stacks of different sizes
  3. Build a simple loading dock from styrene
  4. Construct a small office or shed

Operation:

  • Receive flatcars of raw lumber
  • Ship out finished products in boxcars

Team Track

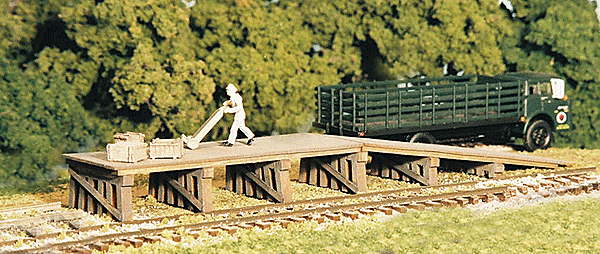
A team track is versatile and perfect for beginners, accommodating various car types without complex structures.

Key Elements:

  • Simple track siding
  • Small loading area
  • Optional small storage shed

Materials Needed:

  • Track and ballast
  • Styrene or cardstock for the loading area
  • Optional kit for a small shed

Construction Steps:

  1. Lay a siding track parallel to your mainline
  2. Create a small paved area using styrene or textured cardstock
  3. Add details like pallets, crates, and barrels
  4. Optionally, build a small storage shed nearby

Operation:

  • Load and unload various car types (boxcars, flatcars, gondolas)
  • Simulate different small businesses using the same track

Small Factory or Warehouse

A generic industrial building offers flexibility in operations and is simple to construct.

Key Elements:

  • Rectangular building with loading docks
  • Parking area
  • Signage

Materials Needed:

  • Styrene sheets for walls and roof
  • Window and door castings
  • Acrylic paints

Construction Steps:

  1. Cut styrene sheets for walls and roof
  2. Add windows and doors
  3. Create loading docks on one side
  4. Paint and weather the structure
  5. Add signage and details like air conditioning units and downspouts

Operation:

  • Receive raw materials in various car types
  • Ship out finished products in boxcars or flatcars

Coal Dealer

A small coal yard with a simple unloading trestle provides opportunities for hopper car operations.

Key Elements:

  • Elevated track or small trestle
  • Coal pile
  • Small office or scale house

Materials Needed:

  • Styrene or balsa wood for the trestle
  • Fine gravel or commercial coal material
  • Small kit for the office

Construction Steps:

  1. Construct a simple elevated track or trestle
  2. Create a coal pile using fine gravel or commercial coal material
  3. Build a small office or scale house
  4. Add details like fencing and equipment

Operation:

  • Receive hopper cars of coal
  • Simulate local delivery operations

Tips for Building Model Industries

  1. Start Small: Begin with one or two industries and expand as you gain confidence and skills.
  2. Research: Look at photos of real industries for inspiration and accuracy.
  3. Use Kits: Many manufacturers offer kits for beginners that can be easily assembled.
  4. Weathering: Add realism by lightly weathering your structures and surrounding areas.
  5. Lighting: Consider adding simple LED lighting to bring your industries to life at night.
  6. Scenery: Integrate your industries into the landscape with appropriate ground cover, trees, and details.
  7. Operations: Plan how your industries will interact with your trains to create interesting operating sessions.

Conclusion

Building model industries for your railroad layout doesn’t have to be daunting. These easy-to-build options provide a great starting point for beginners. They offer a balance of simplicity in construction and interest in operation. As you become more comfortable with modeling techniques, you can add more details or expand to more complex industries.

Remember, the key to enjoying model railroading is to have fun and be creative. Don’t worry about perfect realism at first – focus on creating a layout that you enjoy operating and looking at. With these simple industries, you’ll be well on your way to creating an engaging and operational model railroad that will provide hours of enjoyment.

As your skills grow, you can always modify or replace these starter industries with more complex ones. The beauty of model railroading is that your layout can evolve with your skills and interests. So start simple, enjoy the process, and watch your miniature world come to life!

Citations:

  1. https://www.indeed.com/career-advice/finding-a-job/how-to-find-model-jobs
  2. https://www.scarm.info/blog/tutorials-and-examples/ho-scale-grain-elevator/
  3. https://www.armballast.com/modeling-a-lumber-operation-and-sawmill-a-detailed-guide/
  4. https://www.brandonandrephoto.com/blog/fashion-industry-101-a-guide-for-beginner-models
  5. https://www.youtube.com/watch?v=_BjVEAfxi9I
  6. https://www.youtube.com/watch?v=1yzfPK5LQwc
  7. https://www.reddit.com/r/modelmakers/comments/17wywax/whats_the_best_model_brand_in_your_opinion_for/
  8. https://forum.trains.com/t/grain-elevator-placement/315078

Answer from Perplexity: pplx.ai/share

Planning a Scene for your Railroad Layout: A Cementary near a Church

Creating a captivating model railroad diorama featuring a cemetery near a church is an excellent way to add depth and atmosphere to your layout. This scene can evoke a sense of history, tranquility, and even a touch of mystery. Here’s a comprehensive guide to creating a church cemetery diorama that will fit nicely in a small space..

Planning Your Church Cemetery Diorama

The layout of the Cemetery showing the location of the figures, the wall around the base.

Start by envisioning the overall scene. Consider including:

  • A small, weathered church building
  • Various tombstones and grave markers
  • A winding path or two
  • Old trees and vegetation
  • A low stone wall or iron fence

Research reference photos of old European churches with surrounding cemeteries for inspiration[1][4].

Building the Base

Use a piece of MDF or plywood as your foundation. For a small diorama, aim for a size around 2 feet by 3 feet. Seal the base with shellac to prevent warping[2].

Creating the Terrain

Use extruded polystyrene (XPS) foam to build up the terrain. Shape it to create gentle slopes and uneven ground typical of old cemeteries. Cover the foam with a mixture of wood filler and finely sieved soil to add texture[2].

Constructing the Church

For the church, consider using a 3D-printed model or a kit. Weather it to look old and slightly worn. Add details like stained glass windows, a bell tower, and weathered stonework[1].

The church has been placed next to the backdrop. The church was purchased prebuilt from a hobby shop as part of an estate sale. Being placed next to the backdrop only the rear of the church is visible, the front of the church seen fron another aisle has a wedding leaving the front. The building is doing double duty. It was in an article in Model Railroader years ago.

Adding Tombstones and Grave Markers

Create a variety of tombstones using XPS foam or resin castings. Include different shapes and sizes to represent various eras. Weather them to look old and worn:

  • Inscribe dates and simple designs
  • Use wood filler to add texture
  • Paint with grays and add washes to enhance details[2]

As you will see below the Tombstones I used are a kit that came from Woodland Scenics. The tombstones are glued to the base using Elmers white glue. The next step was to sprinkel grass throughout the grave sites thinly then to add clumps to show weeds.

Vegetation and Scenery

This material has been purchased butg has not been completed to date. I am currently working on getting this completed.

Add trees, bushes, and ground cover to create a realistic environment:

  • Use twisted wire covered with foliage material for gnarly old trees
  • Add moss and ivy to tombstones and the church walls
  • Create patches of longer grass in less-tended areas
  • Include small details like fallen leaves or wildflowers[1][2]

The Cemetery Path

My path will come down the center, the path will be scale gravel grass will be sprinkled around the tombstones.

Create a winding path through the cemetery using fine gravel or sand. This adds visual interest and helps define different areas of the scene.

Fencing or Walls

As shown in the video above the stone wall is around the base and a shrub wall will be above the stone wall.

Surround your cemetery with a low stone wall or wrought iron fence. This helps frame the scene and adds to the historical atmosphere[2].

Painting and Weathering

Use a combination of craft paints and weathering techniques to bring your scene to life:

  • Paint the church and tombstones in various shades of gray and brown
  • Apply washes to enhance details and create a weathered look
  • Use dry brushing to highlight raised areas
  • Add subtle green tones to represent moss and lichen[2]

Adding Final Details

Incorporate small elements to enhance the realism:

  • Place miniature candles or flowers near some graves
  • Add a few scattered leaves on the ground
  • Include a small bench or two for visitors
  • Consider adding a few carefully placed figures to bring the scene to life[5]

Lighting (Optional)

For added atmosphere, consider incorporating subtle lighting:

  • Use small LEDs to create a soft glow from church windows
  • Add a few “candles” near graves for a somber effect

Conclusion

Creating a church cemetery diorama allows you to capture a serene yet slightly eerie atmosphere in a compact space. Focus on weathering, vegetation, and small details to bring your scene to life. With patience and attention to detail, you can create a stunning miniature world that tells a story of history, remembrance, and the passage of time.

Remember, the key to a successful diorama is in the details and the atmosphere it evokes. Take your time, experiment with different techniques, and most importantly, enjoy the creative process of bringing this miniature world to life.

To add to the slightly eerie atmosphere I have the Grim Reaper walking in the Cemetery.

I will update this article as I complete the diorama.

Citations:
[1] https://www.youtube.com/watch?v=xXW9huBTfNg
[2] https://daggerandbrush.de/unrested-souls-how-to-make-a-graveyard-themed-diorama-base-part-i/
[3] https://www.etsy.com/market/cemetery_diorama
[4] https://www.pinterest.com/pin/church-cemetery–12173861478666003/
[5] https://www.reddit.com/r/dioramas/comments/1gdo6ab/164_old_church_with_cemetery/
[6] https://www.etsy.com/market/graveyard_diorama
[7] https://www.pinterest.com/pin/778770960601616311/
[8] https://www.youtube.com/watch?v=S8z4iASx3zY

Model Railroading: A Great Family-Friendly Hobby (Updated for 2025)

Model railroading is a hobby that has captivated people of all ages for generations. This unique craft allows enthusiasts, from novices to professionals, to develop small-scale railway systems complete with miniature trains and intricate scenery. With no skill or age restrictions, it’s an ideal activity for bringing families together. Let’s explore why model railroading remains a fantastic family-friendly hobby in 2025.

Everyone Can Participate

One of the most appealing aspects of model railroading is its inclusivity. Individuals of all ages, from young children to seniors, can participate and find enjoyment. Building a model railroad fosters teamwork and collaboration within the family. Each member can contribute to different aspects of the project, whether it’s designing the layout, constructing buildings, laying track, or adding scenery. This shared effort creates a sense of accomplishment and strengthens family bonds.

Educational Value

Model railroading offers significant educational opportunities. The hobby encompasses various subjects, including history, engineering, and design. Researching prototype railroads and their historical context deepens knowledge of transportation history and technological advancements. Constructing the model railroad itself involves practical engineering skills such as electrical wiring, track design, and spatial planning. These hands-on activities encourage problem-solving, critical thinking, and creativity.

Therapeutic Value

Beyond its educational benefits, model railroading can also be incredibly therapeutic. The hobby provides a means of stress relief and relaxation. The focus and concentration required in model railroading can help individuals detach from daily worries and immerse themselves in a positive and engaging activity. The creative process of designing and building a miniature world can be deeply satisfying, fostering a sense of accomplishment and well-being.

Endless Possibilities

Model railroading offers endless possibilities for customization and creativity. Enthusiasts can create their own unique worlds, designing layouts that reflect their personal interests and preferences. The choice of era, location, and type of trains allows for endless variation. Adding scenery, buildings, and other details allows for further personalization, making each model railroad a one-of-a-kind creation.

Long-Lasting Hobby

Model railroading is a hobby that can span a lifetime. Many enthusiasts begin their journey in childhood and continue to enjoy the hobby throughout their lives. Model railroading creates lasting memories and provides an opportunity to pass on a cherished tradition to future generations. Additionally, the hobby fosters connections with other enthusiasts through clubs, online forums, and model railroad shows, creating a supportive community of like-minded individuals.

What’s New in 2025?

  • Digital Command Control (DCC) is More Accessible: DCC systems are more user-friendly and affordable, making it easier for families to control multiple trains independently and add sound effects to their layouts.
  • 3D Printing Revolutionizes Customization: 3D printers have become more accessible, allowing modelers to create custom parts, buildings, and details that were previously difficult or impossible to find.
  • Augmented Reality (AR) Integration: New AR apps allow users to overlay virtual scenery and details onto their physical layouts, creating a blended reality experience that enhances immersion and realism.
  • Focus on Sustainability: There’s growing interest in using sustainable materials and practices in model railroading, such as recycled cardboard, biodegradable ground cover, and energy-efficient LED lighting.
  • Emphasis on Realistic Operations: More modelers are focusing on replicating real-world railroad operations, including switching maneuvers, freight car routing, and timetable-based operation.

Conclusion

In conclusion, model railroading remains a rewarding and family-friendly hobby in 2025. It provides opportunities for learning, creativity, relaxation, and connection. With its endless possibilities and long-lasting appeal, model railroading is sure to provide hours of entertainment and enjoyment for families for years to come. Now is the perfect time to gather your family, spark your imagination, and embark on the exciting journey of building your own miniature world. The innovative technologies and techniques available today make it easier than ever to create a truly immersive and engaging model railroad experience.

Citations:
[1] https://stanshobbiesandinterests.com/2023/09/18/model-railroading-a-great-family-friendly-hobby/


The Best Christmas Gifts for the Novice Model Railroader

The holiday season is a magical time, especially for families who love model railroading. If you or someone in your family is a novice model railroader, Christmas is the perfect opportunity to enhance the hobby with thoughtful gifts. Whether you’re looking for starter sets, accessories, or tools, this guide will help you find the best Christmas gifts that will inspire creativity and joy in your model railroad journey.

1. Starter Train Sets

Bachmann N 24028 Thomas with Annie and Clarabel Train Set

For young beginners or those new to the hobby, a starter train set is an excellent gift. The Bachmann N Scale Thomas with Annie and Clarabel Train Set is a delightful choice. It includes:

  • Thomas the Tank Engine
  • Annie and Clarabel coaches
  • A circle of nickel silver E-Z Track
  • A power pack and speed controller
  • An illustrated instruction manual

This set is perfect for introducing children to model trains and can be easily expanded as their interests grow.

Lionel HO Santa Fe Cajon Flyer Train Set

For those who prefer a more traditional train experience, the Lionel HO Santa Fe Cajon Flyer Train Set offers a great introduction to model railroading. This set features:

  • A beautifully detailed locomotive
  • Matching cars that evoke the historic Santa Fe railroad
  • Easy-to-use track components

It’s not only budget-friendly but also ideal for both kids and adults who appreciate the history of railroads.

2. Christmas-Themed Train Sets

Lionel Polar Express Train Set

Nothing says Christmas quite like a train running around the tree! The Lionel Polar Express Train Set captures the magic of the beloved holiday movie. This O gauge set includes:

  • A steam locomotive with sound effects
  • Passenger cars that resemble those from the film
  • Tracks that can be easily assembled into a circle

This set can become a cherished holiday tradition, bringing joy year after year. Plus, it’s expandable—add more cars or track pieces each Christmas!

Bachmann Christmas Express Train Set

Another festive option is the Bachmann Christmas Express Train Set, which features:

  • A colorful locomotive adorned with holiday decorations
  • Several festive cars filled with presents and seasonal cheer
  • A simple track layout perfect for under the tree

This set is great for families looking to create a winter wonderland scene during the holidays.

3. Accessories and Add-ons

As your novice model railroader gains confidence, accessories can enhance their layout significantly:

Locomotive Rollers

These handy tools allow modelers to test and tune their locomotives without needing to run them on a complex layout. Locomotive rollers help identify performance issues and let users unleash their trains’ full potential without worrying about derailing.

Scenery Kits

Adding scenery brings layouts to life! Consider gifting scenery kits that include trees, buildings, figures, and other elements. These kits can help novice railroaders create realistic landscapes that enhance their train operations.

Track Expansion Packs

Once your novice has their starter set up and running, they’ll likely want to expand their layout. Look for track expansion packs compatible with their existing set. These packs can add curves, switches, and straight sections to create more complex layouts.

4. Tools for Model Railroading

Having the right tools can make all the difference in building and maintaining a model railroad:

Basic Tool Kit

A basic tool kit should include:

  • Wire cutters
  • Pliers
  • Screwdrivers (both flathead and Phillips)
  • A hobby knife for precise cutting

These tools will help beginners assemble tracks, make repairs, and customize their layouts.

Track Cleaning Supplies

Keeping tracks clean is essential for smooth operation. Consider gifting track cleaning supplies like cleaning erasers or track cleaning cars that automatically clean as they run along the rails.

5. Books and Resources

For those eager to learn more about model railroading, books are invaluable resources:

How-To Books

Look for beginner-friendly how-to books that cover topics such as scenery building, electrical wiring, or layout design. These books provide step-by-step instructions and helpful tips that can inspire creativity.

Magazines

Subscriptions to model railroading magazines can keep novices updated on trends, techniques, and new products in the hobby. Popular titles include “Model Railroader” and “Railroad Model Craftsman.”

6. Gift Certificates

If you’re unsure about what specific items your novice model railroader may want or need, consider giving a gift certificate to a local hobby shop or an online retailer specializing in model trains. This allows them to choose exactly what they want while still feeling appreciated.

7. Community Involvement

Encouraging participation in local model railroading clubs or events can also be an excellent gift idea:

Club Memberships

Many areas have clubs where enthusiasts gather to share ideas, work on projects together, or participate in exhibitions. Memberships often come with benefits such as discounts on products or access to exclusive events.

Train Shows

Tickets to local train shows provide opportunities to see impressive layouts up close, meet fellow enthusiasts, and purchase unique items not found in stores.

Conclusion

The holiday season is an ideal time to introduce someone new to the wonderful world of model railroading or enhance an existing hobbyist’s collection. With thoughtful gifts ranging from starter sets like the Bachmann Thomas set or Lionel Polar Express to accessories like locomotive rollers and scenery kits, there’s something for every novice model railroader.

By choosing gifts that inspire creativity and encourage exploration within this fulfilling hobby, you’ll be helping create lasting memories during this festive season and beyond. So whether it’s adding a train under the tree or expanding an existing layout over time—model railroading offers endless possibilities for fun! Happy holidays and happy railroading!

Citations:
[1] https://blog.modeltrainstuff.com/gifts-for-model-train-enthusiasts/
[2] https://www.reddit.com/r/modeltrains/comments/z8vxzy/recommendations_for_a_christmas_tree_train_that/
[3] https://www.walthers.com/blog/holiday-gift-guide-railroad-modelers
[4] https://www.trainsetsonly.com/christmas-train-sets.html
[5] https://uk.hornby.com/community/blog-and-news/gift-guide/best-christmas-gifts-train-lovers
[6] https://www.modeltrainforum.com/threads/best-christmas-train-for-under-the-tree-ho-or-o.5623/
[7] https://blog.modeltrainstuff.com/the-ultimate-railroading-beginner-gift-guide/
[8] http://www.lionel.com/categories/holiday-memories

Deciding a Track Plan Before Building Your Model Railroad Layout

Introduction:
As we enter 2025, the world of model railroading continues to evolve, offering enthusiasts new and exciting ways to plan and build their layouts. Whether you’re a seasoned hobbyist or just starting out, proper planning remains the cornerstone of a successful model railroad. This guide will walk you through the latest trends, tools, and considerations for planning your model railroad layout in 2024, with a focus on making the information both informative and entertaining.

  1. Embracing Digital Planning Tools:
    The digital revolution has transformed how we approach layout planning. In 2024, software like AnyRail, SCARM, and CADRail have become more sophisticated, offering realistic 3D rendering and even virtual reality previews of your layout. These tools allow you to experiment with different track configurations, elevations, and scenery without lifting a finger in the physical world.

Fun Fact: Did you know that some software can even simulate train operations on your virtual layout? It’s like playing a video game of your own design!

  1. Space Optimization:
    With urban living spaces becoming more compact, there’s a growing trend towards efficient use of space in model railroading. The “Model Railroad Planning 2024” guide showcases several innovative designs for small spaces, including modular layouts that can be easily stored when not in use.

Tip: Think vertically! Multi-level layouts can maximize your available space and add exciting operational possibilities.

  1. Multi-Scale Layouts:
    A fascinating trend in 2024 is the rise of multi-scale layouts. These innovative designs incorporate different scales within the same layout, creating forced perspective and the illusion of greater depth and distance. For example, using N scale in the background transitioning to HO scale in the foreground.

Imagine This: You could create a layout where a bustling city in N scale gives way to a detailed rural scene in HO scale, all in the same space!

  1. Eco-Friendly Considerations:
    Environmental consciousness has reached the model railroading world. Consider incorporating sustainable materials and energy-efficient LED lighting solutions into your plan from the outset.

Green Tip: Repurpose household items for scenery. Old sponges can make great bushes, and used coffee grounds can simulate soil!

  1. Interactive Elements:
    Modern layouts are becoming more interactive. Plan for areas where you can incorporate sound effects, working signals, and even smartphone-controlled turnouts and accessories. These features add a new dimension of engagement to your railroad.

Tech Talk: Some modelers are experimenting with augmented reality (AR) to overlay digital information onto their physical layouts. The future is now!

  1. Prototypical Accuracy:
    With access to vast online resources, there’s a renewed focus on creating historically accurate layouts. When planning, research the specific era and location you’re modeling to ensure authenticity in your track plan and scenery choices.

History Buff Alert: Dive deep into railroad archives and historical societies for inspiration. You might uncover fascinating details to incorporate into your layout!

  1. Modular Design:
    The modular approach to layout building has gained significant popularity. Planning your layout in modules allows for easier construction, transportation, and modification. It’s also great for those who might need to move their layout in the future.

Bonus: Modular designs make it easier to collaborate with other enthusiasts. Imagine connecting your modules with friends for a mega layout!

  1. Operations-Focused Planning:
    There’s a growing interest in operations-based layouts. When planning, consider how your trains will run realistically, incorporating industries, switching puzzles, and timetables into your design.

Game On: Treat your layout planning like a strategy game. How can you create the most engaging and challenging operations for yourself and fellow enthusiasts?

  1. Blending Eras:
    A creative trend in 2024 is the concept of blending different historical eras within the same layout. This allows for a diverse range of rolling stock and architectural styles, adding visual interest and storytelling opportunities.

Time Travel Tip: Create “transition zones” where one era seamlessly blends into another. It’s like having a miniature time machine on your layout!

Building your model Railroad

  1. Essential Tools for Planning:
    Don’t forget the basics! While digital tools are great, sometimes you can’t beat a good old-fashioned ruler, square, and pencil for sketching out ideas. The NMRA (National Model Railroad Association) recommends having a standard ruler or tape measure, a model scale ruler, and a square in your toolbox.

Pro Tip: Invest in a thin beam machinist square for precise 90-degree markings on your benchwork.

Conclusion:
As we move through 2024, the possibilities for model railroad layouts are more exciting than ever. By incorporating these modern trends, technologies, and tools into your planning process, you can create a layout that’s not only visually stunning but also engaging, efficient, and future-proof. Remember, the key to a great model railroad is thorough planning – take your time, explore your options, and most importantly, enjoy the creative process!

Final Thought: Model railroading isn’t just a hobby; it’s a journey through time, space, and imagination. So grab your tools, fire up your planning software, and let’s build something amazing together!

For Model Railroad Supplies check amazon.com

Citations:
[1] https://www.trains.com/mrr/videos-photos/videos/how-to/track-planning/track-planning-software/
[2] https://www.scarm.info/index.php
[3] https://shop.trains.com/products/model-railroad-planning-2024
[4] https://www.zinio.com/publications/model-railroad-planning/7052
[5] https://www.nmra.org/beginners-guide-part-11-tools
[6] https://www.semrush.com/blog/article-writing/
[7] https://ictrainsandhobbies.com/products/kalmbach-model-railroad-planning-2024
[8] https://www.linkedin.com/advice/3/how-can-you-make-your-writing-both-informative-3bh3f

How to Lay Track on a Model Train Layout: A Guide for Novices

Model railroading is a wonderful hobby that combines creativity, engineering, and a love for trains. One of the most important steps in building your model train layout is laying the track. Properly laid track ensures smooth and reliable operation of your trains and adds to the overall realism of your layout. For novices, this task can seem daunting, but with the right guidance, it can be a manageable and enjoyable project. In this article, we’ll walk you through the essential steps to lay track on your model train layout.

Understanding the Basics

Before we dive into the step-by-step process, it’s important to understand some basic concepts related to model train track:

1. Types of Track

There are two main types of model train track: sectional track and flex track.

  • Sectional Track: Comes in fixed lengths and curves. It is easy to assemble and is ideal for beginners.
  • Flex Track: Comes in long, flexible sections that can be bent and cut to fit any layout design. It offers greater flexibility and allows for more realistic track arrangements.

2. Track Gauges

Track gauge refers to the distance between the rails. Common gauges include:

  • HO Scale (1:87): One of the most popular scales, suitable for detailed layouts.
  • N Scale (1:160): Smaller than HO, ideal for limited spaces.
  • O Scale (1:48): Larger than HO, provides more detail but requires more space.

3. Track Bed

The track bed is the foundation on which the track is laid. It provides stability and helps reduce noise. Common materials for track beds include cork, foam, and rubber.

Step-by-Step Guide to Laying Track

Step 1: Plan Your Layout

Before you start laying track, it’s crucial to plan your layout. Draw a detailed track plan, including all tracks, turnouts, and any accessories you plan to use. Consider the following:

  • Space: Measure the area where you will set up your layout.
  • Scale: Choose the scale that best fits your space and preferences.
  • Track Plan: Decide on the type of track plan (e.g., continuous loop, point-to-point, switching layout).

See my article on Factors to consider on your Track Plan

Step 2: Prepare the Base

The base of your layout is the surface on which you will lay the track. Common materials for the base include plywood, foam board, and MDF (medium-density fiberboard). Follow these steps to prepare the base:

  1. Cut the Base: Cut the base material to the desired size and shape.
  2. Support the Base: Build a sturdy frame or table to support the base. Ensure it is level and stable.
  3. Mark the Track Plan: Transfer your track plan onto the base using a pencil or marker. This will serve as a guide when laying the track.

Step 3: Install the Track Bed

The track bed provides a stable foundation for the track and helps reduce noise. Follow these steps to install the track bed:

  1. Cut the Track Bed: Cut the track bed material (e.g., cork or foam) to match the shape of your track plan.
  2. Glue the Track Bed: Apply a thin layer of adhesive (e.g., white glue or contact cement) to the base and press the track bed into place. Allow the adhesive to dry completely.
  3. Smooth the Track Bed: Ensure the track bed is smooth and level. Sand any rough edges if necessary.

Step 4: Lay the Track

Now it’s time to lay the track on the track bed. Follow these steps:

  1. Position the Track: Place the track sections on the track bed according to your track plan. Use track joiners (rail joiners) to connect the sections.
  2. Secure the Track: Once you are satisfied with the track placement, secure the track to the track bed using track nails or adhesive. If using track nails, be careful not to bend the rails.
  3. Cut Flex Track: If you are using flex track, cut it to the desired length using a rail cutter. Bend the flex track to fit your layout and secure it in place.
  4. Install Turnouts: If your layout includes turnouts (switches), install them according to the manufacturer’s instructions. Ensure they operate smoothly and align with the rest of the track.

Step 5: Wire the Track

Proper wiring is essential for smooth operation of your trains. Follow these steps to wire the track:

  1. Power Supply: Connect the power supply (DC or DCC) to the track. For DC layouts, connect the power pack to the track using feeder wires. For DCC layouts, connect the command station to the track.
  2. Feeder Wires: Install feeder wires at regular intervals to ensure consistent power distribution. Solder the feeder wires to the rails and connect them to the bus wires running underneath the layout.
  3. Test the Wiring: Use a multimeter to check for proper voltage and continuity. Ensure there are no short circuits or loose connections.

See my article on tips on How to Wire your Layout

Step 6: Test the Track

Before you start running trains, it’s important to test the track to ensure smooth operation. Follow these steps:

  1. Run a Test Train: Run a test train slowly around the entire layout. Check for any rough spots, derailments, or electrical issues.
  2. Adjust the Track: Make any necessary adjustments to the track alignment, elevation, or wiring. Ensure all turnouts operate smoothly.
  3. Clean the Track: Clean the track using a track cleaning eraser or isopropyl alcohol to remove any dirt or debris.

Step 7: Add Ballast

Ballasting the track adds realism and helps secure the track in place. Follow these steps to add ballast:

  1. Apply the Ballast: Spread the ballast evenly along the track using a small spoon or brush. Ensure the ballast covers the track bed and fills the space between the ties (sleepers).
  2. Shape the Ballast: Use a small brush to shape the ballast and remove any excess. Ensure the ballast is level and does not interfere with the rails.
  3. Glue the Ballast: Apply a mixture of white glue and water (50:50 ratio) to the ballast using a dropper or spray bottle. Allow the glue to dry completely.

Step 8: Add Scenery and Details

Once the track is laid and ballasted, you can add scenery and details to enhance the realism of your layout. Consider adding:

  • Buildings and Structures: Add stations, factories, houses, and other structures to create a realistic scene.
  • Vegetation: Use ground foam, static grass, and trees to add greenery to your layout.
  • Roads and Pathways: Create roads and pathways using paint, plaster, or pre-made road materials.
  • Figures and Vehicles: Add figures, vehicles, and other details to bring your layout to life.

For Model Railroad Scenery Supplies check this SITE

Conclusion

Laying track on a model train layout is a crucial step in creating a realistic and enjoyable model railroad. By following the steps outlined in this guide, you can ensure that your track is properly laid, wired, and tested for smooth operation. Remember, patience and attention to detail are key to a successful track-laying project. With practice and experience, you’ll become more confident in your skills and enjoy the rewarding process of building your model train layout. Happy railroading!

Citations:
[1] https://www.youtube.com/watch?v=oJL8DZO5mks
[2] https://www.nmra.org/beginners-guide-part-2-layout-planning
[3] https://cs.trains.com/mrr/f/11/t/212570.aspx
[4] https://www.building-your-model-railroad.com/model-railroad-track-plans.html
[5] https://www.youtube.com/watch?v=rbPZkp8gaY0

Choosing the Right Track Type for Your Model Railroad on a Budget

Model railroading is a fun and creative hobby that can bring joy to the whole family. But it can also be expensive if you don’t plan carefully. One of the most important decisions you’ll make is choosing the right type of track for your layout. This decision can affect not only how your trains run but also how much money you spend. In this guide, we will help you understand the different types of model railroad tracks and how to choose the best one for your budget.

Understanding Track Types

There are two main types of model railroad tracks: sectional track and flex track. Each type has its own advantages and disadvantages, and the right choice depends on your needs and budget.

Sectional Track

Sectional track comes in fixed lengths and curves. Each piece snaps together easily, making it a good choice for beginners.

Pros:

  • Easy to Use: Simple to assemble, perfect for beginners.
  • Uniformity: Ensures consistent curves and straight sections.
  • Availability: Widely available and often included in starter sets.

Cons:

  • Limited Flexibility: You are limited to the shapes and sizes provided by the manufacturer.
  • Cost: Can become expensive if you need many pieces to create a complex layout.

Budget Tips:

  • Look for bulk packs or second-hand options to save money.
  • Start with a basic set and add pieces as needed.

Flex Track

Flex track comes in long sections that can be bent and cut to fit any layout design. This gives you more flexibility in creating custom curves and layouts.

Pros:

  • Versatility: Can be shaped to fit any layout design.
  • Realism: Allows for more realistic track arrangements.
  • Cost-Effective: Fewer pieces needed to cover large areas.

Cons:

  • Skill Required: Requires cutting and shaping, which can be challenging for beginners.
  • Tools Needed: Additional tools like rail cutters and track gauges are necessary.

Budget Tips:

  • While the initial investment in tools may be higher, flex track can be more cost-effective in the long run.
  • Buy the longest sections of flex track you can afford to reduce the number of joints and save money.

Key Considerations for Choosing Track on a Budget

When deciding which type of track to use, consider the following factors:

  1. Available Space:
  • Measure the area where you plan to set up your layout.
  • Sectional track is good for smaller, simpler layouts.
  • Flex track is better for larger layouts with custom curves.
  1. Skill Level:
  • If you are a beginner, sectional track might be easier to start with.
  • If you are comfortable with cutting and shaping track, flex track offers more flexibility.
  1. Budget:
  • Sectional track can be more expensive over time if you need many pieces.
  • Flex track requires an initial investment in tools but can be cheaper in the long run.
  1. Realism:
  • Flex track allows for smoother curves and more realistic layouts.
  • Sectional track can look more “toy-like” with its fixed curves.

Tips for Saving Money

Here are some additional tips to help you save money on your model railroad track:

  1. Buy in Bulk:
  • Purchasing track in bulk can save you money. Look for deals on larger packs of track.
  1. Second-Hand Options:
  • Check online marketplaces, local hobby shops, and model railroad clubs for second-hand track. You can often find good deals on used track.
  1. Mix and Match:
  • Consider using a combination of sectional and flex track. Use sectional track for straight sections and simple curves, and flex track for custom curves and complex areas.
  1. Plan Ahead:
  • Use track planning software to design your layout before you start buying track. This will help you avoid buying unnecessary pieces and ensure you get the right amount of track for your layout.
  1. DIY Solutions:
  • For some parts of your layout, you can create your own solutions. For example, you can make your own roadbed from inexpensive materials instead of buying pre-made ones.

Find Track, guides for laying track and track plans HERE

Conclusion

Choosing the right track type for your model railroad on a budget involves careful planning and consideration. Both sectional and flex track have their advantages and disadvantages, and the best choice depends on your specific needs and budget. By understanding the pros and cons of each type and following our budget tips, you can create a fun and realistic model railroad layout without breaking the bank.

Remember, model railroading is a journey, and part of the fun is learning and experimenting along the way. Start with the basics, and as you gain experience, you can expand and improve your layout. Happy railroading!

Citations:
[1] https://cs.trains.com/mrr/f/11/t/30534.aspx
[2] https://ogrforum.ogaugerr.com/topic/3-rail-track-prices
[3] https://dccwiki.com/Flex_vs_sectional_track
[4] https://www.keymodelworld.com/article/which-sectional-track-system-choose-oo-gauge

Different types of Model Railroad Track Plans

As a model railroading enthusiast, one of the most exciting aspects of the hobby is designing and building your own layout. The track plan serves as the foundation for your entire layout, and choosing the right type can make a significant difference in the overall experience. In this article, we’ll explore the different types of model railroad track plans, their unique characteristics, and the factors to consider when selecting the best option for your family-friendly layout.

  1. Continuous Loop
    The continuous loop is perhaps the simplest and most beginner-friendly track plan. As the name suggests, it involves a single, continuous loop of track with no beginning or end. This design is ideal for those who are just starting out in the hobby or have limited space available. The continuous loop allows trains to run indefinitely without the need for complex operations or switching.

Advantages:

  • Easy to set up and operate
  • Suitable for small spaces
  • Ideal for young children or those new to the hobby

Disadvantages:

  • Can become monotonous over time
  • Limited operational possibilities
  1. Point-to-Point
    The point-to-point track plan is a more advanced design that features a defined starting point and endpoint. Trains run from one terminus to the other, allowing for more realistic operations and the simulation of long-distance routes. This type of layout often includes staging yards at each end, where trains can be stored and prepared for their next run.

Advantages:

  • Offers more operational possibilities
  • Simulates long-distance routes
  • Allows for more complex scenery and industries

Disadvantages:

  • Requires more space than a continuous loop
  • Staging yards can be challenging to incorporate
  1. Out-and-Back
    The out-and-back track plan is a variation of the point-to-point design, but with only one terminus. Trains depart from the starting point, travel along the mainline, and then return to the same terminus using the same track. This design can be particularly appealing for those who want to model a specific branch line or spur.

Advantages:

  • Offers a balance between simplicity and operational possibilities
  • Suitable for smaller spaces
  • Can model specific branch lines or spurs

Disadvantages:

  • Limited staging options
  • Trains must reverse direction at the terminus
  1. Switching or Shunting Layout
    A switching or shunting layout is designed specifically for realistic switching operations. These layouts typically feature multiple industries, sidings, and yards where trains can pick up and drop off cars. This type of layout is ideal for those who enjoy the intricacies of freight operations and want to recreate the complex movements of a busy rail yard or industrial area.

Advantages:

  • Offers highly realistic switching operations
  • Allows for detailed modeling of industries and rail facilities
  • Provides a challenging and engaging operating experience

Disadvantages:

  • Requires a significant amount of space
  • Can be complex to design and operate

For help finding a track plan LOOK HERE

  1. Modular Layout
    A modular layout is a unique approach that involves building the layout in separate, interconnected modules. Each module can be designed and constructed independently, allowing for greater flexibility and portability. Modular layouts are often used by model railroad clubs or for exhibition purposes, as they can be easily transported and assembled.

Advantages:

  • Highly flexible and portable
  • Allows for collaboration and sharing of modules
  • Can be expanded or reconfigured over time

Disadvantages:

  • Requires careful planning and coordination
  • Transitions between modules can be challenging
  • Limited space for large-scale scenery or industries

When choosing the right track plan for your family-friendly model railroad layout, it’s essential to consider several factors, including:

  1. Available Space: The amount of space you have available will play a significant role in determining the type of track plan you can accommodate. Continuous loops and out-and-back designs are better suited for smaller spaces, while point-to-point and switching layouts typically require more room.
  2. Operational Preferences: Consider the type of operations you and your family enjoy. If you prefer simple running and enjoy watching trains go around a loop, a continuous loop or out-and-back design might be the best choice. If you’re interested in more complex operations, such as switching or simulating long-distance routes, a point-to-point or switching layout might be more suitable.
  3. Skill Level: Some track plans, such as switching layouts or modular designs, can be more challenging to design and operate. If you’re a beginner or introducing the hobby to younger children, it might be best to start with a simpler track plan and gradually work your way up to more complex designs as your skills and interests develop.
  4. Portability: If you plan to move your layout or participate in exhibitions, a modular design might be the most practical option. Modular layouts can be easily disassembled, transported, and reassembled at a new location.
  5. Collaboration: If you plan to involve multiple family members or friends in the construction and operation of your layout, a modular design can be an excellent choice. Each person can work on their own module, and the modules can be combined to create a larger, collaborative layout.

Remember, there is no one-size-fits-all solution when it comes to model railroad track plans. The beauty of this hobby lies in its versatility and the ability to tailor your layout to your specific preferences and needs. Don’t be afraid to experiment and try different designs until you find the one that best suits your family’s interests and available space.

Look Here for help with your TRACK PLAN

In conclusion, choosing the right track plan is a crucial step in creating a model railroad layout that will provide endless hours of enjoyment for you and your family. Whether you opt for a simple continuous loop, a complex switching layout, or a modular design, the key is to select a plan that aligns with your goals, space constraints, and operational preferences. With careful planning and a willingness to explore different options, you can create a layout that not only looks stunning but also offers an engaging and rewarding experience for everyone involved.

For Model Railroad Supplies check amazon.com

Citations:
[1] https://www.youtube.com/watch?v=kZZuGz1SUDw
[2] https://www.trains.com/mrr/how-to/track-types-and-uses-a-beginners-guide/
[3] https://www.nmra.org/beginners-guide-part-4-laying-track
[4] https://www.trains.com/mrr/beginners/the-basics-of-model-railroad-track/
[5] https://midwestmodelrr.com/blog/the-different-types-of-model-railroad-layouts/