How to Wire a Model Train Layout: A Guide for Novices

This article is in response to a comment from Matthew, I hope this helps with your wiring project.

Model railroading is a fascinating and rewarding hobby that combines creativity, engineering, and a love for trains. One of the most crucial aspects of building a model train layout is wiring. Proper wiring ensures that your trains run smoothly and reliably, and it allows you to control various elements of your layout. For novices, wiring can seem daunting, but with the right guidance, it can be a manageable and even enjoyable task. In this article, we’ll walk you through the essential steps to wire your model train layout.

Understanding the Basics

Before diving into the wiring process, it’s essential to understand some basic concepts:

1. Power Supply

The power supply is the heart of your layout’s electrical system. It converts household electricity into a form that your trains can use. There are two main types of power supplies:
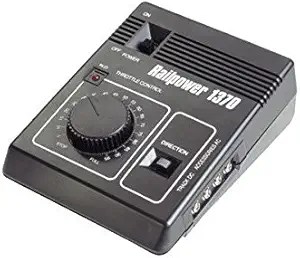
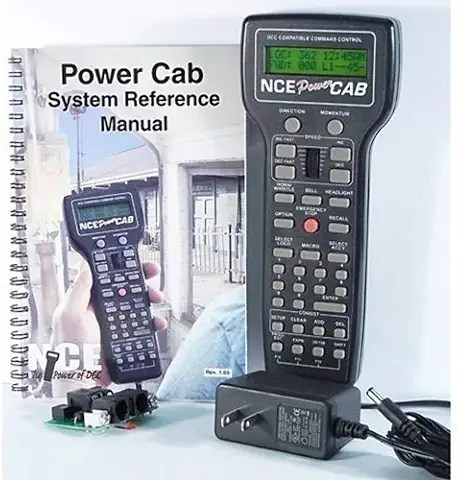
  • DCC (Digital Command Control): Modern layouts often use DCC, which allows for independent control of multiple trains on the same track. DCC systems send digital signals through the rails to control train functions. Power Cab DCC Starter Set NCE5240025

2. Track Wiring

Track wiring involves connecting the power supply to the rails so that the trains receive power. This is typically done using feeder wires and bus wires.

  • Feeder Wires: Short wires that connect the track to the bus wires.
  • Bus Wires: Long wires that run under the layout and distribute power from the power supply to the feeder wires.

3. Blocks and Sections

Dividing your layout into blocks or sections can help manage power distribution and control. Each block is an electrically isolated section of track with its own feeder wires.

4. Switches and Turnouts
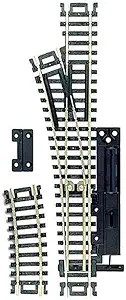
Switches (also known as turnouts) allow trains to change tracks. Wiring switches correctly is essential for smooth operation. HO Code 100 Manual Left-Hand Switch

Step-by-Step Guide to Wiring Your Model Train Layout

Step 1: Plan Your Layout

Before you start wiring, it’s crucial to plan your layout. Draw a detailed track plan, including all tracks, turnouts, and any accessories you plan to use. Identify where you will place the power supply and how you will divide the layout into blocks.

Step 2: Gather Your Materials

You’ll need the following materials for wiring your layout:

  • Power supply (DC or DCC)
  • Bus wires (typically 14-16 gauge)
  • Feeder wires (typically 20-22 gauge)
  • Rail joiners (insulated and non-insulated)
  • Terminal blocks or connectors – ( I prefer Suitcase connectors they work well)
  • Soldering iron and solder
  • Wire strippers and cutters
  • Electrical tape or heat shrink tubing
  • Multimeter (for testing)

Most of these items can be found in this article Must have accessories

Step 3:Install the Power Supply

Place your power supply in a convenient location where you can easily access it. If you’re using a DCC system, follow the manufacturer’s instructions for setting up the command station and connecting it to the power supply.

Step 4: Run the Bus Wires

Run the bus wires under your layout, following the path of your tracks. It’s a good idea to use color-coded wires (e.g., red for positive and black for negative) to avoid confusion. Secure the bus wires to the underside of your layout using cable clips or staples.

Step 5: Connect the Feeder Wires

Feeder wires connect the track to the bus wires, ensuring consistent power distribution. Here’s how to install feeder wires:

  1. Strip the Ends: Use wire strippers to remove about 1/4 inch of insulation from the ends of the feeder wires.
  2. Solder to the Track: Solder one end of the feeder wire to the rail. It’s best to solder the wire to the bottom or side of the rail to keep it hidden.
  3. Connect to the Bus Wires: Strip a small section of insulation from the bus wires and solder the other end of the feeder wire to the bus wire. Alternatively, you can use terminal blocks or connectors to make the connection.

Step 6: Divide the Layout into Blocks

Dividing your layout into blocks helps manage power distribution and control. To create blocks:

  1. Isolate the Sections: Use insulated rail joiners to separate the rails at the boundaries of each block.
  2. Install Block Feeder Wires: Run feeder wires from each block to the bus wires, ensuring that each block is independently powered.

Step 7: Wire the Switches and Turnouts

Wiring switches and turnouts correctly ensures smooth operation and prevents short circuits. Follow these steps:

  1. Power the Frog: If your turnouts have powered frogs (the moving part of the switch), connect a feeder wire to the frog and run it to a switch machine or relay.
  2. Control the Switch: Connect the switch machine or relay to your control panel or DCC system. This allows you to change the position of the turnout remotely.

Step 8: Test Your Wiring

Before running your trains, it’s essential to test your wiring to ensure everything is connected correctly. Use a multimeter to check for continuity and proper voltage at various points on the track. Look for any short circuits or areas with poor electrical contact.

Step 9: Troubleshoot Common Issues

If you encounter any issues, here are some common problems and solutions:

  • Short Circuits: Check for any metal objects or tools touching the rails. Ensure that insulated rail joiners are correctly installed at block boundaries.
  • Poor Electrical Contact: Clean the track and wheels of your trains. Ensure that all solder joints are secure and that feeder wires are properly connected.
  • Inconsistent Power: Check for loose connections in the bus and feeder wires. Ensure that the power supply is functioning correctly.

Step 10: Enjoy Your Layout

Once you’ve tested and verified your wiring, it’s time to enjoy your model train layout! Run your trains and experiment with different operations. As you gain experience, you can add more features and accessories to enhance your layout.

Model Railroad supplies and accessories

Tips for Successful Wiring

  1. Label Your Wires: Use labels or colored tape to identify different wires and their functions. This will make troubleshooting and future modifications easier.
  2. Keep It Neat: Organize your wires using cable clips, zip ties, or wire looms. A tidy wiring setup is easier to manage and less prone to issues.
  3. Document Your Work: Keep a wiring diagram or notes on your layout’s wiring. This will be invaluable for future reference and troubleshooting.
  4. Start Simple: If you’re new to wiring, start with a basic layout and gradually add more features as you become more comfortable with the process.
  5. Ask for Help: Don’t hesitate to seek advice from experienced model railroaders or online forums. The model railroading community is full of knowledgeable and helpful enthusiasts.

Conclusion

Wiring a model train layout may seem intimidating at first, but with careful planning and attention to detail, it can be a manageable and rewarding task. By following the steps outlined in this guide, you’ll be well on your way to creating a reliable and enjoyable model railroad layout. Remember, practice makes perfect, and each wiring project will build your skills and confidence. Happy railroading!

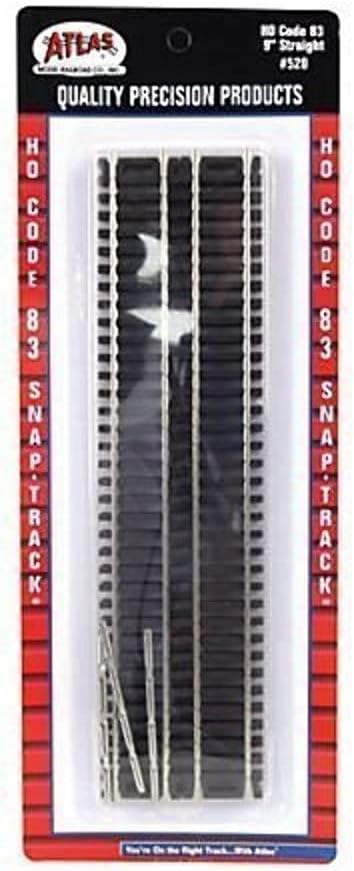
Choosing the Right Track Type for Your Model Railroad on a Budget

Model railroading is a fun and creative hobby that can bring joy to the whole family. But it can also be expensive if you don’t plan carefully. One of the most important decisions you’ll make is choosing the right type of track for your layout. This decision can affect not only how your trains run but also how much money you spend. In this guide, we will help you understand the different types of model railroad tracks and how to choose the best one for your budget.

Understanding Track Types

There are two main types of model railroad tracks: sectional track and flex track. Each type has its own advantages and disadvantages, and the right choice depends on your needs and budget.

Sectional Track

Sectional track comes in fixed lengths and curves. Each piece snaps together easily, making it a good choice for beginners.

Pros:

  • Easy to Use: Simple to assemble, perfect for beginners.
  • Uniformity: Ensures consistent curves and straight sections.
  • Availability: Widely available and often included in starter sets.

Cons:

  • Limited Flexibility: You are limited to the shapes and sizes provided by the manufacturer.
  • Cost: Can become expensive if you need many pieces to create a complex layout.

Budget Tips:

  • Look for bulk packs or second-hand options to save money.
  • Start with a basic set and add pieces as needed.

Flex Track

Flex track comes in long sections that can be bent and cut to fit any layout design. This gives you more flexibility in creating custom curves and layouts.

Pros:

  • Versatility: Can be shaped to fit any layout design.
  • Realism: Allows for more realistic track arrangements.
  • Cost-Effective: Fewer pieces needed to cover large areas.

Cons:

  • Skill Required: Requires cutting and shaping, which can be challenging for beginners.
  • Tools Needed: Additional tools like rail cutters and track gauges are necessary.

Budget Tips:

  • While the initial investment in tools may be higher, flex track can be more cost-effective in the long run.
  • Buy the longest sections of flex track you can afford to reduce the number of joints and save money.

Key Considerations for Choosing Track on a Budget

When deciding which type of track to use, consider the following factors:

  1. Available Space:
  • Measure the area where you plan to set up your layout.
  • Sectional track is good for smaller, simpler layouts.
  • Flex track is better for larger layouts with custom curves.
  1. Skill Level:
  • If you are a beginner, sectional track might be easier to start with.
  • If you are comfortable with cutting and shaping track, flex track offers more flexibility.
  1. Budget:
  • Sectional track can be more expensive over time if you need many pieces.
  • Flex track requires an initial investment in tools but can be cheaper in the long run.
  1. Realism:
  • Flex track allows for smoother curves and more realistic layouts.
  • Sectional track can look more “toy-like” with its fixed curves.

Tips for Saving Money

Here are some additional tips to help you save money on your model railroad track:

  1. Buy in Bulk:
  • Purchasing track in bulk can save you money. Look for deals on larger packs of track.
  1. Second-Hand Options:
  • Check online marketplaces, local hobby shops, and model railroad clubs for second-hand track. You can often find good deals on used track.
  1. Mix and Match:
  • Consider using a combination of sectional and flex track. Use sectional track for straight sections and simple curves, and flex track for custom curves and complex areas.
  1. Plan Ahead:
  • Use track planning software to design your layout before you start buying track. This will help you avoid buying unnecessary pieces and ensure you get the right amount of track for your layout.
  1. DIY Solutions:
  • For some parts of your layout, you can create your own solutions. For example, you can make your own roadbed from inexpensive materials instead of buying pre-made ones.

Find Track, guides for laying track and track plans HERE

Conclusion

Choosing the right track type for your model railroad on a budget involves careful planning and consideration. Both sectional and flex track have their advantages and disadvantages, and the best choice depends on your specific needs and budget. By understanding the pros and cons of each type and following our budget tips, you can create a fun and realistic model railroad layout without breaking the bank.

Remember, model railroading is a journey, and part of the fun is learning and experimenting along the way. Start with the basics, and as you gain experience, you can expand and improve your layout. Happy railroading!

Citations:
[1] https://cs.trains.com/mrr/f/11/t/30534.aspx
[2] https://ogrforum.ogaugerr.com/topic/3-rail-track-prices
[3] https://dccwiki.com/Flex_vs_sectional_track
[4] https://www.keymodelworld.com/article/which-sectional-track-system-choose-oo-gauge

Must-Have Accessories for a Family-Friendly Model Railroad Setup

Model railroading is a wonderful hobby that can bring families together, offering a blend of creativity, engineering, and fun. To make the most out of your model railroad setup, especially if you’re just starting out, it’s important to equip yourself with the right accessories. These accessories not only enhance the realism and functionality of your layout but also make the hobby more enjoyable for everyone involved. Here are some must-have accessories for a family-friendly model railroad setup in 2024.

1. Basic Tool Kit

A basic tool kit is essential for any model railroader, novice or experienced. It helps in assembling, maintaining, and troubleshooting your layout. Here are some key tools you should include:

  • Hobby Knife: For cutting and trimming materials.
  • Small Screwdrivers: Both flathead and Phillips for various screws.
  • Needle-Nose Pliers: For handling small parts and wires.
  • Wire Strippers/Cutters: Essential for working with electrical components.
  • Tweezers: For placing small details and parts.
  • Ruler and Measuring Tape: For accurate measurements.

These tools are fundamental and will be used frequently as you build and maintain your layout.

2. Track Cleaning Kit

Keeping your tracks clean is crucial for smooth operation. Dust and dirt can cause poor electrical contact and derailments. A basic track cleaning kit should include:

  • Track Cleaning Eraser: A specialized eraser for removing grime from the rails.
  • Isopropyl Alcohol: For cleaning the tracks without leaving residue.
  • Lint-Free Cloths: To wipe down the tracks after cleaning.

Regular cleaning ensures that your trains run smoothly and reduces the need for more extensive maintenance.

3. Digital Command Control (DCC) System

A DCC system allows you to control multiple trains independently on the same track, adding a layer of realism and excitement to your layout. For beginners, a user-friendly DCC starter set is ideal. Look for sets that include:

  • Command Station: The brain of the DCC system.
  • Power Supply: To provide the necessary power for your trains.
  • Handheld Throttle: For controlling the speed and direction of your trains.

Brands like Digitrax, NCE, and ESU offer reliable starter sets that are expandable as your layout grows.

4. Scenery Materials

Creating realistic scenery is one of the most enjoyable aspects of model railroading. Basic scenery materials can transform your layout from a simple track to a miniature world. Consider starting with:

  • Ground Foam: Available in various colors to simulate grass, dirt, and other ground covers.
  • Static Grass Applicator: For creating realistic grass effects.
  • Trees and Shrubs: Pre-made or kits that you can assemble and paint.
  • Scenic Cement: To glue down your scenery materials.

These materials will help you create a visually stunning layout that captures the imagination.

5. LED Lighting Kit

Proper lighting can make a significant difference in the appearance of your layout. LED lighting kits are energy-efficient and long-lasting. Look for kits that include:

  • Flexible LED Strips: For illuminating large areas.
  • Individual LEDs: For lighting buildings and specific scenes.
  • Power Supply and Connectors: To set up your lighting system.

LED lighting can simulate different times of day and add a dynamic element to your layout.

6. Rolling Stock and Locomotives

A variety of rolling stock and locomotives will keep your layout interesting and allow for different types of operations. When starting, consider:

  • Freight Cars: Boxcars, tank cars, and flatcars for hauling goods.
  • Passenger Cars: For simulating passenger services.
  • Locomotives: Both steam and diesel engines to add variety.

Look for high-quality models that run smoothly and are easy to maintain.

7. Buildings and Structures

Adding buildings and structures to your layout enhances realism and provides context for your trains. Start with a few key structures:

  • Railroad Station: A central hub for your layout.
  • Industrial Buildings: Factories, warehouses, and other facilities.
  • Residential Buildings: Houses and apartments to create a town or city scene.
  • Bridges and Tunnels: For added complexity and visual interest.

Kits are available in various scales and levels of detail, allowing you to choose what best fits your layout and skill level.

8. Coupler Height Gauge

Ensuring that your couplers are at the correct height is crucial for reliable operation. A coupler height gauge helps you check and adjust the couplers on your rolling stock. Brands like Kadee offer gauges for different scales, ensuring compatibility with your setup. Kadee

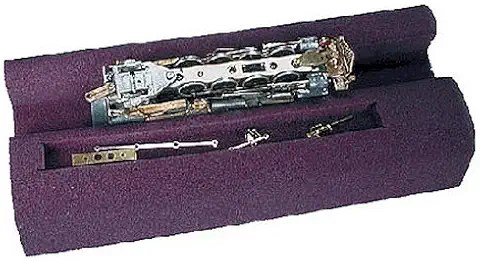
9. Foam Cradle

A foam cradle is a simple yet invaluable accessory for holding your locomotives and rolling stock securely while you work on them. It prevents damage to delicate parts and makes maintenance tasks easier.

10. Weathering Supplies

Weathering adds realism to your models by simulating the effects of age and use. Basic weathering supplies include:

  • Weathering Powders: In various colors to create dirt, rust, and grime effects.
  • Fine Brushes: For applying powders and paints.
  • Matte Clear Coat: To seal the weathering and protect the finish.

Weathering can be as simple or as detailed as you like, and it adds a unique touch to your models.

11. Essential Books and Guides

Having a few good books and guides on hand can provide valuable information and inspiration. Consider starting with:

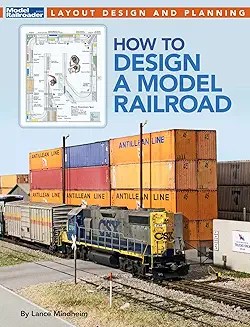
  • “Starter Track Plans for Model Railroaders” by Kent J. Johnson: Offers a variety of track plans to suit different spaces and skill levels.
  • “Model Railroading: A Family Guide” by Bruce C. Greenberg: A comprehensive guide that covers all aspects of the hobby.
  • “The Complete Book of Model Railroading” by David Sutton: A classic reference book with detailed information on building and operating layouts.

These resources will help you learn the basics and provide ideas for expanding your layout.

Conclusion

Building a family-friendly model railroad setup is a rewarding and enjoyable hobby that can bring generations together. By equipping yourself with these must-have accessories, you’ll be well on your way to creating a layout that is both fun and realistic. Remember, the key to a successful model railroad is to start with the basics and gradually expand your collection as your skills and interests grow. Happy railroading!
Citations:
[1] https://toytooth.com/index.php?product_id=1617309&route=product%2Fproduct
[2] https://www.amazon.com/CityBuilder-Gauge-7mm-Railroad-Cardboard/dp/B00NXNWJEQ?psc=1&smid=AV83ANFWMW4VP
[3] https://www.etsy.com/listing/1194765654/scenic-model-railway-layout-made-to?gpla=1
[4] https://modelrailwaytechniques.com/benchworkstore/
[5] https://www.walthers.com/william-s-country-store-kit
[6] http://www.hobbylinc.com/bar-mills-potters-pub-kit-ho-scale-model-railroad-building-1440
[7] https://www.etsy.com/listing/1522850368/realistic-scenic-model-railway-layout?gpla=1
[8] https://www.walmart.com/ip/Starter-Track-Plans-for-Model-Railroaders-9780890248317/17131821?selectedSellerId=0&wmlspartner=wlpa
[9] https://www.trains.com/mrr/how-to/essential-tools-for-model-railroaders/
[10] https://www.youtube.com/watch?v=BkSPl7SSWbY
[11] https://www.amazon.com/Model-railroading-family-Bruce-Greenberg/dp/0135861497
[12] https://familygardentrains.com/primer/kids.htm
[13] https://forum.mrhmag.com/post/kids-and-model-railroading-12190242

Top Accessories for Model Railroading in 2024

As an expert in model railroading, I’m excited to share with you the top 7 accessories that every novice enthusiast should consider for their hobby in 2024. These accessories will enhance your model railroading experience, improve the realism of your layouts, and make your hobby more enjoyable overall. Let’s dive into the must-have items for the coming year!

  1. Digital Command Control (DCC) System

In 2024, Digital Command Control (DCC) systems continue to be at the forefront of model railroading technology. A DCC system allows you to control multiple trains independently on the same track, offering a more realistic and engaging experience. For novices, I recommend starting with a user-friendly DCC starter set, which typically includes:

  • A DCC command station
  • A power supply
  • At least one handheld throttle

Look for systems from reputable brands like Digitrax, NCE, or ESU. These starter sets are expandable, allowing you to add more features as your skills and layout grow. With DCC, you’ll be able to control train speed, direction, lighting, and even sound effects with precision.

  1. LED Lighting Kit

Proper lighting can transform your model railroad layout from good to great. In 2024, LED lighting kits are more affordable and versatile than ever. A good LED lighting kit for your layout should include:

  • Flexible LED strip lights
  • A power supply
  • Connectors and mounting hardware

Look for kits that offer different color temperatures, allowing you to simulate various times of day or different lighting conditions. Some advanced kits even offer programmable RGB LEDs, enabling you to create dynamic lighting effects. Woodland Scenics.

  1. Weathering Powders and Tools

Weathering is the process of making your models look more realistic by simulating the effects of age, use, and environmental exposure. In 2024, weathering powders and tools are essential accessories for creating authentic-looking models. A basic weathering kit should include:

  • A set of weathering powders in various earth tones
  • Fine brushes for application
  • A sealing spray to fix the weathering in place

Brands like AK Interactive and Vallejo offer excellent weathering products. As you gain experience, you can expand your weathering toolkit to include specialized powders, washes, and pigments for different effects.

  1. Static Grass Applicator

Static grass has revolutionized the way model railroaders create realistic ground cover. A static grass applicator uses an electric charge to make grass fibers stand upright, creating a lifelike appearance. In 2024, these tools have become more affordable and user-friendly. Look for a static grass applicator that includes:

  • The applicator unit
  • A power supply (some are battery-operated for portability)
  • A selection of different grass lengths and colors

Brands like Woodland Scenics and Noch offer reliable static grass applicators. This tool will dramatically improve the realism of your layout’s landscape.

  1. Airbrush and Compressor Set

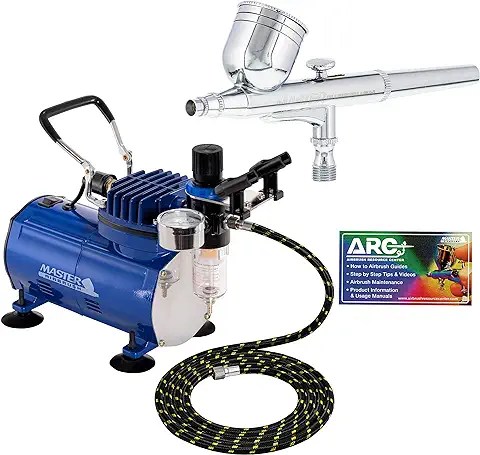
While not strictly necessary for beginners, an airbrush can significantly enhance your ability to paint and weather models. In 2024, entry-level airbrush and compressor sets are more affordable and easier to use than ever. A good starter set should include:

  • A dual-action airbrush
  • A small, quiet compressor
  • Basic cleaning and maintenance tools

Brands like Iwata and Badger offer excellent beginner-friendly airbrush sets. With an airbrush, you’ll be able to achieve smooth, professional-looking paint jobs on your locomotives, rolling stock, and structures.

  1. Digital Multimeter

A digital multimeter is an invaluable tool for troubleshooting electrical issues on your layout. In 2024, even basic multimeters offer features that can help you diagnose and fix common problems. Look for a multimeter that includes:

  • Voltage measurement (AC and DC)
  • Resistance measurement
  • Continuity testing

Brands like Fluke and Klein Tools offer reliable, user-friendly multimeters. This tool will help you identify short circuits, test track power, and ensure your wiring is correct.

  1. 3D Printer

While this might seem like an advanced accessory, 3D printers have become increasingly affordable and user-friendly in recent years. In 2024, a basic 3D printer can be a game-changer for model railroaders. With a 3D printer, you can:

  • Create custom parts and details for your models
  • Print entire structures or scenic elements
  • Prototype your own designs

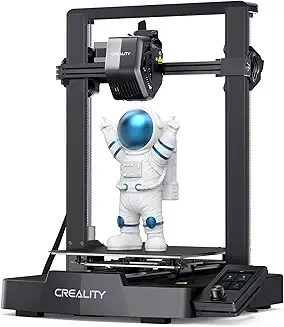
Look for an entry-level 3D printer with a build volume of at least 200mm x 200mm x 200mm. Brands like Creality and Prusa offer excellent printers for beginners. While there is a learning curve, the ability to create custom parts can take your modeling to the next level.

Tips for Choosing and Using These Accessories:

  1. Research and read reviews before purchasing any of these accessories. Look for products that are well-regarded in the model railroading community.
  2. Start with the basics and gradually expand your toolkit as your skills and interests grow.
  3. Join online forums or local model railroad clubs to learn from experienced modelers about how to use these accessories effectively.
  4. Always prioritize safety, especially when working with electrical components or tools like airbrushes.
  5. Keep your accessories organized and well-maintained to ensure they last for years to come.
  6. Don’t be afraid to experiment and try new techniques with your accessories. Model railroading is as much about the journey as it is about the final product.
  7. Consider the scale of your layout when choosing accessories, as some tools may be better suited for certain scales.

Conclusion:

As we look ahead to 2024, these seven accessories represent some of the most valuable additions to any novice model railroader’s toolkit. From enhancing the control and operation of your trains with DCC to creating stunningly realistic scenery with static grass and 3D-printed details, these tools will help you take your hobby to the next level.

Remember, model railroading is a journey of continuous learning and improvement. Don’t feel pressured to acquire all of these accessories at once. Start with the ones that align best with your current interests and goals, and gradually expand your collection as you grow in the hobby.

With these accessories at your disposal, you’ll be well-equipped to create a model railroad that not only looks great but also provides countless hours of enjoyment and satisfaction. Happy modeling!

Citations:
[1] https://www.trains.com/mrr/how-to/model-train-layouts/a-beginners-ho-scale-layout-from-one-sheet-of-plywood/
[2] https://www.youtube.com/watch?v=rbPZkp8gaY0
[3] https://www.youtube.com/watch?v=oJL8DZO5mks
[4] https://www.nmra.org/beginners-guide-part-2-layout-planning
[5] https://kalmbachhobbystore.com/product/book/12466