5 Top Model Train Accessories for 2025: A Family-Friendly Guide for Beginners

Model railroading is an exciting and rewarding hobby, and the accessories you choose can make all the difference in bringing your layout to life. As technology advances, new tools and features emerge every year, enhancing both realism and functionality. In 2025, several innovative accessories have become must-haves for hobbyists looking to elevate their layouts. This family-friendly article explores the top five model train accessories for 2025, perfect for beginners and families alike.


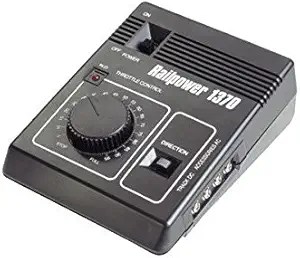
1. Digital Command Control (DCC) Systems

What It Is:

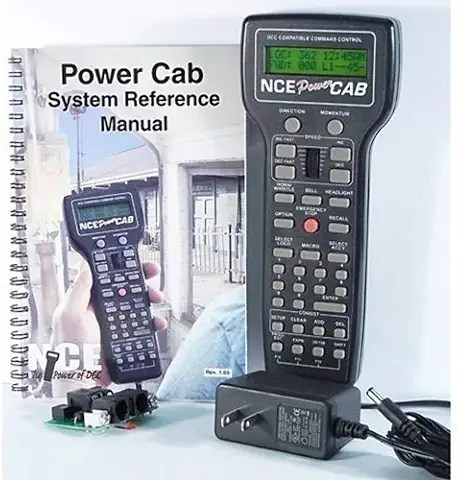
Digital Command Control (DCC) systems allow you to operate multiple trains independently on the same track. In 2025, DCC systems have become more user-friendly, with wireless connectivity and app-based controls.

Why It’s a Must-Have:

  • Ease of Use: Modern DCC systems feature intuitive interfaces that make it easy for beginners to learn.
  • Enhanced Control: You can control speed, direction, lighting, and sound effects for each train individually.
  • Family Fun: App-based controls allow multiple users to operate trains simultaneously, making it a great activity for families.

Tips for Beginners:

  • Start with entry-level DCC systems like the NCE Power Cab or Digitrax Zephyr Express.
  • Use online tutorials and videos to learn how to program locomotives.

2. LED Lighting Kits

What It Is:

LED lighting kits are used to illuminate buildings, streetlights, and train interiors on your layout. In 2025, smart LED kits with programmable features have become increasingly popular.

Why It’s a Must-Have:

  • Realism: Lighting adds depth and atmosphere to your layout, especially during nighttime scenes.
  • Energy Efficiency: LEDs consume less power and last longer than traditional bulbs.
  • Customizable: Programmable kits allow you to adjust brightness and color for different scenes.

Tips for Beginners:

  • Use warm white LEDs for indoor lighting and cool white LEDs for outdoor areas.
  • Experiment with dimming effects to create realistic shadows.

3. Sound Modules

What It Is:

Sound modules provide realistic audio effects like train whistles, engine noises, station announcements, and ambient sounds. In 2025, sound modules have become more compact and versatile.

Why It’s a Must-Have:

  • Immersion: Sound effects bring your layout to life by adding an auditory dimension.
  • Customizable: Many sound modules allow you to upload custom audio files.
  • Family-Friendly: Kids love hearing realistic train sounds as they operate the layout.

Tips for Beginners:

  • Start with pre-programmed sound modules like those from SoundTraxx or MRC.
  • Place speakers strategically around your layout for even sound distribution.

4. Static Grass Applicators

What It Is:

Static grass applicators are tools used to create realistic grassy textures on your layout. In 2025, rechargeable applicators with adjustable voltage settings are trending.

Why It’s a Must-Have:

  • Realism: Static grass stands upright when applied correctly, mimicking real grass.
  • Versatility: Applicators can be used for fields, lawns, or overgrown areas.
  • Easy to Use: Modern applicators are lightweight and beginner-friendly.

Tips for Beginners:

  • Practice on a small area before applying static grass to larger sections of your layout.
  • Mix different shades of grass fibers for a more natural look.

5. Modular Scenery Kits

What It Is:

Modular scenery kits include pre-made components like hills, tunnels, rivers, and bridges that can be easily assembled and customized. These kits have become more detailed and lightweight in 2025.

Why It’s a Must-Have:

  • Time-Saving: Modular kits simplify the process of building complex terrain features.
  • Customizable: You can paint and add details to match your layout’s theme.
  • Family-Friendly: Assembly is straightforward and fun for all ages.

Tips for Beginners:

  • Choose kits that match the scale of your layout (e.g., HO or N scale).
  • Combine modular components with natural materials like rocks or twigs for added realism.

How These Accessories Enhance Your Layout

These top accessories not only improve the visual appeal of your model railroad but also make it more interactive and engaging. Here’s how they contribute:

  1. Realism: DCC systems and sound modules create lifelike operations that mimic real-world railroads. LED lighting adds atmosphere while static grass enhances scenery detail.
  2. Functionality: Modular kits save time while allowing you to focus on creative aspects of your layout.
  3. Family Fun: All five accessories offer opportunities for collaboration—whether it’s programming trains or assembling scenery components together as a family.

Beginner Tips for Accessory Integration

If you’re new to model railroading, here are some tips to help you incorporate these accessories into your layout:

  1. Start Small: Focus on one accessory at a time to avoid feeling overwhelmed.
  2. Learn as You Go: Watch tutorials online or join local model railroading clubs for guidance.
  3. Experiment: Don’t be afraid to try different techniques or configurations until you find what works best.
  4. Involve the Family: Assign tasks like painting scenery or programming trains to make it a shared activity.

Final Thoughts

The world of model railroading continues to evolve with new technologies and innovations each year. In 2025, accessories like DCC systems, LED lighting kits, sound modules, static grass applicators, and modular scenery kits are helping hobbyists create layouts that are more realistic and engaging than ever before.

For beginners, these tools provide an excellent starting point while offering plenty of room for creativity and customization. Whether you’re building a bustling cityscape or a quiet countryside scene, these accessories will help bring your miniature world to life—and create wonderful memories along the way!

So gather your family, pick up these must-have items, and start crafting a model railroad layout that’s truly breathtaking!


References

  1. Kalmbach Media (2025). Model Railroader Magazine. Various issues featuring reviews of model train accessories.[^1]
    Website: https://www.trains.com/mrr
  2. Woodland Scenics (n.d.). Scenery Techniques.
    Website: https://woodlandscenics.com
  3. National Model Railroad Association (NMRA). Recommended Tools & Accessories.
    Website: https://nmra.org
  4. Digitrax (2025). DCC Systems Overview.
    Website: https://www.digitrax.com
  5. Luke Towan (2025). YouTube Channel. Tutorials on integrating advanced techniques into model railroads.[^2]
    Link: https://www.youtube.com/@LukeTowan

[^1]: Kalmbach Media provides insights into modern tools like DCC systems that enhance model railroading layouts.
[^2]: Luke Towan’s tutorials offer step-by-step guidance on using accessories like LED lighting kits effectively.


Bringing Your Model Railroad Layout to Life with 3D Printed Details: A Beginner’s Guide

Model railroading is a rewarding hobby that allows you to create a miniature world filled with intricate details and personal touches. Over the years, advancements in technology have made it easier than ever to add unique and realistic elements to your layout. One of the most exciting innovations in recent years is 3D printing. With 3D printed details, you can customize your model railroad like never before, creating everything from tiny accessories to entire structures.

If you’re new to the world of 3D printing or wondering how to incorporate these details into your layout, this family-friendly guide will walk you through everything you need to know.


Why Use 3D Printed Details?

3D printing has revolutionized the model railroading hobby for several reasons:

  1. Customization: You can create one-of-a-kind pieces that perfectly match your vision for your layout.
  2. Affordability: Once you have access to a 3D printer or online printing service, producing small details is often more cost-effective than buying pre-made items.
  3. Precision: 3D printers can produce highly detailed models that bring a level of realism difficult to achieve with traditional methods.
  4. Accessibility: Many online platforms offer free or affordable 3D models designed specifically for model railroads.

Getting Started with 3D Printing for Model Railroads

Step 1: Accessing a 3D Printer

If you don’t own a 3D printer, don’t worry! You have several options:

  • Purchase a Printer: Entry-level resin printers like the Elegoo Mars or Anycubic Photon are affordable and perfect for small, detailed prints.
  • Use Online Services: Websites like Shapeways or Treatstock allow you to upload designs and order prints without owning a printer.
  • Local Makerspaces: Many libraries and community centers have 3D printers available for public use.

Step 2: Finding Models

There are countless ready-to-print models available online:

  • Free Resources: Websites like Thingiverse and Printables offer free downloadable files for model railroad accessories.
  • Paid Models: Platforms like MyMiniFactory or Cults3D provide high-quality designs for a small fee.
  • Custom Designs: If you have specific needs, consider designing your own models using software like Tinkercad (beginner-friendly) or Fusion 360 (advanced).

Step 3: Choosing Materials

For model railroading, two types of materials are commonly used:

  1. PLA (Polylactic Acid): Affordable and easy to work with, PLA is great for larger pieces like buildings or terrain features.
  2. Resin: Resin printers produce finer details, making them ideal for small accessories like figures or tools.

Incorporating 3D Printed Details into Your Layout

Now that you have access to 3D printed models, let’s explore how to use them effectively on your layout.

1. Buildings and Structures

One of the most popular uses of 3D printing in model railroading is creating custom buildings and structures. Whether it’s a train station, factory, or farmhouse, 3D printing allows you to design structures that fit perfectly into your layout.

Tips:

  • Print buildings in sections (walls, roofs) to make painting easier.
  • Add texture by using sandpaper or applying weathering techniques after painting.
  • Use LED lighting inside buildings for added realism.

2. Accessories and Props

Small details make a big difference when it comes to bringing your layout to life. With 3D printing, you can add accessories like:

  • Benches, streetlights, and mailboxes for urban scenes.
  • Barrels, crates, and tools for industrial areas.
  • Picnic tables, fences, and birdhouses for rural settings.

Tips:

  • Paint accessories in realistic colors using acrylic paints.
  • Group props together logically (e.g., crates near loading docks) to create believable scenes.

3. Vehicles

From cars and trucks to horse-drawn wagons, vehicles add movement and storytelling elements to your layout. Many hobbyists use 3D printing to create vehicles that match specific eras or themes.

Tips:

  • Add weathering effects like rust or dirt for used vehicles.
  • Use clear resin or transparent plastic sheets for windows.

4. Figures

Figures bring life and activity to any model railroad layout. With a resin printer, you can create highly detailed figures in various poses:

  • Workers loading cargo at an industrial site.
  • Families enjoying a picnic in the park.
  • Passengers waiting at the train station.

Tips:

  • Paint figures with fine brushes for precise details.
  • Place figures in contextually appropriate locations (e.g., workers near factories).

5. Terrain Features

Enhance your layout’s landscape with custom terrain features such as:

  • Rocks and cliffs
  • Bridges and tunnels
  • Water features like fountains or docks

Tips:

  • Combine printed terrain features with natural materials (e.g., real rocks) for added realism.
  • Use textured paints or flocking materials on terrain pieces.

6. Signage and Lettering

Custom signs are an easy way to add personality and storytelling elements to your layout. With a 3D printer, you can create:

  • Business signs for shops and factories
  • Street signs for urban areas
  • Custom lettering on buildings or vehicles

Tips:

  • Use contrasting paint colors to make lettering stand out.
  • Add weathering effects like chipped paint or grime.

Painting and Finishing Your Prints

To make your printed details look realistic, proper painting and finishing are essential:

  1. Clean Your Prints: Remove any support material left over from printing and lightly sand rough edges.
  2. Prime Before Painting: Apply a primer designed for plastic surfaces to help paint adhere evenly.
  3. Use Acrylic Paints: Acrylic paints are easy to work with and come in a wide range of colors.
  4. Add Weathering Effects: Use washes, dry brushing, or powders to simulate dirt, rust, or wear.
  5. Seal Your Work: Apply a matte or gloss sealant to protect your painted pieces.

Family-Friendly Fun with 3D Printing

One of the best things about using 3D printed details is that it’s a fun activity the whole family can enjoy! Here’s how everyone can get involved:

  • Kids can help paint small accessories like benches or barrels.
  • Teens can learn basic design skills using beginner-friendly software like Tinkercad.
  • Adults can handle more complex tasks like assembling buildings or operating the printer.

Working together not only makes the process faster but also creates lasting memories as you build something special as a family.


Final Thoughts

Incorporating 3D printed details into your model railroad layout is an exciting way to add customization and realism while keeping costs manageable. Whether you’re creating unique buildings, adding lifelike figures, or enhancing terrain features, the possibilities are endless with this innovative technology.

For beginners, start small—experiment with simple accessories before moving on to larger projects like custom structures. With time and practice, you’ll be amazed at what you can achieve!

So fire up that printer (or order from an online service), gather some paints and brushes, and start bringing your miniature world to life—one detail at a time!


References

  1. Kalmbach Media (2025). Model Railroader Magazine. Various issues featuring tips on using technology in model railroading.[^1]
    Website: https://www.trains.com/mrr
  2. Thingiverse (n.d.). Free Downloadable Models.
    Website: https://www.thingiverse.com
  3. Woodland Scenics (n.d.). Scenery Techniques.
    Website: https://woodlandscenics.com
  4. Luke Towan (2025). YouTube Channel. Tutorials on integrating advanced techniques into model railroads.[^2]
    Link: https://www.youtube.com/@LukeTowan
  5. Elegoo Official (2025). Resin Printers for Beginners.
    Website: https://www.elegoo.com

[^1]: Kalmbach Media provides insights into modern tools like 3D printing that enhance model railroading layouts.
[^2]: Luke Towan’s tutorials offer step-by-step guidance on painting and finishing techniques specific to 3D printed scenery elements.


Easy-to-Build Model Industries for Beginners

Adding industries to your model railroad layout brings it to life and provides engaging operational possibilities. For beginners, starting with simple yet effective industries is key. Here are some easy-to-build model industries that will enhance your layout without overwhelming you:

Grain Elevator

A grain elevator is a classic rail-served industry that’s visually striking and operationally significant2.

Key Elements:

  • Tall cylindrical silos
  • Loading/unloading area
  • Small office building

Materials Needed:

  • Plastic tubing or PVC pipe for silos
  • Styrene sheets for walls and roofs
  • Small-scale ladders and railings

Construction Steps:

  1. Cut plastic tubing to desired heights for silos
  2. Create a base and top for silos using styrene sheet
  3. Build a small office structure using styrene
  4. Add details like ladders, conveyor belts, and signage

Operation:

  • Receive covered hoppers of grain
  • Ship out processed products in boxcars

A grain elevator provides excellent opportunities for switching operations and adds vertical interest to your layout5.

Lumber Yard

A lumber yard is easy to model and offers varied operational possibilities3.

Key Elements:

  • Stacks of lumber
  • Loading dock
  • Small office or shed

Materials Needed:

  • Stripwood or basswood sheets for lumber stacks
  • Styrene for the loading dock and office
  • Glue and paint

Construction Steps:

  1. Cut stripwood into various lengths for lumber stacks
  2. Glue strips together to form stacks of different sizes
  3. Build a simple loading dock from styrene
  4. Construct a small office or shed

Operation:

  • Receive flatcars of raw lumber
  • Ship out finished products in boxcars

Team Track

A team track is versatile and perfect for beginners, accommodating various car types without complex structures.

Key Elements:

  • Simple track siding
  • Small loading area
  • Optional small storage shed

Materials Needed:

  • Track and ballast
  • Styrene or cardstock for the loading area
  • Optional kit for a small shed

Construction Steps:

  1. Lay a siding track parallel to your mainline
  2. Create a small paved area using styrene or textured cardstock
  3. Add details like pallets, crates, and barrels
  4. Optionally, build a small storage shed nearby

Operation:

  • Load and unload various car types (boxcars, flatcars, gondolas)
  • Simulate different small businesses using the same track

Small Factory or Warehouse

A generic industrial building offers flexibility in operations and is simple to construct.

Key Elements:

  • Rectangular building with loading docks
  • Parking area
  • Signage

Materials Needed:

  • Styrene sheets for walls and roof
  • Window and door castings
  • Acrylic paints

Construction Steps:

  1. Cut styrene sheets for walls and roof
  2. Add windows and doors
  3. Create loading docks on one side
  4. Paint and weather the structure
  5. Add signage and details like air conditioning units and downspouts

Operation:

  • Receive raw materials in various car types
  • Ship out finished products in boxcars or flatcars

Coal Dealer

A small coal yard with a simple unloading trestle provides opportunities for hopper car operations.

Key Elements:

  • Elevated track or small trestle
  • Coal pile
  • Small office or scale house

Materials Needed:

  • Styrene or balsa wood for the trestle
  • Fine gravel or commercial coal material
  • Small kit for the office

Construction Steps:

  1. Construct a simple elevated track or trestle
  2. Create a coal pile using fine gravel or commercial coal material
  3. Build a small office or scale house
  4. Add details like fencing and equipment

Operation:

  • Receive hopper cars of coal
  • Simulate local delivery operations

Tips for Building Model Industries

  1. Start Small: Begin with one or two industries and expand as you gain confidence and skills.
  2. Research: Look at photos of real industries for inspiration and accuracy.
  3. Use Kits: Many manufacturers offer kits for beginners that can be easily assembled.
  4. Weathering: Add realism by lightly weathering your structures and surrounding areas.
  5. Lighting: Consider adding simple LED lighting to bring your industries to life at night.
  6. Scenery: Integrate your industries into the landscape with appropriate ground cover, trees, and details.
  7. Operations: Plan how your industries will interact with your trains to create interesting operating sessions.

Conclusion

Building model industries for your railroad layout doesn’t have to be daunting. These easy-to-build options provide a great starting point for beginners. They offer a balance of simplicity in construction and interest in operation. As you become more comfortable with modeling techniques, you can add more details or expand to more complex industries.

Remember, the key to enjoying model railroading is to have fun and be creative. Don’t worry about perfect realism at first – focus on creating a layout that you enjoy operating and looking at. With these simple industries, you’ll be well on your way to creating an engaging and operational model railroad that will provide hours of enjoyment.

As your skills grow, you can always modify or replace these starter industries with more complex ones. The beauty of model railroading is that your layout can evolve with your skills and interests. So start simple, enjoy the process, and watch your miniature world come to life!

Citations:

  1. https://www.indeed.com/career-advice/finding-a-job/how-to-find-model-jobs
  2. https://www.scarm.info/blog/tutorials-and-examples/ho-scale-grain-elevator/
  3. https://www.armballast.com/modeling-a-lumber-operation-and-sawmill-a-detailed-guide/
  4. https://www.brandonandrephoto.com/blog/fashion-industry-101-a-guide-for-beginner-models
  5. https://www.youtube.com/watch?v=_BjVEAfxi9I
  6. https://www.youtube.com/watch?v=1yzfPK5LQwc
  7. https://www.reddit.com/r/modelmakers/comments/17wywax/whats_the_best_model_brand_in_your_opinion_for/
  8. https://forum.trains.com/t/grain-elevator-placement/315078

Answer from Perplexity: pplx.ai/share

How to Wire a Model Train Layout: A Guide for Novices

This article is in response to a comment from Matthew, I hope this helps with your wiring project.

Model railroading is a fascinating and rewarding hobby that combines creativity, engineering, and a love for trains. One of the most crucial aspects of building a model train layout is wiring. Proper wiring ensures that your trains run smoothly and reliably, and it allows you to control various elements of your layout. For novices, wiring can seem daunting, but with the right guidance, it can be a manageable and even enjoyable task. In this article, we’ll walk you through the essential steps to wire your model train layout.

Understanding the Basics

Before diving into the wiring process, it’s essential to understand some basic concepts:

1. Power Supply

The power supply is the heart of your layout’s electrical system. It converts household electricity into a form that your trains can use. There are two main types of power supplies:

  • DCC (Digital Command Control): Modern layouts often use DCC, which allows for independent control of multiple trains on the same track. DCC systems send digital signals through the rails to control train functions. Power Cab DCC Starter Set NCE5240025

2. Track Wiring

Track wiring involves connecting the power supply to the rails so that the trains receive power. This is typically done using feeder wires and bus wires.

  • Feeder Wires: Short wires that connect the track to the bus wires.
  • Bus Wires: Long wires that run under the layout and distribute power from the power supply to the feeder wires.

3. Blocks and Sections

Dividing your layout into blocks or sections can help manage power distribution and control. Each block is an electrically isolated section of track with its own feeder wires.

4. Switches and Turnouts

Switches (also known as turnouts) allow trains to change tracks. Wiring switches correctly is essential for smooth operation. HO Code 100 Manual Left-Hand Switch

Step-by-Step Guide to Wiring Your Model Train Layout

Step 1: Plan Your Layout

Before you start wiring, it’s crucial to plan your layout. Draw a detailed track plan, including all tracks, turnouts, and any accessories you plan to use. Identify where you will place the power supply and how you will divide the layout into blocks.

Step 2: Gather Your Materials

You’ll need the following materials for wiring your layout:

  • Power supply (DC or DCC)
  • Bus wires (typically 14-16 gauge)
  • Feeder wires (typically 20-22 gauge)
  • Rail joiners (insulated and non-insulated)
  • Terminal blocks or connectors – ( I prefer Suitcase connectors they work well)
  • Soldering iron and solder
  • Wire strippers and cutters
  • Electrical tape or heat shrink tubing
  • Multimeter (for testing)

Most of these items can be found in this article Must have accessories

Step 3:Install the Power Supply

Place your power supply in a convenient location where you can easily access it. If you’re using a DCC system, follow the manufacturer’s instructions for setting up the command station and connecting it to the power supply.

Step 4: Run the Bus Wires

Run the bus wires under your layout, following the path of your tracks. It’s a good idea to use color-coded wires (e.g., red for positive and black for negative) to avoid confusion. Secure the bus wires to the underside of your layout using cable clips or staples.

Step 5: Connect the Feeder Wires

Feeder wires connect the track to the bus wires, ensuring consistent power distribution. Here’s how to install feeder wires:

  1. Strip the Ends: Use wire strippers to remove about 1/4 inch of insulation from the ends of the feeder wires.
  2. Solder to the Track: Solder one end of the feeder wire to the rail. It’s best to solder the wire to the bottom or side of the rail to keep it hidden.
  3. Connect to the Bus Wires: Strip a small section of insulation from the bus wires and solder the other end of the feeder wire to the bus wire. Alternatively, you can use terminal blocks or connectors to make the connection.

Step 6: Divide the Layout into Blocks

Dividing your layout into blocks helps manage power distribution and control. To create blocks:

  1. Isolate the Sections: Use insulated rail joiners to separate the rails at the boundaries of each block.
  2. Install Block Feeder Wires: Run feeder wires from each block to the bus wires, ensuring that each block is independently powered.

Step 7: Wire the Switches and Turnouts

Wiring switches and turnouts correctly ensures smooth operation and prevents short circuits. Follow these steps:

  1. Power the Frog: If your turnouts have powered frogs (the moving part of the switch), connect a feeder wire to the frog and run it to a switch machine or relay.
  2. Control the Switch: Connect the switch machine or relay to your control panel or DCC system. This allows you to change the position of the turnout remotely.

Step 8: Test Your Wiring

Before running your trains, it’s essential to test your wiring to ensure everything is connected correctly. Use a multimeter to check for continuity and proper voltage at various points on the track. Look for any short circuits or areas with poor electrical contact.

Step 9: Troubleshoot Common Issues

If you encounter any issues, here are some common problems and solutions:

  • Short Circuits: Check for any metal objects or tools touching the rails. Ensure that insulated rail joiners are correctly installed at block boundaries.
  • Poor Electrical Contact: Clean the track and wheels of your trains. Ensure that all solder joints are secure and that feeder wires are properly connected.
  • Inconsistent Power: Check for loose connections in the bus and feeder wires. Ensure that the power supply is functioning correctly.

Step 10: Enjoy Your Layout

Once you’ve tested and verified your wiring, it’s time to enjoy your model train layout! Run your trains and experiment with different operations. As you gain experience, you can add more features and accessories to enhance your layout.

Model Railroad supplies and accessories

Tips for Successful Wiring

  1. Label Your Wires: Use labels or colored tape to identify different wires and their functions. This will make troubleshooting and future modifications easier.
  2. Keep It Neat: Organize your wires using cable clips, zip ties, or wire looms. A tidy wiring setup is easier to manage and less prone to issues.
  3. Document Your Work: Keep a wiring diagram or notes on your layout’s wiring. This will be invaluable for future reference and troubleshooting.
  4. Start Simple: If you’re new to wiring, start with a basic layout and gradually add more features as you become more comfortable with the process.
  5. Ask for Help: Don’t hesitate to seek advice from experienced model railroaders or online forums. The model railroading community is full of knowledgeable and helpful enthusiasts.

Conclusion

Wiring a model train layout may seem intimidating at first, but with careful planning and attention to detail, it can be a manageable and rewarding task. By following the steps outlined in this guide, you’ll be well on your way to creating a reliable and enjoyable model railroad layout. Remember, practice makes perfect, and each wiring project will build your skills and confidence. Happy railroading!

Must-Have Accessories for a Family-Friendly Model Railroad Setup

Model railroading is a wonderful hobby that can bring families together, offering a blend of creativity, engineering, and fun. To make the most out of your model railroad setup, especially if you’re just starting out, it’s important to equip yourself with the right accessories. These accessories not only enhance the realism and functionality of your layout but also make the hobby more enjoyable for everyone involved. Here are some must-have accessories for a family-friendly model railroad setup in 2024.

1. Basic Tool Kit

A basic tool kit is essential for any model railroader, novice or experienced. It helps in assembling, maintaining, and troubleshooting your layout. Here are some key tools you should include:

  • Hobby Knife: For cutting and trimming materials.
  • Small Screwdrivers: Both flathead and Phillips for various screws.
  • Needle-Nose Pliers: For handling small parts and wires.
  • Wire Strippers/Cutters: Essential for working with electrical components.
  • Tweezers: For placing small details and parts.
  • Ruler and Measuring Tape: For accurate measurements.

These tools are fundamental and will be used frequently as you build and maintain your layout.

2. Track Cleaning Kit

Keeping your tracks clean is crucial for smooth operation. Dust and dirt can cause poor electrical contact and derailments. A basic track cleaning kit should include:

  • Track Cleaning Eraser: A specialized eraser for removing grime from the rails.
  • Isopropyl Alcohol: For cleaning the tracks without leaving residue.
  • Lint-Free Cloths: To wipe down the tracks after cleaning.

Regular cleaning ensures that your trains run smoothly and reduces the need for more extensive maintenance.

3. Digital Command Control (DCC) System

A DCC system allows you to control multiple trains independently on the same track, adding a layer of realism and excitement to your layout. For beginners, a user-friendly DCC starter set is ideal. Look for sets that include:

  • Command Station: The brain of the DCC system.
  • Power Supply: To provide the necessary power for your trains.
  • Handheld Throttle: For controlling the speed and direction of your trains.

Brands like Digitrax, NCE, and ESU offer reliable starter sets that are expandable as your layout grows.

4. Scenery Materials

Creating realistic scenery is one of the most enjoyable aspects of model railroading. Basic scenery materials can transform your layout from a simple track to a miniature world. Consider starting with:

  • Ground Foam: Available in various colors to simulate grass, dirt, and other ground covers.
  • Static Grass Applicator: For creating realistic grass effects.
  • Trees and Shrubs: Pre-made or kits that you can assemble and paint.
  • Scenic Cement: To glue down your scenery materials.

These materials will help you create a visually stunning layout that captures the imagination.

5. LED Lighting Kit

Proper lighting can make a significant difference in the appearance of your layout. LED lighting kits are energy-efficient and long-lasting. Look for kits that include:

  • Flexible LED Strips: For illuminating large areas.
  • Individual LEDs: For lighting buildings and specific scenes.
  • Power Supply and Connectors: To set up your lighting system.

LED lighting can simulate different times of day and add a dynamic element to your layout.

6. Rolling Stock and Locomotives

A variety of rolling stock and locomotives will keep your layout interesting and allow for different types of operations. When starting, consider:

  • Freight Cars: Boxcars, tank cars, and flatcars for hauling goods.
  • Passenger Cars: For simulating passenger services.
  • Locomotives: Both steam and diesel engines to add variety.

Look for high-quality models that run smoothly and are easy to maintain.

7. Buildings and Structures

Adding buildings and structures to your layout enhances realism and provides context for your trains. Start with a few key structures:

  • Railroad Station: A central hub for your layout.
  • Industrial Buildings: Factories, warehouses, and other facilities.
  • Residential Buildings: Houses and apartments to create a town or city scene.
  • Bridges and Tunnels: For added complexity and visual interest.

Kits are available in various scales and levels of detail, allowing you to choose what best fits your layout and skill level.

8. Coupler Height Gauge

Ensuring that your couplers are at the correct height is crucial for reliable operation. A coupler height gauge helps you check and adjust the couplers on your rolling stock. Brands like Kadee offer gauges for different scales, ensuring compatibility with your setup. Kadee

9. Foam Cradle

A foam cradle is a simple yet invaluable accessory for holding your locomotives and rolling stock securely while you work on them. It prevents damage to delicate parts and makes maintenance tasks easier.

10. Weathering Supplies

Weathering adds realism to your models by simulating the effects of age and use. Basic weathering supplies include:

  • Weathering Powders: In various colors to create dirt, rust, and grime effects.
  • Fine Brushes: For applying powders and paints.
  • Matte Clear Coat: To seal the weathering and protect the finish.

Weathering can be as simple or as detailed as you like, and it adds a unique touch to your models.

11. Essential Books and Guides

Having a few good books and guides on hand can provide valuable information and inspiration. Consider starting with:

  • “Starter Track Plans for Model Railroaders” by Kent J. Johnson: Offers a variety of track plans to suit different spaces and skill levels.
  • “Model Railroading: A Family Guide” by Bruce C. Greenberg: A comprehensive guide that covers all aspects of the hobby.
  • “The Complete Book of Model Railroading” by David Sutton: A classic reference book with detailed information on building and operating layouts.

These resources will help you learn the basics and provide ideas for expanding your layout.

Conclusion

Building a family-friendly model railroad setup is a rewarding and enjoyable hobby that can bring generations together. By equipping yourself with these must-have accessories, you’ll be well on your way to creating a layout that is both fun and realistic. Remember, the key to a successful model railroad is to start with the basics and gradually expand your collection as your skills and interests grow. Happy railroading!

Citations:
[1] https://toytooth.com/index.php?product_id=1617309&route=product%2Fproduct
[2] https://www.amazon.com/CityBuilder-Gauge-7mm-Railroad-Cardboard/dp/B00NXNWJEQ?psc=1&smid=AV83ANFWMW4VP
[3] https://www.etsy.com/listing/1194765654/scenic-model-railway-layout-made-to?gpla=1
[4] https://modelrailwaytechniques.com/benchworkstore/
[5] https://www.walthers.com/william-s-country-store-kit
[6] http://www.hobbylinc.com/bar-mills-potters-pub-kit-ho-scale-model-railroad-building-1440
[7] https://www.etsy.com/listing/1522850368/realistic-scenic-model-railway-layout?gpla=1
[8] https://www.walmart.com/ip/Starter-Track-Plans-for-Model-Railroaders-9780890248317/17131821?selectedSellerId=0&wmlspartner=wlpa
[9] https://www.trains.com/mrr/how-to/essential-tools-for-model-railroaders/
[10] https://www.youtube.com/watch?v=BkSPl7SSWbY
[11] https://www.amazon.com/Model-railroading-family-Bruce-Greenberg/dp/0135861497
[12] https://familygardentrains.com/primer/kids.htm
[13] https://forum.mrhmag.com/post/kids-and-model-railroading-12190242

A lively debate on Steam vs. Diesel

After the last article I had some comments about the neglect to mention electric power along with steam and diesel. I used creative license and developed a discussion between Mark Twain and John Grisham, my favorite authors from the periods to have a lively discussion about motive power.

I can attempt to emulate the writing styles of Mark Twain and John Grisham (both authors from different eras Mark Twain wrote Huckleberry Finn, John Grisham wrote The Firm, The Pelican Brief and more) in the form of a debate on the topic of modeling steam or diesel locomotives. Both favorite authors.

Mark Twain: Well, here we are, gathered in the realm of model railroading, debating the merits of steam versus diesel locomotives. A delightful topic indeed! Let me begin by extolling the virtues of steam. Its hissing, chugging symphony carries us back to a bygone era, where the romance of train travel enthralled our imaginations.

Steam locomotives embody the very essence of nostalgia and provide a tangible link to our shared history.

John Grisham: Ah, Mark, while I appreciate your fondness for steam, allow me to advocate for the practicality of diesel locomotives. Picture this: sleek, efficient engines gliding effortlessly along the tracks, with the power to transport us to the modern era. Diesel locomotives symbolize progress, representing the advancement and innovation that have shaped the contemporary world we live in.

Their reliability and ease of maintenance make them a sensible choice for any model railroad enthusiast.

Mark Twain: John, I must concede that diesel locomotives have their merits. Their streamlined design and efficient performance do hold an undeniable allure. However, we must not dismiss the historical significance and visual grandeur of steam. The plumes of smoke and rhythmic chugging stir the soul and evoke a sense of adventure.

There’s a reason steam locomotives have captured the hearts of enthusiasts for generations.

John Grisham: Mark, I cannot dispute the emotional connection one may feel with steam locomotives. They do possess a certain charm. However, we must also consider the practical aspects of modeling. Diesel locomotives offer a wide range of models, allowing enthusiasts to explore various eras and railroad lines. They are more accessible, both in terms of maintenance and availability of models and accessories. For those seeking a modern touch, diesel power is the way to go.

Mark Twain: John, I understand your point. The modeling world is indeed fortunate to have a diverse array of diesel locomotives to choose from. But let us not forget that blending the two worlds can create a harmonious fusion. By incorporating both steam and diesel locomotives into our layouts, we can capture the best of both eras, paying homage to the rich history while embracing the dynamic present.

John Grisham: Mark, I must admit your proposition has merit. The juxtaposition of steam and diesel can add layers of intrigue and versatility to our layouts. It allows us to explore different time periods and create a narrative that spans generations. Perhaps a compromise is in order, blending the classic with the contemporary to create a truly captivating model train experience.

Mark Twain: Well said, John. By combining our passions for both steam and diesel locomotives, we can embark on a remarkable journey through time, where the echoes of history mingle with the pulse of progress. Let us celebrate the diversity and possibilities that model railroading offers, irrespective of our chosen power source.

In this lively debate between Mark Twain and John Grisham, we witness the clash of perspectives on the steam versus diesel locomotive dilemma. While Mark Twain champions the nostalgia and historical significance of steam, John Grisham emphasizes the practicality and modern appeal of diesel. Ultimately, they find common ground in the idea of blending the two, allowing for a harmonious coexistence on the model railroad.