A model railroad layout is far more than a collection of tracks, switches, and rolling stock. It is a snapshot of a living, breathing world. While smooth-running locomotives and realistic scenery set the foundation, the true magic of a model railroad empire lives in the fine details.
Nothing grounds a layout in a specific time and place quite like scale vehicles. From a rusted pickup truck parked near an abandoned barn to a shiny delivery van backing up to a freight station, vehicles bridge the gap between rail traffic and community life.
Whether you are modeling in HO scale, N scale, or O scale, here is how to select, detail, weather, and place scale vehicles to bring authentic, dynamic storytelling to your model railroad layout.
1. Selecting the Right Vehicles for Your Era
Before placing a single car or truck on your roadways, you must establish chronological consistency. Just as you wouldn’t pull a modern double-stack container train with a 19th-century steam locomotive, placing a 1990s sedan next to a 1940s coaling tower immediately breaks the illusion of reality.
Define Your Layout’s Time Window
Most modelers choose a specific era—such as the late transition era (1950s), the early Amtrak era (1970s), or modern industrial railroading. When purchasing scale vehicles, keep these guidelines in mind:
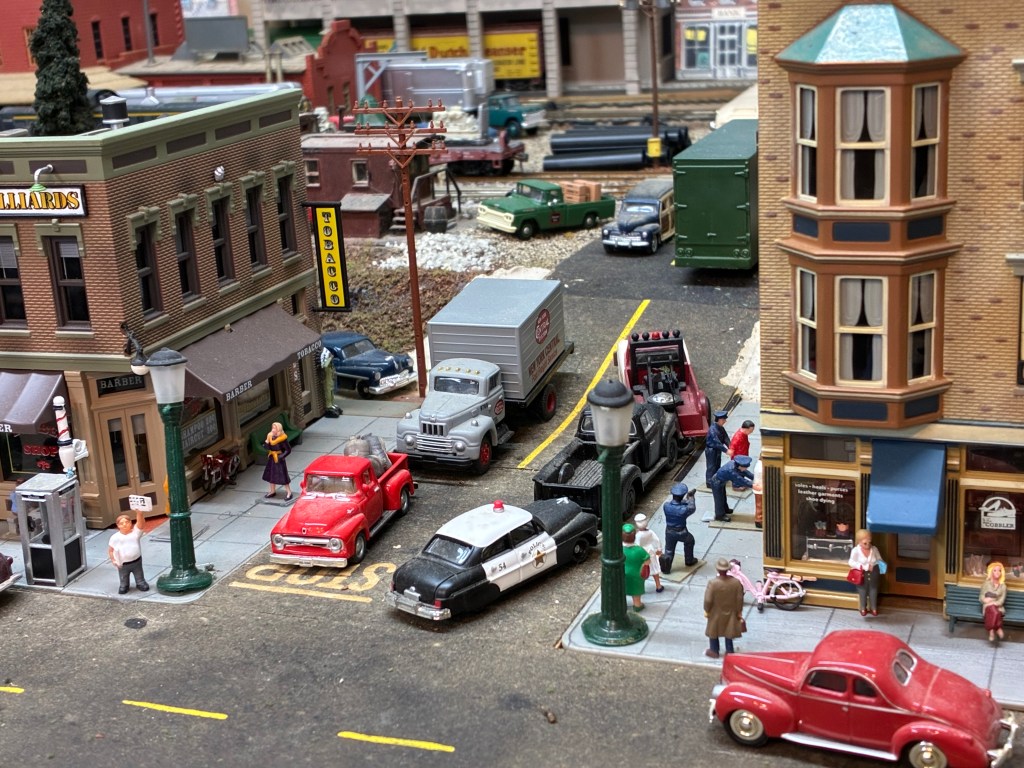
- The “Old Car” Rule: On real roads, people drive cars that are 5, 10, or even 20 years old. If your layout is set in 1968, your streets should include models from 1968, but they should also feature cars from 1958, 1952, and 1946.
- Regional Accuracy: Consider where your layout is set. A rural Midwestern farming community in 1975 will feature far more pickup trucks, grain trucks, and station wagons than high-end imported sports cars.
- Commercial and Utility Vehicles: Freight depots, industrial parks, and trackside unloading docks need period-correct delivery trucks, flatbeds, forklifts, and semi-trucks to explain why the railroad is servicing that industry.
2. Upgrading Plastic and Die-Cast Vehicles
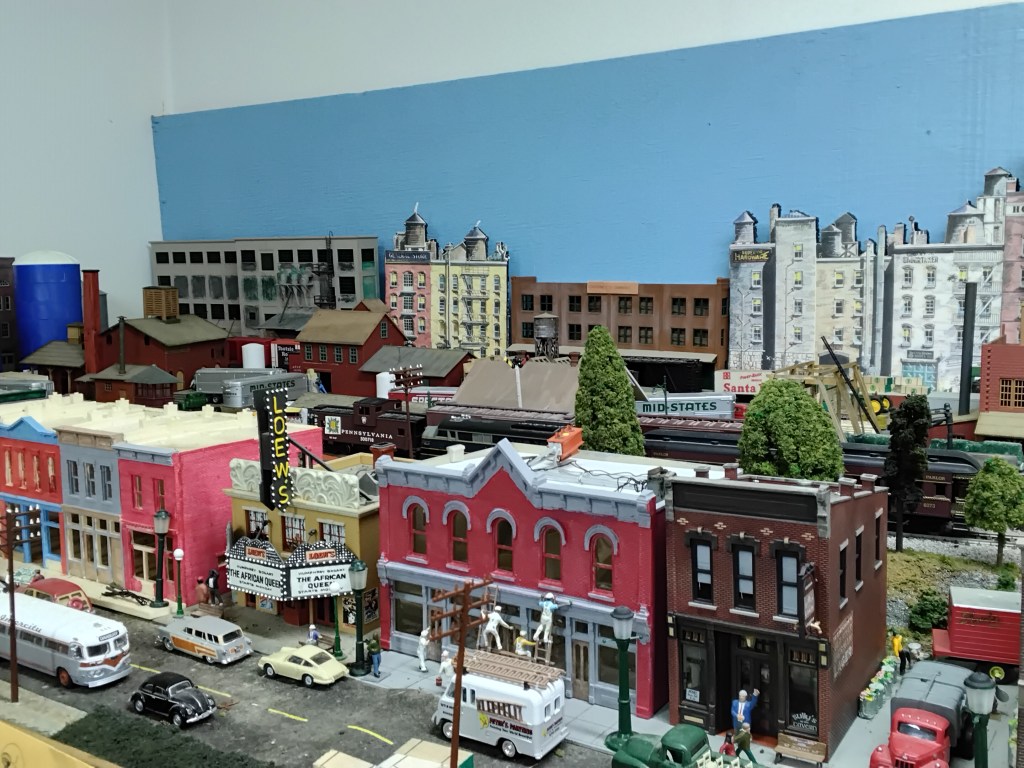
Out-of-the-box die-cast and plastic vehicles often suffer from two major problems: high-gloss “toy-like” shine and a total lack of interior life. Transforming an off-the-shelf model into a museum-quality layout asset requires only a few basic tools and simple techniques.
Eliminating the Toy Gloss
Real vehicles parked outdoors quickly lose their showroom shine due to sun exposure, dust, and road grime.
- Disassembly: Carefully separate the vehicle body from the chassis, window glass, and interior mold whenever possible.
- Matte or Satin Finishes: Spray the body with a light coat of clear flat or satin finish. A subtle sheen looks far more realistic in scale than a high-gloss coat, which creates unnaturally large light reflections under layout room lighting.
- Window Prep: Factory plastic windows are often thick and excessively reflective. Applying a micro-coat of clear gloss to window interiors or replacing them with thin clear styrene sheet dramatically improves realism.
Detailing Interiors and Adding Driver Figures
A fleet of driverless cars cruising down a downtown street instantly looks ghost-like.
- Paint the Interior: Most inexpensive models feature single-color black or grey plastic interiors. Use acrylic paints to color the seats (tan, dark red, or grey), highlight the steering wheel, and paint the dashboard.
- Install Figures: Cut HO or N scale seated driver figures at the waist if necessary to fit them flush behind the wheel. Adding a driver figure and a passenger instantly animates a moving vehicle on a roadway.
- Headlights and Taillights: Use a tiny drop of silver or chrome paint on headlight lenses, followed by a dot of clear resin or canopy glue to simulate glass lenses. Use clear red paint over silver for realistic taillights.
3. Weathering Techniques for Realistic Road Grime
A brand-new car belongs in a dealership lot, but vehicles operating in the real world accumulate mud, brake dust, rust, and road salt. Weathering vehicles helps them blend seamlessly into your painted scenery rather than popping out like plastic toys.
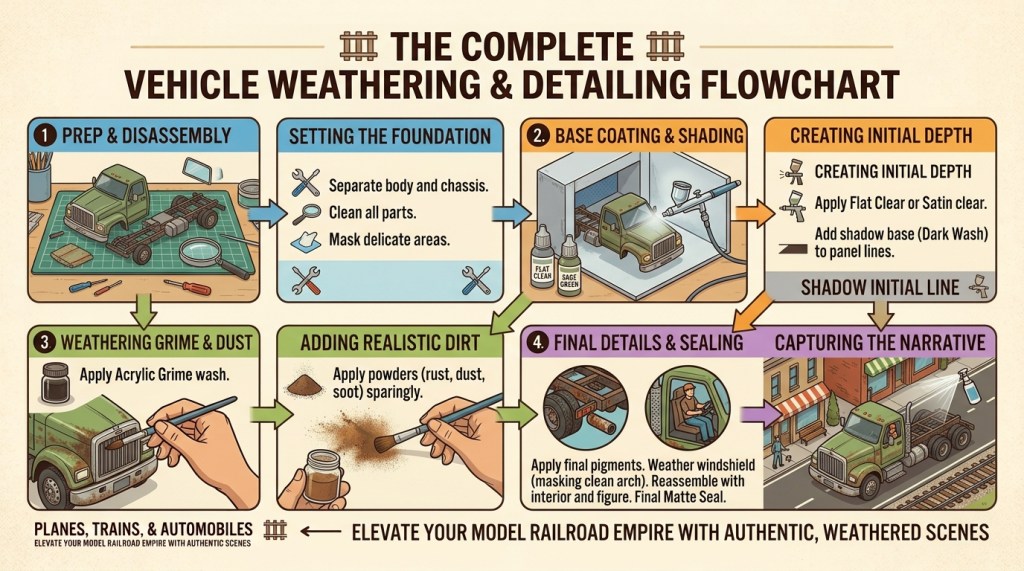
For weathering paints and powders check this site
Dry Brushes and Acrylic Washes
- Panel Line Washes: Mix a thin wash of dark grey or black acrylic paint with water and a drop of dish soap. Apply it to the door seams, hood lines, and grill openings. Capillary action will pull the dark paint into the crevices, creating natural shadow lines.
- Undercarriage Dirt: Use a dry brush with light tan or mud-colored acrylic paint to lightly stroke the lower rocker panels, wheel wells, and mudflaps. Always brush in the direction of air movement—front to back and bottom to top.
Weathering Powders and Pigments
Pigment powders are ideal for simulating road dust, rust, and soot:
- Apply dark rust powders sparingly around lower wheel wells, quarter panels, and exhaust pipes on older work trucks.
- Apply light grey or tan dust powders to windshields (using a small piece of tape to mask off the clean arch swept by the windshield wipers!).
4. Roadway Placement and Dynamic Storytelling
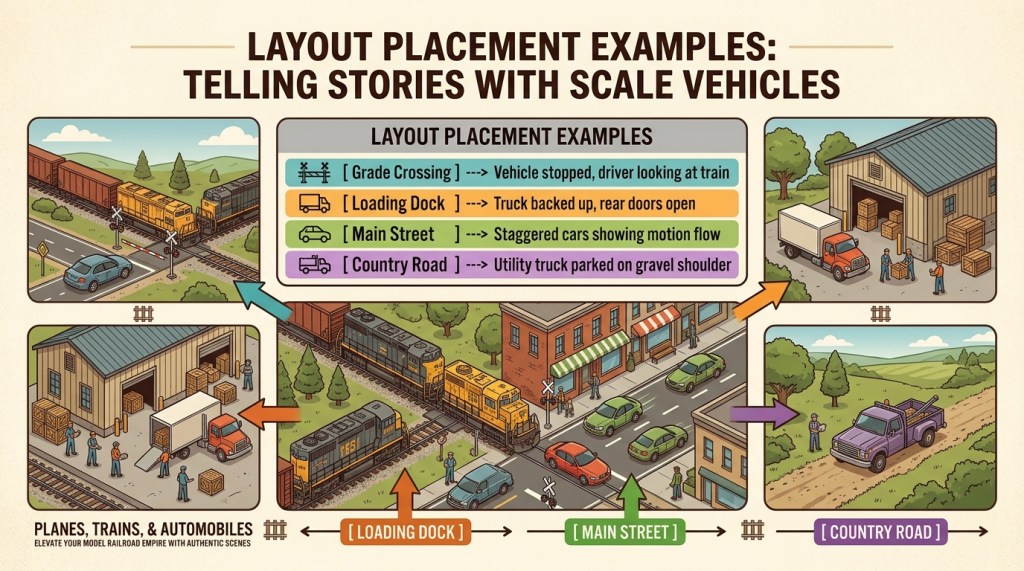
The difference between a static display and a dynamic model railroad lies in layout composition. Vehicles should never be placed randomly; every vehicle should have a purpose, a destination, or a narrative role.
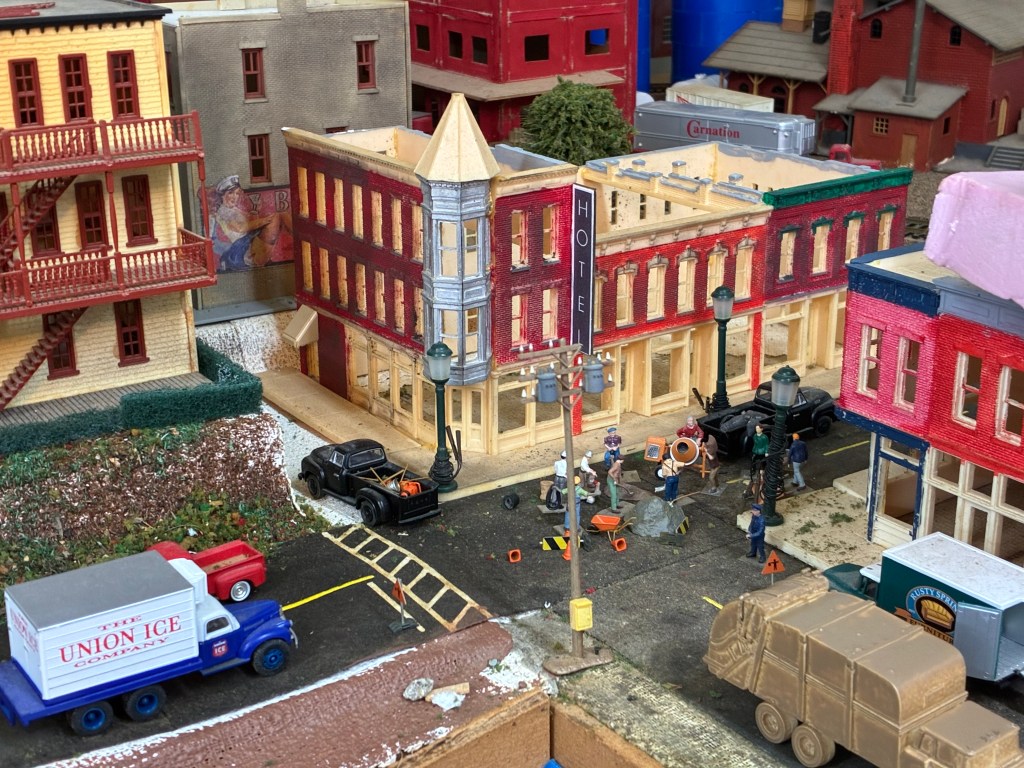
Check here for vehicles in all scales and brands.
1. Create Action at Grade Crossings
Place a vehicle stopped at a railroad crossing signal, angled slightly toward the approaching train. This simple setup creates immediate tension and draws the viewer’s eye directly to the interaction between rail traffic and road traffic.
2. Animate Industrial Loading Docks
At freight houses, warehouses, and manufacturing plants, park delivery trucks with their rear doors open, backed up to loading bays. Position crates, pallets, forklifts, and HO scale workers nearby to show active commerce in progress.
3. Use Natural Vehicle Spacing
On town streets and highways, avoid placing vehicles in perfectly straight, evenly spaced lines. Real traffic flows unevenly:
- Angle parked cars slightly away from the curb to simulate recent parking.
- Leave varying gaps between moving traffic to suggest different speeds.
- Place a maintenance truck parked on a gravel shoulder with hazard orange cones set up behind it.
Micro-Scenes: Telling Stories in Scale
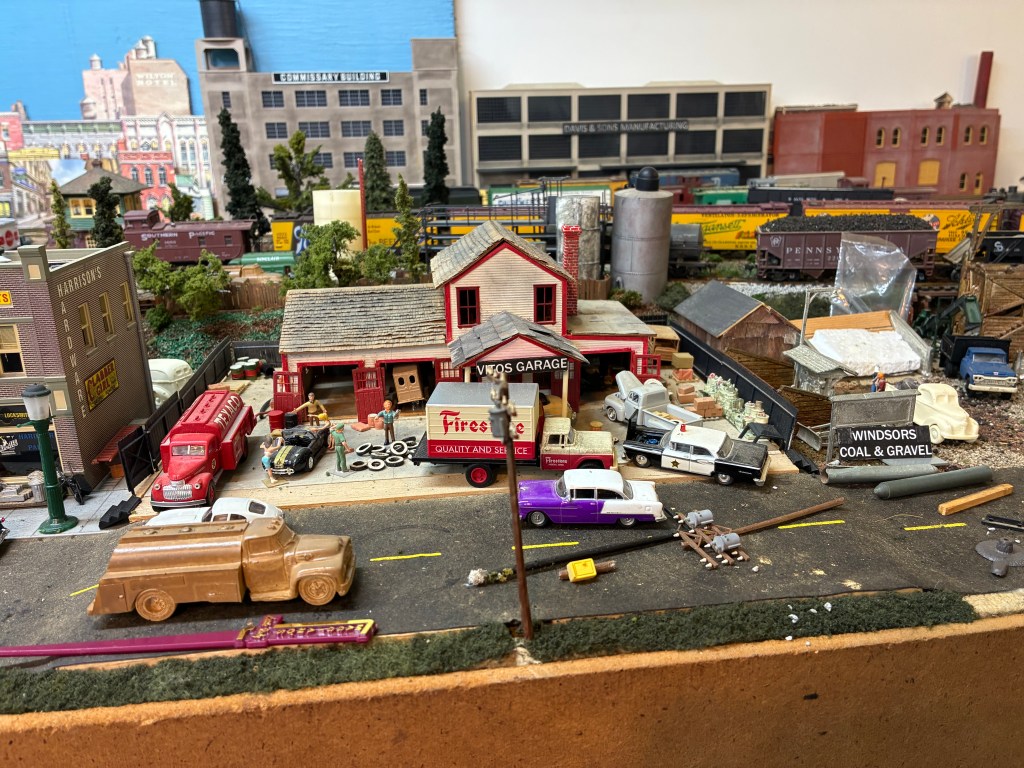
The most memorable layout details are tiny micro-scenes that viewers discover only upon close inspection:
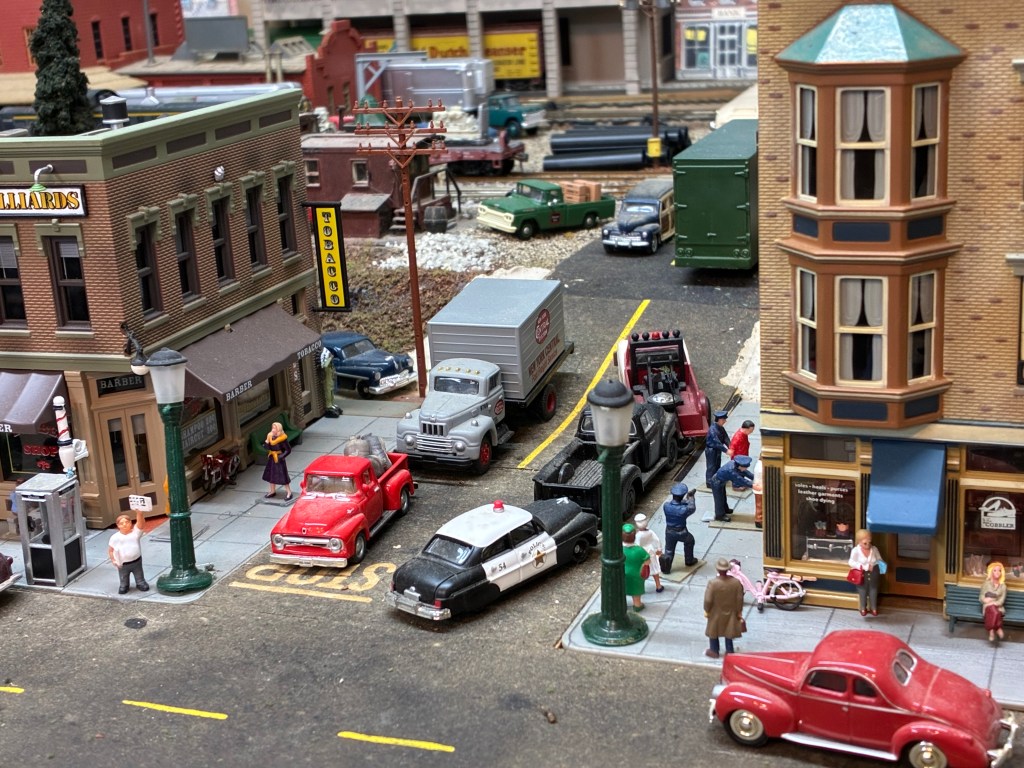
- The Local Gas Station: A 1950s sedan with the hood popped open, a mechanic leaning over the engine bay, and the driver leaning against the pump leaning in conversation.
- The Rural Farm: A weathered vintage tractor pulling a hay wagon out of a field, leaving faint dirt tire tracks painted onto the paved rural road.
- The Downtown Traffic Jam: A double-parked delivery van holding up a line of two or three cars, complete with a driver figure gesturing out the window.
Bringing Your Roadways to Life
Scale vehicles are far more than scenery fillers—they are crucial historical anchors, visual scale indicators, and narrative engines for your entire model railroad layout. By taking the time to pick era-appropriate models, strip away factory gloss, add driver figures, apply subtle road grime, and place each vehicle with intentional purpose, you turn ordinary roadways into captivating scenes that tell stories for years to come.
For vehicles for all scales and all brands check this site.
Coming Up Next Month: Join us for our October installment as we tackle trackside structures and industrial scenery! We’ll explore how to kitbash plastic building kits, create realistic brick and concrete finishes, and add weathered signage to give your layout’s industries authentic character and purpose. Don’t miss it!

