Some people sometimes view hobbies as sometimes silly or frivolous pastimes. And it’s true some hobbies are like that. But it is healthy to have a hobby because it diversifies our interests and keeps us active and fun to be with. But many hobbies are for the few that really get into that area of study. Stamp collecting or rock climbing are valid hobbies. But to be sure, these are not hobbies that just anybody will get into.
Astronomy, by contract, that you could say everybody gets into at some point or another. It is safe to say that everybody at some point has looked up at a magnificent night sky and said “WOW.” At that moment, even if was only for that moment, that person became an amateur astronomy hobbyist. They had that “Wow” moment in what can only be described as the “WOW” hobby.
That common experience is what makes astronomy one of the most exciting and popular hobbies of them all. Any hobby has to have a few “wow” moments. Whether it’s hitting that strike in bowling or finding that perfect stamp, there has to be a moment when the bell rings. Well astronomy has many “wow” moments that occur virtually any clear night in the stars. From the coming of an asteroid shower to just figuring out another constellation, there is so much to do and play with in astronomy that you can be a hobbyist your whole life and never get bored.
Besides the excitement of astronomy, another reason it makes a great hobby is that it is easy and cheap to get started. Unlike skiing for example, to just start enjoying astronomy, all you need is the night sky. But there is no end to the levels of complexity and sophistication you can get to as you move along in astronomy as well. So like any good hobby, astronomy is endlessly fascinating and tremendously addictive because there is always more you want to learn and more you can do to make your knowledge and experiences more interesting and fun.
A great side benefit of how many people are into astronomy is that it is a tremendously social hobby as well. This is unusual for a hobby that is associated with a science, that is executed by staring up in the sky by yourself and that is not competitive. But in any town or city, there are at least a few and probably dozens of astronomy clubs and associations that meet regularly to discuss astronomy.
This is the perfect way to introduce a new recruit to the hobby of astronomy. These clubs thrive on sharing their love of astronomy with new members, kids and those just learning how to explore the stars. Most astronomy clubs schedule regular “safaris” to go out away from the lights of the city and get a good night of sky watching done. Going on such an outing with a big group of enthusiasts is the type of experience that will take a passive interest into astronomy and change it into a healthy obsession.
This side-by-side comparison shows observations of the Southern Ring Nebula in near-infrared light, at left, and mid-infrared light, at right, from NASA’s Webb Telescope.
This scene was created by a white dwarf star – the remains of a star like our Sun after it shed its outer layers and stopped burning fuel though nuclear fusion. Those outer layers now form the ejected shells all along this view.
In the Near-Infrared Camera (NIRCam) image, the white dwarf appears to the lower left of the bright, central star, partially hidden by a diffraction spike. The same star appears – but brighter, larger, and redder – in the Mid-Infrared Instrument (MIRI) image. This white dwarf star is cloaked in thick layers of dust, which make it appear larger.
The brighter star in both images hasn’t yet shed its layers. It closely orbits the dimmer white dwarf, helping to distribute what it’s ejected.
Over thousands of years and before it became a white dwarf, the star periodically ejected mass – the visible shells of material. As if on repeat, it contracted, heated up – and then, unable to push out more material, pulsated. Stellar material was sent in all directions – like a rotating sprinkler – and provided the ingredients for this asymmetrical landscape.
Today, the white dwarf is heating up the gas in the inner regions – which appear blue at left and red at right. Both stars are lighting up the outer regions, shown in orange and blue, respectively.
The images look very different because NIRCam and MIRI collect different wavelengths of light. NIRCam observes near-infrared light, which is closer to the visible wavelengths our eyes detect. MIRI goes farther into the infrared, picking up mid-infrared wavelengths. The second star more clearly appears in the MIRI image, because this instrument can see the gleaming dust around it, bringing it more clearly into view.
The stars – and their layers of light – steal more attention in the NIRCam image, while dust pl
By going out with a group, you can rub elbows with people who know the night sky, can help you learn how to spot the great constellations and how to train your eyes to see the really cool stuff going on over our heads virtually every night. Astronomy is a passion that is shared equally by everyone from children, to college students to serious scholars in the field to even professional astronomers who work at exploring the universe full time. On any given night, you or your child may be sitting next to an award winning professional astronomer who will happily provide a private lesson looking up at the cosmos just for the sheer fun of shared learning.
The great thing is that everything we have talked about here costs virtually nothing. You can get started with your love of astronomy and learn as you go so when you are ready to make some investment in equipment, you have learned from others what is just the right thing for you. Sure, eventually you will want some astronomy magazine subscriptions, a star map or two and binoculars or a telescope. But those things come as your love of the hobby matures. Meanwhile, get out there, meet others who share your excitement about star gazing and get to know a hobby that never stops making you say “WOW”.
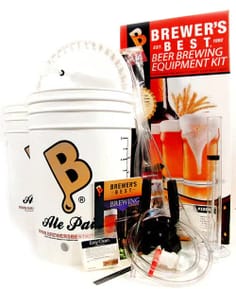
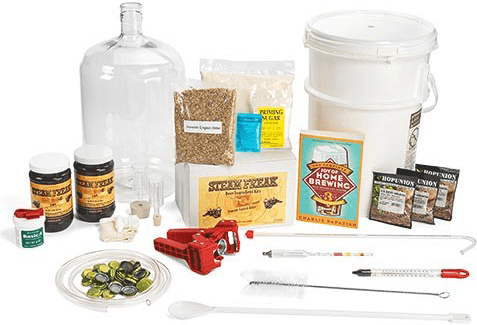
I’m frequently asked by craft beer fans what they need in order to start brewing their own beer. Is there a home brewing equipment list that one could follow? Luckily, E. C. Kraus has taken the guess work out of this question by offering a Starter Home Brew Kit, which includes a bunch of equipment and one ingredient kit for the homebrewer’s first batch of beer. The only thing not included is a large kettle, which you may have on hand already. (If you don’t, we can hook you up with a brew kettle, too!)
Now, let’s take a closer look at the list of home brewing equipment included in the Steam Freak beer brewing kit:
Home Brewing Book: Before even getting to the actual equipment, every brewer needs some literature to guide them through their first batch. The Complete Joy of Home Brewing is the perfect accompaniment for the beginning brewer. After getting a batch or two of homemade beer under their belt, homebrewers can upgrade to more advanced books. I recommend Marty Nachel’s Homebrewing for Dummies and Ray Daniels’ Designing Great Beers. More >>
6 Gallon Primary Fermenter (Comes with airlock, stopper, and faucet): A 6 Gallon Fermenter is ideal for primary fermentation. Even though you will be brewing a five-gallon batch, the extra space allows for krausen, or foam, to build during the height of fermentation. The airlock and stopper allow carbon dioxide – a byproduct of fermentation – to escape from the fermenter, while the faucet makes it easy to transfer to the carboy for secondary fermentation. More >>
5 Gallon Plastic Carboy (Comes with airlock, stopper, and faucet): The carboy is where the beer sits for a 10-14 day conditioning phase, known as secondary fermentation. A curved racking cane will make it easier to transfer from the carboy back into the fermenter for bottling. More >>
Home Brew Hydrometer: This nifty tool should on any home brewing equipment list. It allows brewers at every level to determine the alcohol content of their beer. Carefully place the sanitized home brew hydrometer in the unfermented wort to take the first measurement – referred to as the original gravity (OG). After fermentation, take another – called the final gravity (FG). The difference between the two is used to calculate the alcohol by volume (ABV)! More>>
Thermometer: Your fermentation temperature matters. Too cool, and the yeast won’t ferment; too warm and you are promoting bacterial growth and possible death of the yeast. More >>
6′ Length of 3/8″ Vinyl Hose: Any home brewing equipment list is going to have this. The heat resistant hose facilitates transferring from one fermenter to the other. More >>
Bottle Capper When it’s time to bottle your brew, you’ll need something to cap the beer bottles. The double lever capper is easy to operate and ensures a firm seal on every bottle. More >>
Cleaner/Sanitizer: Brewing can get a little messy, but with several cases of beer at the end, it’s well worth the effort. A cleaner is ideal for cleaning your home brewing equipment before and after brewing a batch of beer. More >>
Beer Bottle Brush: Homebrewers typically save beer bottles for when their home brew is ready. The beer bottle brush helps to clean the insides of the bottles, helping to make sure nothing contaminates the beer you’ve worked so hard to make. More >>
Beer Ingredient Kit: Choose from over 30 beer ingredient kits for your making your first batch of beer. The Steam Freak Ingredient Kits include all home brewing ingredients for a five gallon batch, recipe instructions, and caps. More >>
Check out this great video about the Beginning Homebrew Kit
So what are you waiting for? Order a kit already and start brewing! It has a home brewing equipment list that is perfect for the first-timer. And, it’s something you can easily build upon as you progress in this wonderful hobby.
Below you will find a listing for Beginning Homebrew Kit containing the equipment needed, also there are several recipe kits available. What is your favorite beer? If you see it or one similar make note. Read the product description and the questions and answers also watch the video. See how easy a beer kit an be. Try one, enjoy the results of your efforts. Start your new hobby and share it with family and friends. You never know your beer could be in great demand. Once you have the equipment kit the recipes are endless. Make several types for poker night or the game party.
—– David Ackley is a beer writer, brewer, and self-described “craft beer crusader.” He is a graduate of the Siebel Institute of Technology’s “Start Your Own Brewery” program and the Oskar Blues Brew School in Brevard, NC.
Can you remember the moment you first got the idea in your head to take up brewing your own beer at home? For many it is a tour of a brew pub or some other behind the scenes exposure to all that happens when good beer is made. Before that one pivotal moment, you may have never even thought about beer being made at all. The origin of beer was the liquor store or the market and that was that. But when you realized that not only does beer go through a fascinating transformation from grains, hops and malts to this delicious brew you enjoy but that you can make your own beer if you want to, that is when the idea of becoming a home brewer started to become a reality in your mind. For others that moment of realization that home brewing could be a whole new world may have happened when you first were exposed to “real” beer, as the home brewing enthusiasts call it. That is when you sampled a brew that was not made by one of the big retail beer makers like Budweiser, Coors or Miller and you discovered what beer tasted like when it came directly from the brewing process to your glass. That may also be the day you found out what an amazing diversity of beer types, textures and flavors there were. And for many when you realize that you can find a diversity of beers that is almost as extensive as in the wine world that it is often very difficult to go back to boring old pasteurized beer again. So if you are about to “make the leap” to become a home brewer yourself, you are about to step into a rich and full world that is full of history, culture, tradition and new friends and associates. You won’t just take up the hobby of brewing beer, you will “become” a home brewer which is a unique kind of individual indeed. It isn’t hard to “define” home brewing because the term is self explanatory except to go on to say that it is entirely possible for you to make high quality beer right in your own home with a small investment in equipment, the base ingredients that are readily available as well and the love and patience it will take to learn the process. But the process is not difficult which explains why home brewing is a passion and a hobby that is growing in popularity more and more every year. You might be surprised who you know who has a love of brewing beer because it is not just the hard core beer drinker you might know. Because brewing beer at home is as much about the art and the craft of making a quality beverage, home brewers come from every walk of life there is from bartenders to ministers and from college professors to librarians. The heart of home brewing is the fun, the excitement and the fulfillment creating your own batch of delicious beer can bring. But what transforms home brewing hobbyists to life long makers of beer is the challenge of always finding new blends, new methods and new ways to make their beer even more flavorful than the last batch. Be forewarned that a zeal for becoming better and better at home brewing can be habit forming. But if you get hooked, you will meet thousands of others in your town and around the country and the world who have the same addiction as you. It’s a wonderful addiction that you will never regret catching because brewing beer at home can provide decades of fun and enjoyment making your own blends of beer. But it provides something else just as good which is really great tasting beer. So enjoy.
Below you will find a listing for Beginning Homebrew Kit containing the equipment needed, also there are several recipe kits available. What is your favorite beer? If you see it or one similar make note. Read the product description and the questions and answers also watch the video. See how easy a beer kit an be. Try one, enjoy the results of your efforts. Start your new hobby and share it with family and friends. You never know your beer could be in great demand. Once you have the equipment kit the recipes are endless. Make several types for poker night or the game party.
Adventures in Homebrewing has many options for the home winemaker. Even if you are new to winemaking, we can answer all of your questions.
How long does it take to make a wine? Depending on the wine you choose, it will take between 4 and 8 weeks to complete the winemaking process. Can I make wine that is as good as store bought brands? Yes! Adventures in Homebrewing offers many wine recipe kits to choose from. We feature Winexpert, and Winexpert sources juices and concentrates from all over the world and follows the same process as a winery, but on a much smaller scale. For the best wine, allow your wine to age in the bottle – the longer you wait the better it will become. Is making wine at home expensive? Not at all. Adventures in Homebrewing offers options to make wine for every budget. Because you are making the wine yourself, you save the high tax rates associated with beverage alcohol. In fact, our wines can be made for as little as $5 per bottle, making it very affordable compared to store-bought wine. How do I make my own wine? To get started, you will need your
. If you need everything, that is no problem. Adventures in Homebrewing has some complete Equipment Kits for the homebrewer ready to get started in winemaking. Don’t worry about extra costs…we are shipping Wine Beginner Kits Free.
With the right equipment, you just need to know the process. Making a wine kit from one of our Winexpert kits is simple and easy because the kit has all the ingredients, in pre-measured amounts, that one needs to make 6 gallons of wine (30 bottles). Here is an example of some of the ingredients included in a Winexpert Kit.
Juice Bag: The grape juice has all the fermentable sugars that the yeast feed on to make alcohol. The vast majority of the wine’s flavor and complexity is also derived from the grape juice.
Wine Yeast: 1-2 Yeast packets depending on the kit. Yeast is what eats and converts the sugars to alcohol.
Oak: In select kits, you will find packets of oak. Oak will impart beneficial flavors and colors into the wine. Oak also helps to balance some of the rich flavors found in wines like chardonnays.
Bentonite: This is a fine clay in powder form that helps clarify the wine during fermentation
Metabisulfite: Stops yeast action and is used in stabilizing the wine before clarifying. Metabisulfite can also be used as a sanitizer for winemaking equipment in higher concentrations. Your kit will not include enough for use as a sanitizer but can be purchased from AHS if desired.
Potassium Sorbate: Stops all remaining fermentation action and fully stabilizes the wine. Sorbate is used in conjunction with metabisulfite for wine stabilization.
Finishing Fining Agent: Depending on the kit this will be either an isinglass pack or chitosan pack. Like bentonite, these agents help clarify the wine into the sparkling beauty you sip from your glass.
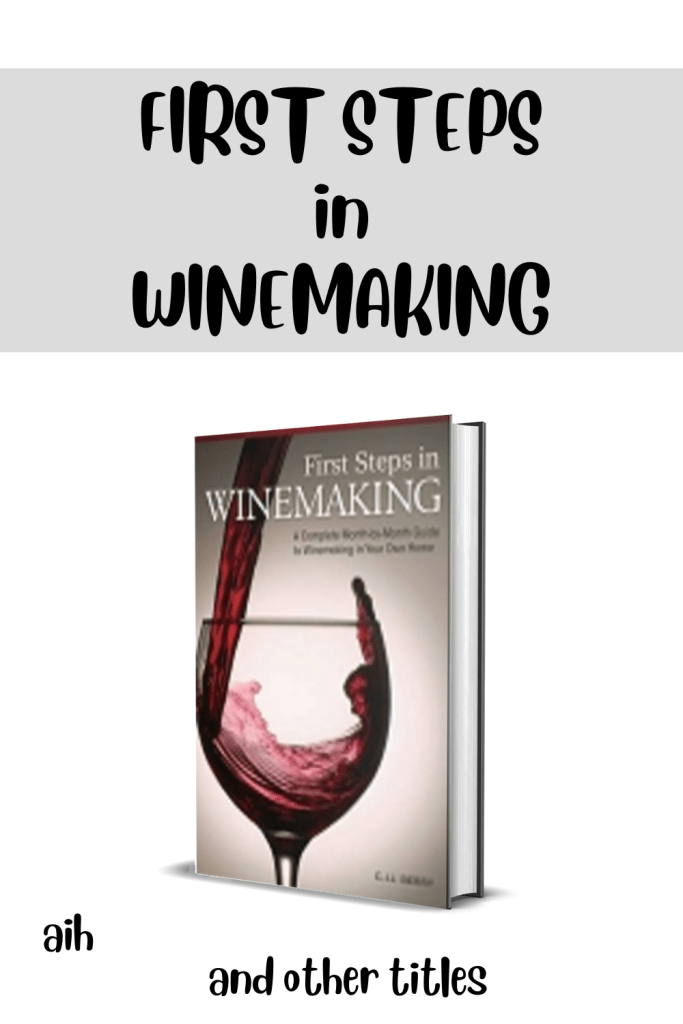
Wine kits do not take a long time to get into the bottle. It is possible to have a wine in bottle at 4-6 weeks from start. However, the catch that you’re looking for comes in the form of aging the wine. There are benefits to aging and following the recommended guidelines ensure your wine will always be delectable and desired by your friends. But, a remarkable amount of the improvement can be obtained within the first 1-2 months of bottling and as such it is possible for you to have a delicious wine within 3 months of starting. Packaged wine making juices tend to make wines faster than making wine using fresh fruit juices because there is generally no pulp or skins involved (with some very specific exceptions). Winexpert has some very specific aging recommendations from which you can get the best possible flavor. Island Mist: Island mist kits are fermented from a grape base and sweetened with a fruit juice. These wines are ready within just a few weeks of bottling. Specialty Dessert Wine Kits: These kits can vary depending on the type of wine being made. A standard dessert wine could be ready with as little as 2-3 months age time, whereas a chocolate raspberry port may take 4-6 months. Winexpert Classic: It is recommended that these wines age from 2-5 months after bottling. The aging process allows tannins and other flavors to mellow meld into one another so as to be pleasing to the pallet. One Gallon Winexpert Classic kits: Have all the same requirements for fermentation and aging as a 6 gallon Winexpert Classic kit. Winexpert Reserve: Winexpert strongly recommend that these wines be aged up to a year in order to enjoy the best possible flavors. While they will be ready to drink in as little as 3-4 months, they will be best at 12 months or more. This has to do with the quality of the juices in the juice bag. Reserve kits are a step above the rest in that they rely on purer grape juices that are sourced and/or blended from very specific locales within a given region. The quantity of juice is also more than what will be found in a Classic Kit, meaning less water will be used, which results in a longer age time. Winexpert Private Reserve: These kits are the highest quality wine kits produced on the market, bar none. They will take 16-18 months age time to achieve the best results. Private Reserve kits include the most pure juice of any level kit and the highest quality ingredients. The grapes used in these kits are often sourced from specific vineyards. It can be hard to age a wine for this long, especially when you’ve put the time and effort and money into making a Reserve or Private Reserve Kit. I’m not saying you can’t start to drink the fruits of your labor at 3-4 months, it will be a very good wine, but at 12-18 months it will be a phenomenal wine. Adventures in Homebrewing recommends saving 1/4 to 1/2 your batch bottles and then start a new batch. This way you can enjoy your wine at its best, but you can start to enjoy it as it’s maturing. In addition to a wine making recipe kit and being prepared to age it, you will need a wine making equipment kit and wine bottles in order to make your nectar of the gods. We offer several levels of kits to get you started. Or if you’re a brewer of beer already, all you need to do is get an additional 7.9 gallon fermenter, corker, corks and a 6 gallon carboy.
Let’s Go Through The Whole Process How To Make Wine At Home 1: Welcome to Winemaking Tim Vandergrift walks you through some of the basics of making wine at home. Winemaking is a natural process, that you can do at home, and produce a good product. The process is completely safe, and with our equipment and wine kits, you can create store quality wine at home. All of our equipment and wine kits come with great instructions and are easy to follow. Watch this video, and you will learn about the basic equipment needed. https://www.youtube.com/embed/Vcfs0DRtkAU
How To Make Wine At Home 2: Before You Begin Now it is time to dive right in, right? Wrong. If you want a quality, good tasting wine, there is some prep work involved. But don’t worry, it is easy to do. This next video will walk you through the cleaning process and as well as an in-depth look at the instructions. https://www.youtube.com/embed/8SJbjNlp75M
How To Make Wine At Home 3: Primary Fermentation With all your equipment clean and sanitized, it is time to make the wine. This next video will walk you through filling the fermenter and taking a Gravity Reading and all the way to pitching your yeast.
How To Make Wine At Home 4: Secondary Fermentation Ferment again? You bet! After 5-7 days your Primary Fermentation should be complete. In this video, you will learn to how to take your Gravity to ensure fermentation has taken place. Typically, we will transfer into a Glass Carboy. Transferring your wine is made much easier with Auto-Siphon. They are available in a 1/2″ and 3/8″ diameter sizes.
How To Make Wine At Home 5: Stabilising and Clearing At this point, the wine is just about finished with its fermentation. Now it is time to stabilize and clear the wine. Follow the instructions and to take a sample. A Wine Thief is a perfect tool for this. You will also learn how to calculate the Alcohol Content. There will be some additives that will need to be added at this point, refer to your instructions for your particular wine kit. Time to de-gas? Yes, a Wine Whip will make all the difference.
How To Make Wine At Home 6: Bottling Finally, time to drink…I mean to bottle. The wine should now be clear. Use that Wine Thief again to get a close look, you want to bottle clear wine. You will need about 30 standard wine bottles. Adventures in Homebrewing has multiple sizes, colors, and styles of wine bottles to choose from. Check out our full selection here =>Wine Bottles. https://www.youtube.com/embed/80o0k-Eb4SI
That’s it, you are a winemaker. Now it is time to pick out a wine!
Ever wonder how to brew wine at home? What do I need? How much will it cost? Is it legal? Well keep reading, I am about to tell you all you need to know to get started on making your wine from home.
First you need a wine making kit. These kits, to a lot of peoples surprise, are not that expensive. A 5 or 6 gallon kit will cost between $100 and $200. A one gallon kit will run about $30. Your equipment will cost $70 to $170. The equipment kit is a one time purchase. That comes out to about 2.50$ a bottle. This will very on the type of wine, your first batch will be slightly higher. After that the cost will drop. I strongly suggest that the first batch be a one gallon variety.
You don’t need a winepress. Wineries use these winepresses to extract every last drop of juice from the fruit. Not for quality reasons. At $1 to $2 a bottle for home wine makers, the last drop of juice is not important.
Making wine at home is legal. A household of 2 adults can make up to 200 gallons of wine a year. And a household of 1 adult can make 100 gallons a year. You will need to check with your local authorities if you intend to sell or distibrut your wine.
The most important thing you need to have is good recipes and clear instruction on how to use them. This is where alot of wine makers fail. The recipes might be good but the instruction part is to vague. There are some additives that need to be added wheter listed or not. And some wine need to be shaken every 48 hours and some don’t.
You will also need to determine how sweet you like your wine. This is done with a hydrometer. Wich comes with the wine making kit. A reading of 1020 on the hydrometer means it is a sweet wine, 1010 is medieum and 990 is very dry.
Wine making at home is not hard as long as you have the right equipment, a basic kit works fine, and some good recipes and instruction. The kits come with all you will need.
Read the how to brew and watch the videos to learn more.
So you want to jump into the expanding whirlwind of photographers? Here are some helpful notes to get you setup for a good first photo shoot.
Equipment You probably have this notion that you should look like one of those photographers you see in the movies or paparazzi groups you see in the news when you think about what equipment to get. To your relief, all you really need to have is a camera that is portable and has good color reception, or in other words, will capture the colors for you. There are, at this time, a lot of options in the market that you no longer have to settle with a point-and-shoot camera. You can now acquire a DSLR for half the price than it used to sell for. For a starting photographer, I suggest that you get a DSLR as this type of camera would allow you to set manual controls and afford you to tinker with other settings that can widen your photographing range otherwise unavailable in a point-and-shoot. Most popular ones are Canon, Nikon and Olympus. These are the three names I trust. However, if we’re talking about options and flexibility, I’d go for a Canon since, not only do they have a lot of available lenses for DSLRs, but their cameras are more compatible with the other brand lenses too.
Manual Controls You will notice that there a bunch of settings available in a camera. If you check your camera’s manual, you’ll find that there are programmed settings for you to easily choose from. There’s landscape, portrait, sport and macro. These settings are just preset or programmed combinations of the two items I refer to as Manual Controls. Hence, let me introduce you to aperture and shutterspeed. Aperture is a range of numbers and so is shutterspeed. The programmed settings I mentioned earlier are just preset combinations of these two. The portrait setting has a high aperture and low shutterspeed, the landscape setting has the opposite and so on. But for more flexibility, I strongly suggest you use Manual Controls. With this, you can select any aperture or shutterspeed you wish to use for any given picture at any time.
The aperture is the size of the opening of your shutter. To cut the chase short, the smaller the number, the bigger your opening is, thus more light will be rendered on your picture. Shutterspeed almost works in the same way. The smaller the number, the longer your shutter will be open to absorb light. Shutterspeed deals with time, aperture deals with the diameter. Given this, aperture of 2.8 and shutterspeed of 10 will render a very bright picture. Whereas an aperture of 9 and a shutterspeed of 1000 will render a rather dark picture. It’s up to you how to mix these two to come up with the perfect combination to capture your picture. This knowledge will enable you to take pictures even in situations when your programmed controls can no longer manage it.
Framing and Composition Everybody can tell if a picture is nice or not after looking at it. But how can you tell if something will make a nice picture or not? This is the challenge you, as a photographer, will have to undertake. What might be interesting for others may not be interesting to you, and vice-versa. In this department, since we’re depending on your creativity and your so-called eye for photography, I can only leave you with two things: 1. check your frame: make sure everything is within it and leave as little dead space as you can and 2. check the available light (avoid harsh lighting) and what direction it’s coming from. Light pouring towards you will render your subject black and light pouring profusely from behind you will render your subject too bright. Check your frame if everything in it, really has to be in it. Will it distract the people from your real subject? Is it interesting enough to be in my picture? Should I do a tight shot instead? These are some of the questions you should be asking when examining your frame.
Lenses When you purchase a camera body, it normally comes with a kit lens. Should it not come with a kit lens, then I suggest you get a kit lens before jumping to the more complex ones. Kit lens cover the normal range of aperture numbers. But then again, I don’t want to delve into this so much as you do not want to be overwhelmed with complexities that come with your lens on top of the complexities of your camera. So just to quickly give you an idea, there are several kinds of lenses. Lenses may differ in their aperture ranges and in the material the lens is made of. There are lenses that are specific to the smaller aperture numbers. There are lenses made of plastic and some of glass. Those made of glass have better color reception than the former.
Post Processing This area is optional, but most of the mind-blowing pictures I’ve seen lately have been to some extent, post processed. Post processing involves some degree of enhancement using any one of the graphic design software. A very popular one is Adobe Photoshop. It wouldn’t hurt if you tried learning the basic enhancement techniques, not to manipulate your image altogether, but rather just to clean up your image, enhance colors and sharpen your subject. This will also prove to be helpful when you send your photos to an online printing company and see the final results.
Photography is a very technical subject at the same time highly customizable. Each photographer has his or her own style that they incorporate into their photos. The equipment can only do so much. But it still depends on you and how you want other people to see a commonplace object or perspective. So as a closing remark to beginning photographers, let me finish off with a phrase I used to take with me whenever I go shooting, remember: safety in numbers.
You can get all the things that you are going to need in a beer making kit. If you are new or an experienced beer maker, you will find that you can create your own great tasting beer with a little knowledge and a great beer making kit. There is no other way of getting what you want and finding a fun new hobby.
Many simple beer kits are sold today. You can find many of the great brewing kits online or in the beer and liquor stores in your area. There are beer-making kits that will come with complete instructions to make it easier on the beer maker. They will also have the ingredients and the best beer recipe that will make any new beginner create the best beer that they can.
There are many books and other reading material that you can buy to give you the information that is necessary to get down to business. You can get all the facts that will get you ready for making the best tasting beer that you can. These books can guide you through the process and all the different kinds of recipes that you can try for your taste buds.
There are also deluxe beers making kits that are available too. These kits will have everything and more that you will need to get your beer making going. They will have the ingredients and some of the equipment that you will need to get started. You will get your sanitizer and some of the malts that you will need to get your beer making started. With some of the beer kits, the only thing that you will need is a stainless steel pot to do all the brewing in.
These brew kits will make great gifts for anyone that needs to have a hobby. These kits will be the very thing that they need to do this great hobby and get started learning about beer making. Most of the people will enjoy having these kits and trying their hand at making great tasting beer and doing something that they have always wanted to do.
It is a good idea to read and know all of the instructions that are included in the books. You can learn a lot and this is a great way to get all the information that you need first before you start on the process. This way, you will have a better idea of where and how to start your brewing at home.
Below you will find a listing for Beginning Homebrew Kit containing the equipment needed, also there are several recipe kits available. What is your favorite beer? If you see it or one similar make note. Read the product description and the questions and answers also watch the video. See how easy a beer kit an be. Try one, enjoy the results of your efforts. Start your new hobby and share it with family and friends. You never know your beer could be in great demand. Once you have the equipment kit the recipes are endless. Make several types for poker night or the game party.
It seems from the moment you begin to take your love of astronomy seriously, the thing that is on your mind is what kind of telescope will you get. And there is no question, investing in a good telescope can really enhance your enjoyment of your new passion in astronomy. But don’t be too hasty to keep up with the big wigs in the astronomy clubs that have advanced telescopes. There is another alternative that can give you most of the advantages of a telescope and some extra flexibility and reduced cost to boot.
That alternative is a good pair of astronomy binoculars. Mostly we think of binoculars as the thing you use to see the football game when you have to sit in the cheap seats. But if you do some homework and had a good grasp on what your stargazing objectives are, the advantages of astronomy binoculars over an entry level telescope can be pretty convincing.
* As a rule, they are cheaper. So you can get a lot of good stargazing at much less of an investment. You can always spend more money later but for now, this may be just the solution for you.
* There are not so many accessories. To own and operate a telescope takes a lot of orientation to how to set up and use the device. Beyond that, tuning it for optimum view and diagnosing it when you have problems can sometimes make the telescope more of the passion than stargazing itself.
* It is much easier to use. If you have not bought a telescope yet, you may have seen telescope owners going through a laborious set up and break down discipline for each use. This is time they are not looking at the stars. The binocular users are happily stargazing as this goes on.
* Binoculars are lightweight and portable. Unless you have the luxury to set up and operate an observatory from your deck, you are probably going to travel to perform your viewings. Binoculars go with you much easier and they are more lightweight to carry to the country and use while you are there than a cumbersome telescope set up kit.
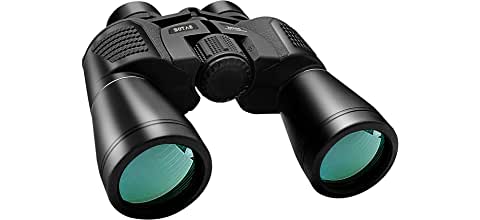
【Professional High Powered Binoculars】Binoculars with 20X high power magnification and 50mm objective lens, provides wider field of view at 1000 yards
So give the binocular option some consideration. To make the most effective choice, however, here are a few facts about astronomy binoculars that will help you evaluate which ones are best for you…
Binoculars have two lens sets, one at the end of the eyepiece and a set right next to your eyes. The ones closest to the eye are called the ocular lenses which magnify the image (make it bigger). The ones closest to the sky are called the objective lenses and the size of these lenses will determine how much sky you can see at once. So anytime you are evaluating binoculars, there are two numbers associated with the set. So if the binoculars have a rating of 15-40, that means that the ocular lenses magnify 15 times and the later number is a relative number to how much of the sky you can see. The higher the second number, the more you can see. The explanation is simple. The bigger the lens, the more light it lets in. But be aware that the bigger the second number, the larger, heavier and more cumbersome the binoculars will be.
You will have to balance these two numbers with both your budget and what you want the binoculars to do for you. If you decide to go with a lower power binoculars, you could become frustrated with what you can see and you may have to take your eyes away from the view to get your orientation and consult the star map more often because your range of vision is so limited.
There will also be a temptation to buy a set of binoculars that have zoom functions and other features that will allow you to use it for other purposes such as hunting, whale watching or seeing the football game from the cheap seats. While this is good economy, those functions will get in the way when you are using the binoculars for astronomy. So if you are considering this purchase as your alternative to buying a telescope, our advice is buy binoculars made just for astronomy and don’t take them to the ball game.
Some people will want to try their luck at making wine at home. This is a fun idea and one that needs to have a great deal of thought first. Wine making is the next step for anyone that has already tried their hand at brewing their own beer. If they have tried this, they can make wine and good tasting wine at that.
Not everyone is going to be able to make perfect wine the first time. They are going to have to take their time to perfect their recipe and figure out what they are going to need to make the right wine and make sure that it tastes great.
Being clean is critical when you are making wine. You will find that if you keep work area and equipment always clean, you will avoid many problems in the wine making process. You do not want to have unwanted bacteria in your wine solution.
Patience is another must that you have to have. You have to make sure that you are aware that you are going to be working at this for a while. You may be great it the first time or you may find that you need to have more practice. You will also have a hard time waiting to taste your creation. However, you have to let the wine sit for the recommended amount of time so that it can ferment over time.
The actual art of making wine has been around for a long time. The recipes and the styles of wine have changed but the process is just about the same that it always has been. You may find that the recipes have different ingredients, temperatures, yeast, and fruits. This makes no difference. All that really matters is that you are making your own naturally tasting wine. Even if you fail, you will at least have given it the chance. You may succeed or you may fail, but either way you will have enjoyed the experience.
You can find all the information and basics of wine making online and in other literature. You can get everything that you will need to know out of these books. This is how you are going to be able have the know how when it comes to making your own great tasting wine. Once you know what supplies you need and you have the right equipment and state of mind, you can then begin your own wine making experience.
One place you might start is with this article” How to make wine at home. A Great lesson”. CLICK HERE
Try something new
How to make wine at home. A Great lesson. CLICK HERE
Small Batch wine Kits to try. Learning is Fun. CLICK HERE
Whenever you start a major new hobby, its best to take a few minutes and think about what you are getting into. A lot of new hobbies require a significant investment of time and money. This is certainly true of golf, skydiving, scuba and home brewing. So along with a plan on how to get started, its good to have a good plan for getting ready to plunge into home brewing full scale. If you have a road map for “checking it out”, you can determine if home brewing will fit into your lifestyle and your budget.
“Looking before you leap” means that you find out what it means to be involved in the hobby or sport as a full time member of that hobby community. When it comes to home brewing, that will only happen when you too can make your own beer at home. And when that time finally gets here and you can play with the recipes and make the taste of your own beer very unique, that will be an exciting moment for you. But a mature approach to this very adult hobby means checking it out and knowing the investment of time, money and space in the home before you spend your first dollar to get set up as a home brewer.
An easy and fun way to ease into the hobby of home brewing that doesn’t cost a cent is to begin to network with those who are already well into their passion for making beer. You can find forums online to use to learn more about getting started. And there are almost certainly a number of home brewing societies and clubs in town that you can find out about online or through your local retail brewing supply store. These social connections will be people who are very much “evangelists” for home brewing because they know the fun of it. So you will get plenty of chances to sit in with a new friend to step through the brewing process and not only learn what equipment you will need but how it is used as you get training from an “old pro” in home beer making.
Once you have gotten some basic training the free route through home brewing gurus, the time will come when you are ready to consider buying your own equipment and taking a stab at it yourself. But you have already witnessed that home brewing is a big event in the house filling up the kitchen, the refrigerator, making a mess sometimes and requiring places to store, refrigerate and ferment the beer in the various stages from ingredients to finished product. So it is important that the hobby of home brewing not just be your solitary passion but if at all possible you get the family into the act. If they can attend meetings at the home brewing club or go to competitions or other events that are all about home brewing, they can catch the same enthusiasm you have. That enthusiasm will be very important particularly in your significant other because each brewing session will be a major event in the house involving the kitchen with lots of pans and bottles and equipment. So having your wife or husband fully onboard with the process and even working on it together makes the fun of home brewing even more fulfilling.
Another area of looking before you leap is to plan out not only how you will use all of the equipment you will buy but how you will handle issues of storage. It’s a very pragmatic concern but if you bring in this arsenal of beer making equipment. Between batches it is going to have to be somewhere. And while you will enjoy that equipment a great deal, you don’t want it to dominate the home.
By getting a feel for the equipment when you are preparing to start your home brewing hobby, you can prepare a storage space for the equipment when it is not in use. Think ahead about storage for the fermentation phase of brewing as well as storing up to five gallons of beer per finished batch. But by thinking ahead, when you become a very active home brewer, you will have your family and facilities all ready for the changes. And that is looking before you leap into the exciting world of making and enjoying your own home made beer.
Below you will find a listing for Beginning Homebrew Kit containing the equipment needed, also there are several recipe kits available. What is your favorite beer? If you see it or one similar make note. Read the product description and the questions and answers also watch the video. See how easy a beer kit an be. Try one, enjoy the results of your efforts. Start your new hobby and share it with family and friends. You never know your beer could be in great demand. Once you have the equipment kit the recipes are endless. Make several types for poker night or the game party.





 How long does it take to make a wine?