Model railroading is a rewarding hobby that allows you to create a miniature world filled with intricate details and personal touches. Over the years, advancements in technology have made it easier than ever to add unique and realistic elements to your layout. One of the most exciting innovations in recent years is 3D printing. With 3D printed details, you can customize your model railroad like never before, creating everything from tiny accessories to entire structures.
If you’re new to the world of 3D printing or wondering how to incorporate these details into your layout, this family-friendly guide will walk you through everything you need to know.
Why Use 3D Printed Details?
3D printing has revolutionized the model railroading hobby for several reasons:
- Customization: You can create one-of-a-kind pieces that perfectly match your vision for your layout.
- Affordability: Once you have access to a 3D printer or online printing service, producing small details is often more cost-effective than buying pre-made items.
- Precision: 3D printers can produce highly detailed models that bring a level of realism difficult to achieve with traditional methods.
- Accessibility: Many online platforms offer free or affordable 3D models designed specifically for model railroads.
Getting Started with 3D Printing for Model Railroads
Step 1: Accessing a 3D Printer
If you don’t own a 3D printer, don’t worry! You have several options:
- Purchase a Printer: Entry-level resin printers like the Elegoo Mars or Anycubic Photon are affordable and perfect for small, detailed prints.
- Use Online Services: Websites like Shapeways or Treatstock allow you to upload designs and order prints without owning a printer.
- Local Makerspaces: Many libraries and community centers have 3D printers available for public use.
Step 2: Finding Models
There are countless ready-to-print models available online:
- Free Resources: Websites like Thingiverse and Printables offer free downloadable files for model railroad accessories.
- Paid Models: Platforms like MyMiniFactory or Cults3D provide high-quality designs for a small fee.
- Custom Designs: If you have specific needs, consider designing your own models using software like Tinkercad (beginner-friendly) or Fusion 360 (advanced).
Step 3: Choosing Materials
For model railroading, two types of materials are commonly used:
- PLA (Polylactic Acid): Affordable and easy to work with, PLA is great for larger pieces like buildings or terrain features.
- Resin: Resin printers produce finer details, making them ideal for small accessories like figures or tools.
Incorporating 3D Printed Details into Your Layout
Now that you have access to 3D printed models, let’s explore how to use them effectively on your layout.
1. Buildings and Structures
One of the most popular uses of 3D printing in model railroading is creating custom buildings and structures. Whether it’s a train station, factory, or farmhouse, 3D printing allows you to design structures that fit perfectly into your layout.

Tips:
- Print buildings in sections (walls, roofs) to make painting easier.
- Add texture by using sandpaper or applying weathering techniques after painting.
- Use LED lighting inside buildings for added realism.
2. Accessories and Props
Small details make a big difference when it comes to bringing your layout to life. With 3D printing, you can add accessories like:
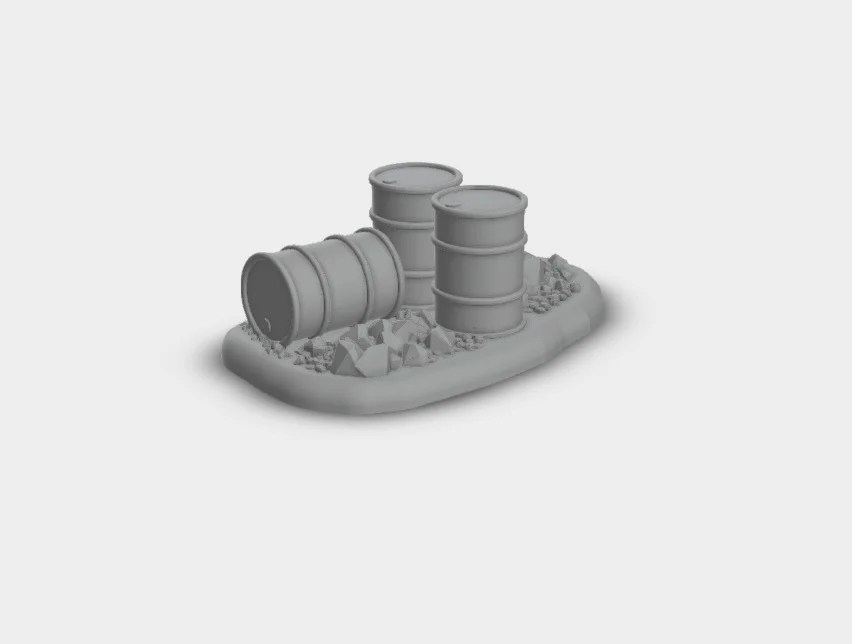


- Benches, streetlights, and mailboxes for urban scenes.
- Barrels, crates, and tools for industrial areas.
- Picnic tables, fences, and birdhouses for rural settings.
Tips:
- Paint accessories in realistic colors using acrylic paints.
- Group props together logically (e.g., crates near loading docks) to create believable scenes.
3. Vehicles
From cars and trucks to horse-drawn wagons, vehicles add movement and storytelling elements to your layout. Many hobbyists use 3D printing to create vehicles that match specific eras or themes.


Tips:
- Add weathering effects like rust or dirt for used vehicles.
- Use clear resin or transparent plastic sheets for windows.
4. Figures
Figures bring life and activity to any model railroad layout. With a resin printer, you can create highly detailed figures in various poses:

- Workers loading cargo at an industrial site.
- Families enjoying a picnic in the park.
- Passengers waiting at the train station.
Tips:
- Paint figures with fine brushes for precise details.
- Place figures in contextually appropriate locations (e.g., workers near factories).
5. Terrain Features
Enhance your layout’s landscape with custom terrain features such as:
- Rocks and cliffs
- Bridges and tunnels
- Water features like fountains or docks
Tips:
- Combine printed terrain features with natural materials (e.g., real rocks) for added realism.
- Use textured paints or flocking materials on terrain pieces.
6. Signage and Lettering
Custom signs are an easy way to add personality and storytelling elements to your layout. With a 3D printer, you can create:

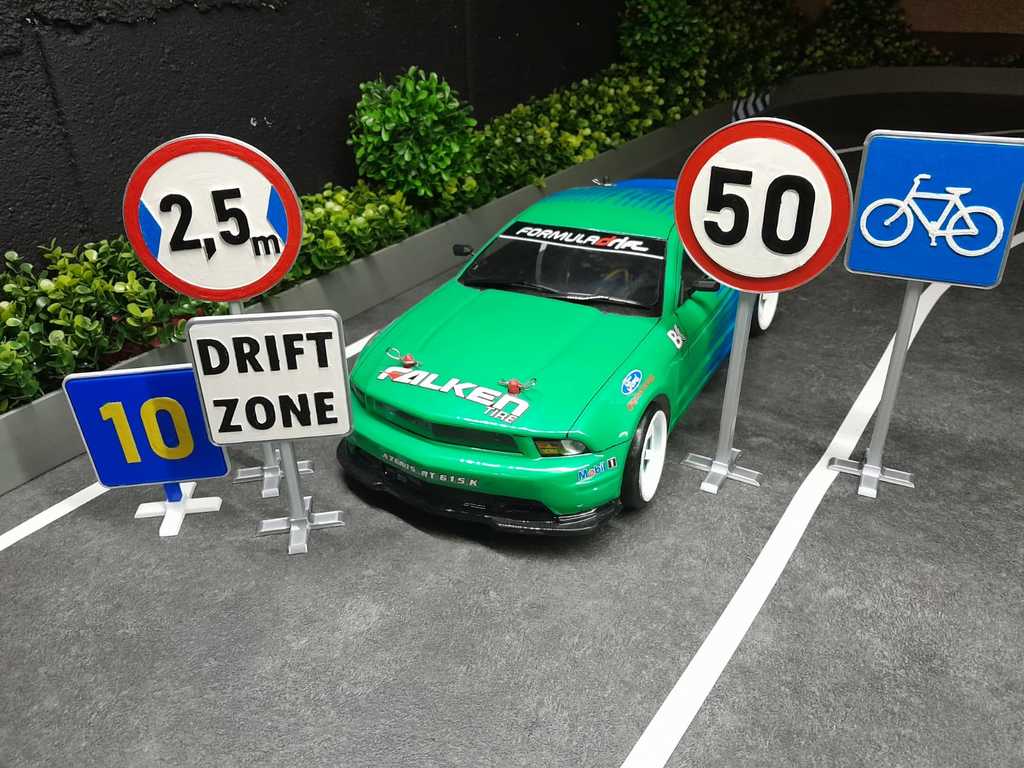
- Business signs for shops and factories
- Street signs for urban areas
- Custom lettering on buildings or vehicles
Tips:
- Use contrasting paint colors to make lettering stand out.
- Add weathering effects like chipped paint or grime.
Painting and Finishing Your Prints
To make your printed details look realistic, proper painting and finishing are essential:
- Clean Your Prints: Remove any support material left over from printing and lightly sand rough edges.
- Prime Before Painting: Apply a primer designed for plastic surfaces to help paint adhere evenly.
- Use Acrylic Paints: Acrylic paints are easy to work with and come in a wide range of colors.
- Add Weathering Effects: Use washes, dry brushing, or powders to simulate dirt, rust, or wear.
- Seal Your Work: Apply a matte or gloss sealant to protect your painted pieces.
Family-Friendly Fun with 3D Printing
One of the best things about using 3D printed details is that it’s a fun activity the whole family can enjoy! Here’s how everyone can get involved:
- Kids can help paint small accessories like benches or barrels.
- Teens can learn basic design skills using beginner-friendly software like Tinkercad.
- Adults can handle more complex tasks like assembling buildings or operating the printer.
Working together not only makes the process faster but also creates lasting memories as you build something special as a family.
Final Thoughts
Incorporating 3D printed details into your model railroad layout is an exciting way to add customization and realism while keeping costs manageable. Whether you’re creating unique buildings, adding lifelike figures, or enhancing terrain features, the possibilities are endless with this innovative technology.
For beginners, start small—experiment with simple accessories before moving on to larger projects like custom structures. With time and practice, you’ll be amazed at what you can achieve!
So fire up that printer (or order from an online service), gather some paints and brushes, and start bringing your miniature world to life—one detail at a time!
References
- Kalmbach Media (2025). Model Railroader Magazine. Various issues featuring tips on using technology in model railroading.[^1]
Website: https://www.trains.com/mrr - Thingiverse (n.d.). Free Downloadable Models.
Website: https://www.thingiverse.com - Woodland Scenics (n.d.). Scenery Techniques.
Website: https://woodlandscenics.com - Luke Towan (2025). YouTube Channel. Tutorials on integrating advanced techniques into model railroads.[^2]
Link: https://www.youtube.com/@LukeTowan - Elegoo Official (2025). Resin Printers for Beginners.
Website: https://www.elegoo.com
[^1]: Kalmbach Media provides insights into modern tools like 3D printing that enhance model railroading layouts.
[^2]: Luke Towan’s tutorials offer step-by-step guidance on painting and finishing techniques specific to 3D printed scenery elements.
