Creating a captivating model railroad diorama featuring a cemetery near a church is an excellent way to add depth and atmosphere to your layout. This scene can evoke a sense of history, tranquility, and even a touch of mystery. Here’s a comprehensive guide to creating a church cemetery diorama that will fit nicely in a small space..
Planning Your Church Cemetery Diorama
Start by envisioning the overall scene. Consider including:
- A small, weathered church building
- Various tombstones and grave markers
- A winding path or two
- Old trees and vegetation
- A low stone wall or iron fence
Research reference photos of old European churches with surrounding cemeteries for inspiration[1][4].
Building the Base
Use a piece of MDF or plywood as your foundation. For a small diorama, aim for a size around 2 feet by 3 feet. Seal the base with shellac to prevent warping[2].
Creating the Terrain
Use extruded polystyrene (XPS) foam to build up the terrain. Shape it to create gentle slopes and uneven ground typical of old cemeteries. Cover the foam with a mixture of wood filler and finely sieved soil to add texture[2].
Constructing the Church
For the church, consider using a 3D-printed model or a kit. Weather it to look old and slightly worn. Add details like stained glass windows, a bell tower, and weathered stonework[1].
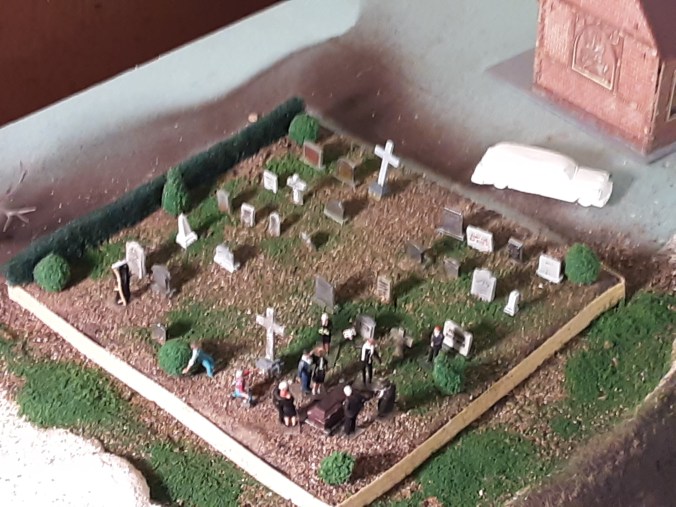
The church has been placed next to the backdrop. The church was purchased prebuilt from a hobby shop as part of an estate sale. Being placed next to the backdrop only the rear of the church is visible, the front of the church seen fron another aisle has a wedding leaving the front. The building is doing double duty. It was in an article in Model Railroader years ago.
Adding Tombstones and Grave Markers
Create a variety of tombstones using XPS foam or resin castings. Include different shapes and sizes to represent various eras. Weather them to look old and worn:
- Inscribe dates and simple designs
- Use wood filler to add texture
- Paint with grays and add washes to enhance details[2]
As you will see below the Tombstones I used are a kit that came from Woodland Scenics. The tombstones are glued to the base using Elmers white glue. The next step was to sprinkel grass throughout the grave sites thinly then to add clumps to show weeds.
Vegetation and Scenery
This material has been purchased butg has not been completed to date. I am currently working on getting this completed.
Add trees, bushes, and ground cover to create a realistic environment:
- Create patches of longer grass in less-tended areas
- Include small details like fallen leaves or wildflowers[1][2]
The Cemetery Path
My path will come down the center, the path will be scale gravel grass will be sprinkled around the tombstones.
Create a winding path through the cemetery using fine gravel or sand. This adds visual interest and helps define different areas of the scene.
Fencing or Walls
As shown in the video above the stone wall is around the base and a shrub wall will be above the stone wall.
Surround your cemetery with a low stone wall or wrought iron fence. This helps frame the scene and adds to the historical atmosphere[2].
Painting and Weathering
Use a combination of craft paints and weathering techniques to bring your scene to life:
- Paint the church and tombstones in various shades of gray and brown
- Apply washes to enhance details and create a weathered look
- Use dry brushing to highlight raised areas
- Add subtle green tones to represent moss and lichen[2]
Adding Final Details
Incorporate small elements to enhance the realism:
- Place miniature candles or flowers near some graves
- Add a few scattered leaves on the ground
- Include a small bench or two for visitors
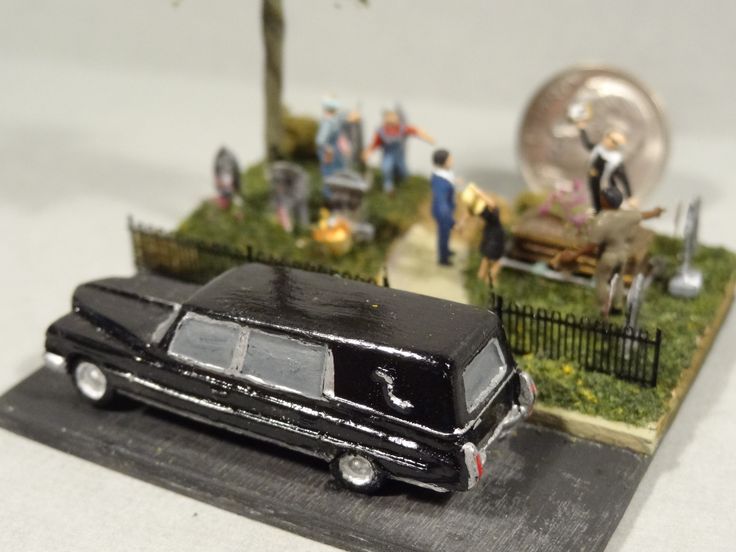
- Consider adding a few carefully placed figures to bring the scene to life[5]
Lighting (Optional)
For added atmosphere, consider incorporating subtle lighting:
- Use small LEDs to create a soft glow from church windows
- Add a few “candles” near graves for a somber effect
Conclusion
Creating a church cemetery diorama allows you to capture a serene yet slightly eerie atmosphere in a compact space. Focus on weathering, vegetation, and small details to bring your scene to life. With patience and attention to detail, you can create a stunning miniature world that tells a story of history, remembrance, and the passage of time.
Remember, the key to a successful diorama is in the details and the atmosphere it evokes. Take your time, experiment with different techniques, and most importantly, enjoy the creative process of bringing this miniature world to life.
To add to the slightly eerie atmosphere I have the Grim Reaper walking in the Cemetery.
I will update this article as I complete the diorama.
Citations:
[1] https://www.youtube.com/watch?v=xXW9huBTfNg
[2] https://daggerandbrush.de/unrested-souls-how-to-make-a-graveyard-themed-diorama-base-part-i/
[3] https://www.etsy.com/market/cemetery_diorama
[4] https://www.pinterest.com/pin/church-cemetery–12173861478666003/
[5] https://www.reddit.com/r/dioramas/comments/1gdo6ab/164_old_church_with_cemetery/
[6] https://www.etsy.com/market/graveyard_diorama
[7] https://www.pinterest.com/pin/778770960601616311/
[8] https://www.youtube.com/watch?v=S8z4iASx3zY
